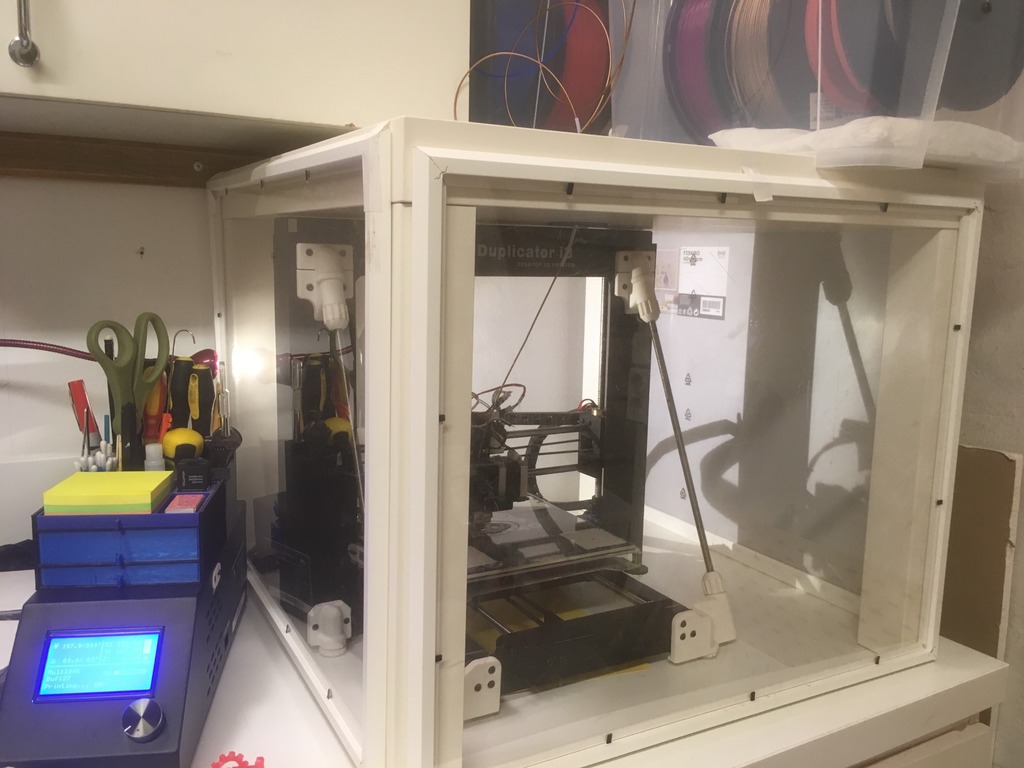
Improv enclosure IKEA Lack + IKEA Fiskbo frames
thingiverse
Human: I'm building a super fast, simple and cheap enclosure. My goal with this enclosure is to get higher temps and avoid drafts. Just getting to about 35°C or so can make a big difference when printing with ABS, nylon etc. You'll need: • 1 x IKEA Lack table • 3-4 x IKEA Fiskbo picture frames 70x50cm (I use my plaster wall for backing… Far less flammable than Lack itself. ) • Some electrical tape or duct tape to fasten picture frames to Lack. Or velcro. • If the table is too low for your printer, you'll need floor protectors, printer feet or print spacers ( like the ones from https://www.thingiverse.com/thing:3085211/files, kudos to Devilscave for a really neat enclosure!). Abt 30 mm or so will work fine with Fiskbo frames, for a higher enclosure this thing will need some modification. My printer is a Wanhao duplicator i3 V2.1, and it fits just about perfectly without anything. For filament pass through: • Filament guide pass through https://www.thingiverse.com/thing:2027206, shoutout to ppardee for this great thing! • A short piece of 4/2 PTFE tube, abt 10-15 cm will do • 38 mm hole drill for filament guide hole (or use your preferred filament guide, there are plenty out there! https://www.thingiverse.com/search?sort=relevant&q=lack+filament+guide&type=things&dwh=235d3c265520bcc ) • A filament spool holder of some sort to put on or above enclosure. Assembly: Place Lack table in place over printer on workbench. If the table is too low, use floor protectors, printer feet or print spacers, for example from https://www.thingiverse.com/thing:3085211/files . Remove cardboard back from picture frames. Place on sides and duct tape into place. Don't go crazy, a small strip on each side from table top to top of frame will work just fine, and you will be able to easily remove sides if necessary. Also, if the frames don't cover every hole, slot, nook or cranny is not important. Remember, we're going for fast and easy with this one, not perfect! Drill a hole in table top for filament pass through. Fit the filament guide with inserted PTFE tube. Put filament on spool holder on top of your enclosure. Ta-da! Print. The excess heat from heated bed and extruder will warm up the inside of your enclosure to a cozy, nice temperature. PS You got brains, you use them. Don't let stupid burn down your house. There is such a thing as too much heat.
With this file you will be able to print Improv enclosure IKEA Lack + IKEA Fiskbo frames with your 3D printer. Click on the button and save the file on your computer to work, edit or customize your design. You can also find more 3D designs for printers on Improv enclosure IKEA Lack + IKEA Fiskbo frames.
