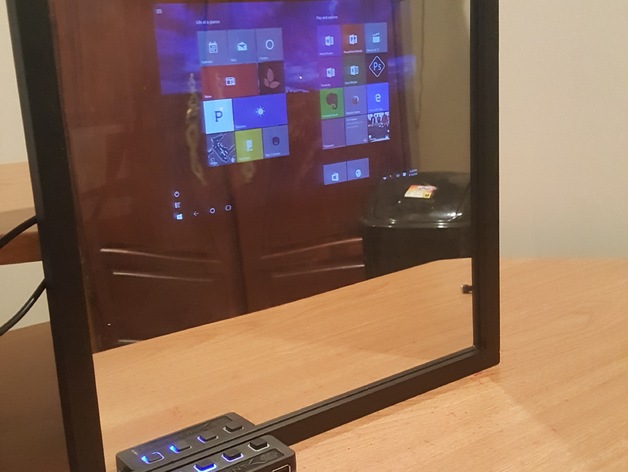
iMirror – DIY Smart Mirror
thingiverse
The iMirror is a revolutionary gesture-controlled "smart mirror" that breaks new ground as the first universal smart mirror designed to work seamlessly with any tablet and even devices like Raspberry Pi or others. Its design complexity ranges from easy to challenging, depending on which teaching option you choose. This project is perfect for college students who want a personal computer without having to type on a keyboard or get up from their bed. Simply hang the iMirror on your wall or wardrobe across from your bed, and you're ready to watch Netflix or browse the web in style. Here's how to build the iMirror: **Step 1: Purchase Items in Bill of Materials** Start by buying all the necessary items listed in the bill of materials. **Step 2: Modify the Cradle as Needed Using Choice of CAD Software** Use your chosen CAD software to modify the cradle as needed. **Step 3: Print the Cradle** Print the modified cradle using a 3D printer. **Step 4: Cut Wood Backing and Attach Two-Way Mirror** Cut the wood backing to fit inside the picture frame, then attach the two-way mirror. **Step 5: Assemble Mirror Frame** Assemble the mirror frame by attaching the wood backing and two-way mirror together. **Step 6: Connect Tablet or Display** Connect your tablet or display to the iMirror using a micro-USB to USB adapter. **Step 7: Set Up Gesture Control** Set up gesture control using Myo or Kinect, then connect it to the iMirror. **Step 8: Customize and Test the Smart Mirror** Customize the smart mirror by setting up Keylemon facial recognition software and testing its features. **Bill of Materials** Here's a list of items you'll need to build the iMirror: * Two-way mirror * Tablet or LCD display with Raspberry Pi * Plywood * Wood glue * Micro-USB to USB adapter * Myo, Kinect, or other gesture control device * Picture frame * Keylemon or other facial recognition software **How I Designed This Project** Designing the iMirror was a challenge that required creativity and problem-solving skills. I wanted to create a fully interactive smart mirror that could work with any tablet or display, so I designed a 3D printable cradle that would hold the device against the two-way mirror while allowing for easy removal. I used Autodesk Fusion 360 as my design software and created a simple yet effective design that met all the project's requirements. **Project Overview** This project is perfect for students aged 10+ and college students who want to learn about gesture control technology and create an interactive smart mirror. By completing this project, students will gain hands-on experience with coding and software design skills if they choose to use a Raspberry Pi or other programmable device. **Audiences and Subjects** This project is suitable for students of all skill levels, from beginners to advanced programmers. The subjects covered include engineering, computer science, and programming. **Skills and Lesson Plan** Students will need intermediate to advanced coding skills to complete this project successfully. The lesson plan includes three options: A) Easy Option: Assemble the mirror and demonstrate its features to students. B) Intermediate Option: Have students customize an open-source smart mirror using pair programming techniques. C) Advanced Option: Have students design and build their own smart mirrors, working in pairs to create unique programs. **Duration and Assessment** This project can be completed in under a day if you use a tablet. If you use a Raspberry Pi or other device, it may take around 10 weeks depending on the coding skills of your students. Students will be graded on producing a deliverable and adding unique features to their project.
With this file you will be able to print iMirror – DIY Smart Mirror with your 3D printer. Click on the button and save the file on your computer to work, edit or customize your design. You can also find more 3D designs for printers on iMirror – DIY Smart Mirror.
