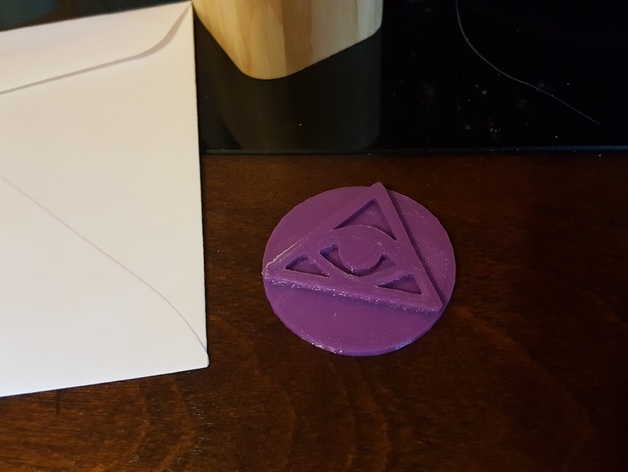
Illuminati Stamp
thingiverse
Create Your Own Illuminati Stamp! Seal Letters, Reward Good Grades or Spread the Word with This Custom Design Print Settings: Printer: Micro 3D Rafts: No Supports: No Resolution: Medium Infill: Low Notes: Printed with M3D's tough ink, also works with NinjaFlex and similar materials Post-Printing Instructions: How to Use Your New Stamp: I created this stamper so I could properly seal all my envelopes. To use it like I did, you'll need the following items: A sanded, raw wood block approximately 43mmx43mmx50mm - The 50mm portion can be any length that's comfortable for your hand Howard Cutting Board Oil - If you'd like to make your raw-wood stamper last a little longer. Other sealers work too, but this one is safe to use elsewhere in the household. 200 Grit sandpaper Testors Cement for Plastic Models - Super Glue or Crazy Glue also works well A black Sharpie Green stamp pad Print out the attached .stl file To make your wooden block last longer, apply a coat of Howard Cutting Board Oil following the directions on the bottle. Once the stl has finished printing, mark the face of the Illuminati symbol (the triangle and eye icon) with a black Sharpie. This will be your guide for sanding and getting this stamp uniformly smooth. Sand the face of the stamp against a flat surface using 200 grit sandpaper. Once you've sanded off all the black marker, the surface will be nice and uniformly flat. Dip the face of the stamp into your ink pad and stamp an Illuminati logo onto the top of your wooden block. Then, align and glue the stamp to the bottom of your wooden block. Source: The original Illuminati icon is from http://www.flaticon.com/free-icon/bills-symbol-of-an-eye-inside-a-triangle-or-pyramid_50215
With this file you will be able to print Illuminati Stamp with your 3D printer. Click on the button and save the file on your computer to work, edit or customize your design. You can also find more 3D designs for printers on Illuminati Stamp.
