Illuminated Marquee Box
thingiverse
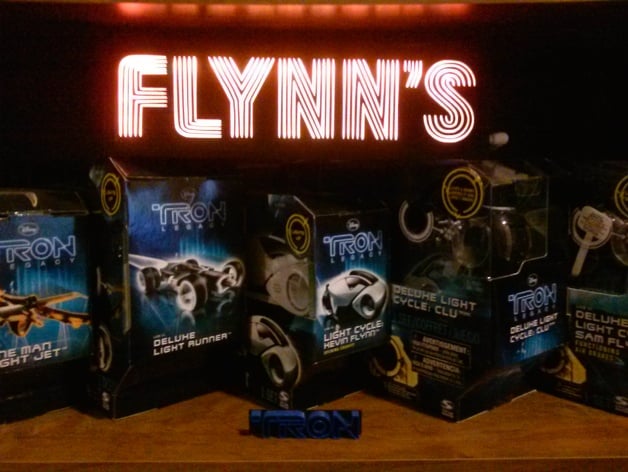
I needed a Flynn's arcade sign to hang above my MAME cabinet. What I came up with can be used in numerous ways. Use the provided Flynn's marquee or create your own marquee for this box (I've given you a template). Additional designs are being created, and marquees can easily be swapped by removing the bezel. A notch on the bottom accommodates an optional tag, and the box itself can be printed with or without screw hanger holes on the back. The project is functional in its current state. I want to light up my weekend with this awesome project! I need you to read the instructions carefully; descriptions of the STL files are below: Print the parts needed based on your build: Marquee box: marquee_box_hangers.stl - has screw hanger holes on the back for wall mounting marquee_box_noholes.stl - has no holes, ideal for a desk or tabletop Bezels: marquee_bezel.stl - A clean bezel to hold the marquee sign marquee_bezel_notched.stl - has a circular notch on one end to help accommodate a grommet or power socket Arcade_one_piece_large.stl is an optional tag that can be attached to the notch at the bottom of the sign. Print it in black and switch colors when printing the letters. The signage consists of two parts, mask and diffuser: FLYNNS' mask and diffuser STLs are for the sign shown, while marquee_blank_template.stl is a blank mask (or use your own dimensions) and marquee_diffuser_blank.stl is a blank for a diffuser to be used with a mask of your own design. I used automotive LED strips to provide the lighting, and a 12v power brick to drive it. You can easily come up with your own lighting solution. Holes can be drilled in the box to accommodate plugs, wires, switches, etc. Some additional notes on lighting (update as of 3/16/2015): I lined the interior of the box with aluminum foil tape (usually found at hardware stores in the plumbing section). This makes the interior reflective. You can also paint the inside white or just use sheets of white paper. Using colored paper or paint will color your reflected light, too. The LED strips were placed around the interior perimeter of the box, stuck to the interior walls where they meet the backplate. Sometimes the LED's themselves will cause "hot spots", extra bright areas, which are visible through the diffuser. To make illumination more consistent, you can use strips of paper, polyfill or thin packing foam directly in front of the LED's, between the LED strip and the marquee to diffuse these hot spots. Feel free to experiment and fine-tune your setup for best results. On the Flynn's Marquee: The diffuser snaps onto the mask over 3mm "pins". You may need to ream the holes on the diffuser a little if it doesn't easily fit over the pins. Next, place the diffuser over a light table or a window and color it as in the last two photos (the final one is a quality photo of an actual FLYNN'S neon sign). Start on the back of the diffuser, using the mask as a template. Once done, remove the diffuser from the mask, flip it around and do the other side. The color is definitely noticeable, but when photographed, it all tends to look orange. My pictures don't do it justice - it will be much cooler viewed in-person. I did another marquee using only standard orange and while decent, the tri-color method makes it pop, and it's authentic to the signs used in the TRON films, as well as those in the actual arcades at Disney, and during the ComiCon viral campaign. Lastly, place the diffuser onto the mask, aligning it over the pins. I used a micro torch to quickly heat each pin and pressed it down flat using the end of a bolt as a tool. This will rivet the diffuser onto the mask. You can also use glue. Feel free to use my blank templates to create your own signage or have a marquee printed to the correct dimensions, mount on thin glass or plexi, and use that instead. I have included the SVG files I used in making of for the Flynn's sign as it's hard to get the logo correct, and the font is not freely available. This design maxes out my Rep2's build area on the X so you may need to rescale everything to print it on smaller machines, but if you go bigger, I'd love to see your results! Any questions?
With this file you will be able to print Illuminated Marquee Box with your 3D printer. Click on the button and save the file on your computer to work, edit or customize your design. You can also find more 3D designs for printers on Illuminated Marquee Box.
