Illuminated Hummingbird Remix
prusaprinters
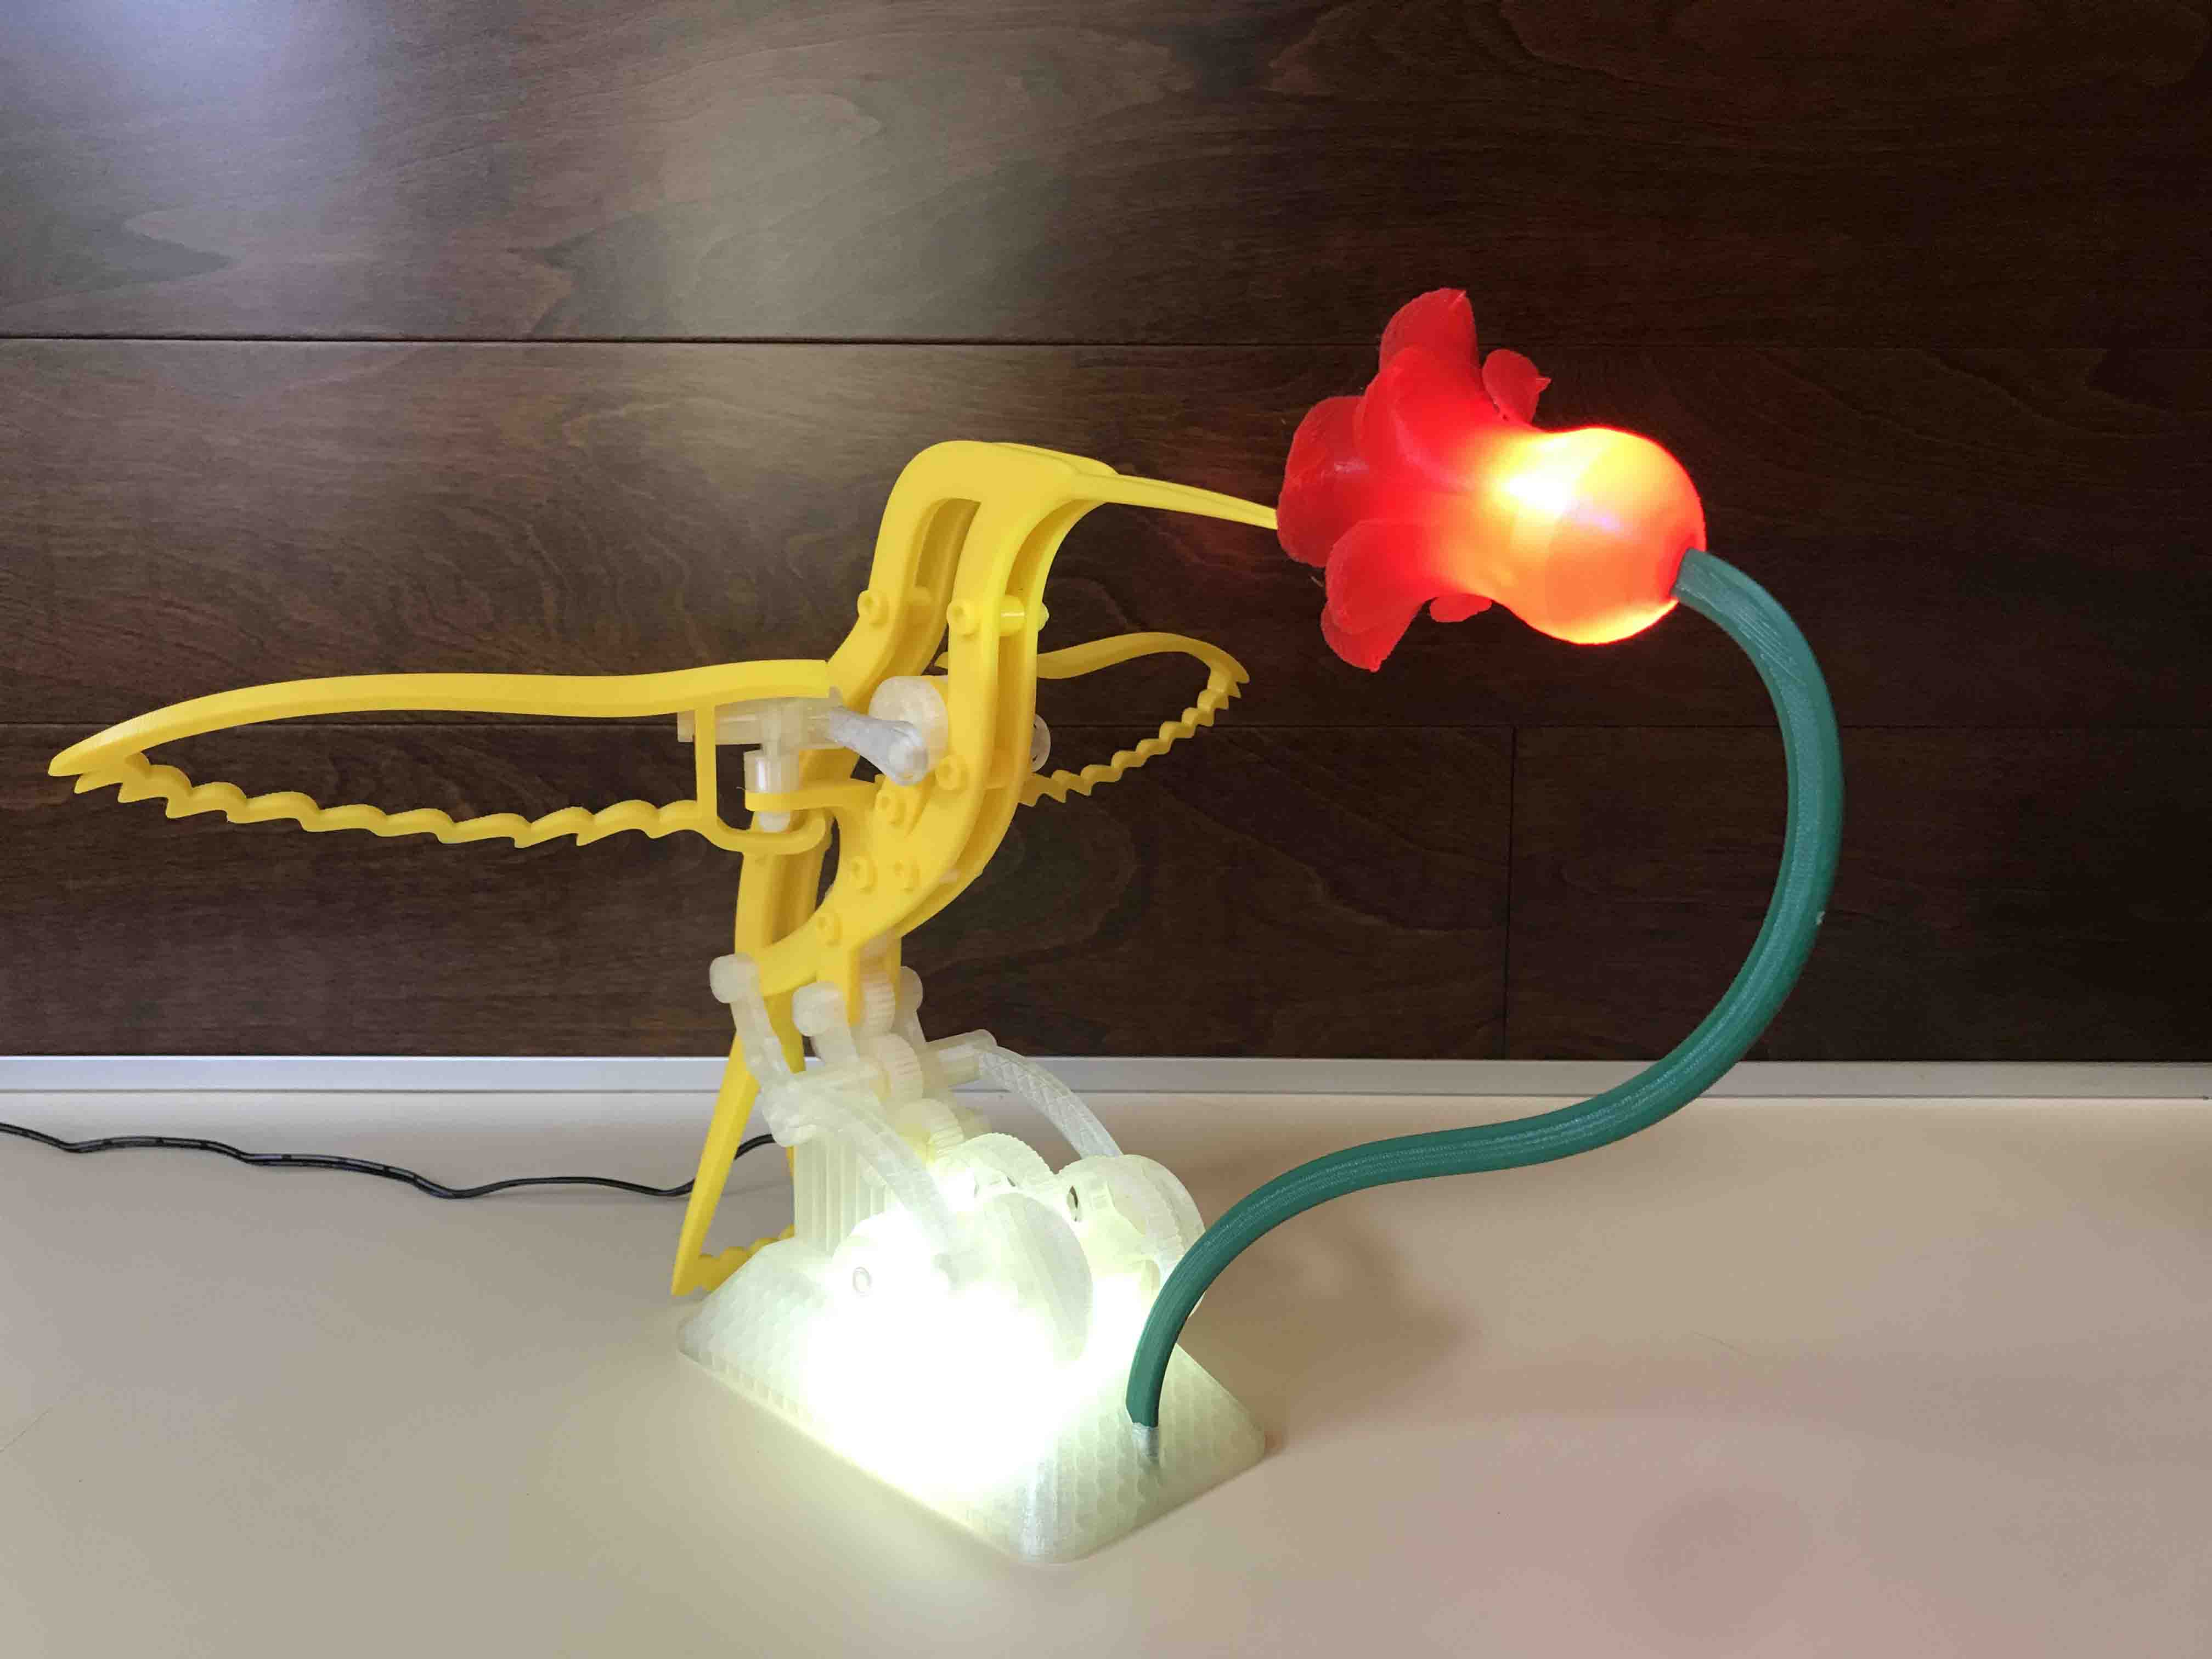
<p>This is a remix of the remix created by GeoDave. This adds Illumination. You will need to download the parts library from GeoDave as I have only provided the ones associated with the illumination and motor size change.</p><p>The creator of this bird is Greg Zumwalt<br/>https://www.instructables.com/Hummingbird/</p><p>Greg’s 25mm motor adapter <br/>https://www.instructables.com/Hummingbird-25mm-Motor-Adapter/</p><p>I printed the parts from GeoDave which are mostly not interchangeable because all threaded parts are a more printable thread. GeoDave’s post explains why. He provided some nice changes including beveled edges on the gear to ward off affects of elephant foot. GeoDave also added a large selection of SCAD files to make modifications.</p><figure class="media"><oembed url="https://youtu.be/hS0tKBtI4Q0"></oembed></figure><p> </p><p><strong>Other Parts</strong><br/>You need the parts library from Geo Dave as I provide the parts that were changed.<br/>https://www.thingiverse.com/thing:2978552</p><p>Instructions on assembly are with Greg’s post. Same quantity and variety of parts.</p><p><strong>Parts used in the LED strip</strong><br/>here is a multi-pack… any 12V 1amp or over will work https://www.amazon.com/gp/product/B00FEOB4EI </p><p>https://www.amazon.com/YUNBO-6000-6500K-Waterproof-Flexible-Cuttable/dp/B07K18HS94</p><p><br/><strong>Barrel Jack Connector</strong><br/>https://www.amazon.com/ThreeBulls-Pieces-5-5mmx2-1mm-Female-Connector/dp/B01N8VV78D</p><p><strong>Adjustable Motor Controller</strong> <br/>Item size: 30*24*15mm This looks the same..<br/>https://www.amazon.com/gp/product/B07WGT8K82 </p><p>sold under many names… for example<br/>https://www.amazon.com/Onyehn-Controller3V-Control-Switch-Dimmer/dp/B07GP72BWV</p><p><strong>Motor</strong><br/>20mm 50RPM motor. They also had a 100RPM in this size I think could be used. <br/>https://www.amazon.com/gp/product/B07D294GS7 </p><p><strong>For the Dimmer a Capacitive LED switch.</strong><br/>Here are some links to some like products. It needs to be 40mm x 10 or smaller. I provide the base with switch center and a clip to hold the board in place if you print the base with the switch center in the back.<br/>https://www.amazon.com/IKSACE-Capacitive-Control-Kitchen-Cabinet/dp/B08KDG1MZ5<br/>https://www.aliexpress.com/item/32846782608.html<br/>https://www.banggood.com/10pcs-DC-9V-To-24V-Touch-Switch-Capacitive-Touch-Sensor-Module-LED-Dimming-Control-Module-p-1323825.html</p><p>If you are going to try this illuminated Hummingbird, these are the parts I am providing and what they replace from GeoDave's Part library.</p><p>Stem (Replaces GeoDave’s Stem.stl)<br/>Stem_with_Electric_Holes.stl</p><p><strong>Choose a base.</strong><br/> I showed the 20mm base with the motor directly mounted. (Replaces GeoDave’s Base_Mod_HollowBot_Rev9.stl)<br/>I am providing the 20mm motor base and the 16mm motor base in case you want to try the adapter.<br/>Base_LargerMotor_16mm_PowerCenter_SwitchCenter.stl<br/>Base_LargerMotor_20mm_PowerCenter_SwitchCenter.stl</p><p><strong>Threaded pin to hold wing to frame.</strong><br/>While it is a slip on pin… you can screw it in. If it loosens… consider glueing. It is such a short pint I printed it in PETG for a little flex. It prints flat side laying down. That should make the threads a little rough so it won’t come out. <br/>2mm_Threaded_Pin_for_Wing_Mod_Rev1.stl</p><p><br/><strong>Wheelbody and Connecting Rod</strong><br/>If you print the wheel body with recessed hole you will need the longer connecting rod. (Replaces WheelBody_Mod_2x_Rev2.stl and RodConnect_22_Mod_2x_Rev2.stl)<br/>WheelBody_Mod_Rev2_Recessed_Nut.stl <br/>RodConnect_22_Mod_Rev2_Thicker_for_6_2_Recessed_wheelbody.stl</p><p><strong>4mm Motor Gear</strong><br/>In case you want to see if you can get the motor gear on a 4mm shaft with breaking it… (replaces GearMotor_10_Mod_Rev8.stl)<br/>Gear_Motor_10-tooth_4mm-Motor-shaft_Mod_Rev1.stl</p><p><strong>From Greg’s Adapter library.. </strong><br/>20mm to base with 16mm motor hole<br/>20mm-Motor_to_16mm_Hole_Adapter_Sleeve.stl</p><p>16mm Version</p><p>Gear adapter… I think the original was already 4mm but I could not tell so I re-cast the hole with the size I used.<br/>Motor_Gear_adapter_4mm-hole.stl</p><p>GeoDave Modified Parts</p><p>The six bolts I increased the shoulder on I am including so don't have to re-create the mod. You can always make your own custom lengths from GeoDaves Scad files.</p><p>BoltWheelBody_Mod_Rev7+point3_shoulder.stl</p><p>BoltWheelBase_Mod_Rev7+point3_shoulder.stl</p><p>Bolt_61223_Mod_Rev8+point3_shoulder.stl</p><p>Bolt_6128_Mod_Rev7_8+point45_Shoulder.stl</p><p>Bolt_6104_Mod_Rev7+point3_shoulder.stl</p><p>Bolt_684_Mod_Rev7+point3_shoulder.stl</p><p><strong>New Parts I added</strong><br/>capacitive_Switch_Bracket.stl (holds the light switch board in the switch center)<br/>Motor_hole_Plug_20mm_10mmdeep.stl (covers the motor hole… a plug)</p><p>motor hole touch button... I don't recommend this option. The switch center I added to the back provides a place for the board. The motor button hole requires wires that at any point they touch something could short the ability for the touch sensor to work... but just in case you want to try... I have included the parts. If you do this keep the wires separated. You should find two holes in the print. I wrapped my wires to the spring in cloth tape to help prevent touching and triggering the capacitance sensor.<br/>Capacitive_Touch_Button_for_Motor_hole_16mm.stl <br/>Capacitive_Touch_Button_for_Motor_hole_20mm.stl </p><p>If your touch spring is bigger than mine I have provided the SCAD file to regenerate the button with the appropriate spring retaining rings of your choice. Motor_hole_Plug_or_Capacitance_button.scad</p><p><br/>Other remix things people have done with this bird. <br/>https://www.thingiverse.com/thing:2913680<br/>https://www.thingiverse.com/thing:3041589<br/>https://www.thingiverse.com/thing:2930668<br/>https://www.thingiverse.com/thing:3471293</p>
With this file you will be able to print Illuminated Hummingbird Remix with your 3D printer. Click on the button and save the file on your computer to work, edit or customize your design. You can also find more 3D designs for printers on Illuminated Hummingbird Remix.