IKEA VIDGA Motorized curtains
thingiverse
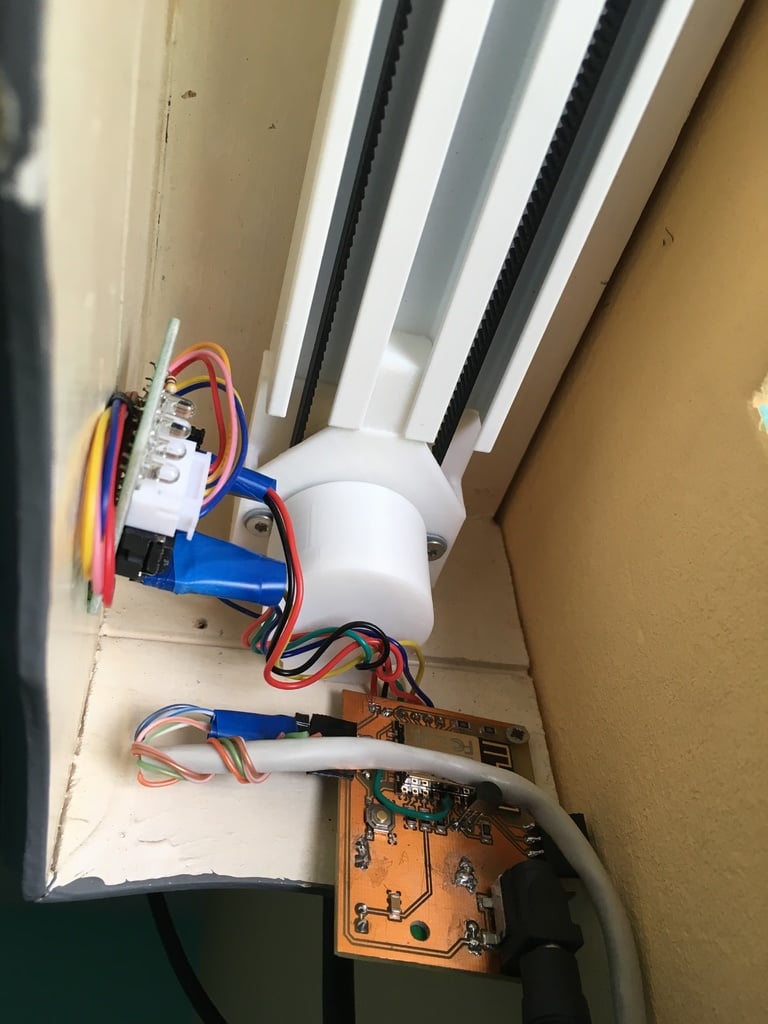
<h1>Motorized IKEA VIDGA Curtains.</h1> I stumbled upon these motorized curtain sliders after visiting an IKEA store and wondered if I could design something to make them motor-driven. After taking some measurements, I started designing a motor and idler mount that can attach on the end of the sliders. This way, I can run a GT2 belt through the slider with the curtain attached to some clips that are hooked onto the belt. After a day of designing, I came up with this prototype. As you can see, it is not perfect but it does the job for me. Links to Fusion 360 files: * Motor Mount: https://a360.co/2pPQGG8 * Idler Mount: https://a360.co/2ryaxdl * GT2 Pulley: https://a360.co/2K7KWhK * GT2 Idler: https://a360.co/2NyOdIR * Clip 1: https://a360.co/34MODRS * Clip 2: https://a360.co/32yqfBS Link to a remix that uses the NEMA17 stepper motor: https://www.thingiverse.com/thing:3621216 I haven't tested the remix yet. If someone has, please leave a comment below. Thanks! <h1>BOM</h1> <ul> <li>IKEA VIDGA curtain slider(s) and accessories</li> <li>1x 28BYJ-48 Stepper Motor</li> <li>3x M3 Screws (2x short / 1x longer)</li> <li>1x M3 Nut</li> <li>GT2 Timing Belt (the length depends on the size of your window)</li> <li>1x 608ZZ bearing</li> </ul> All the parts listed above are available on AliExpress. <h1>Assembly</h1> <b>Motor mount</b> <ol> <li>Take the motor mount, GT2 pulley, 28BYJ-48 Stepper Motor and 2 short M3 screws</li> <li>Put the pulley inside the motor mount so that it lines up with the hole for the motor shaft</li> <li>Take the stepper motor and press the shaft into the pulley</li> <li>When the stepper motor is attached to the pulley, fasten it to the motor mount by screwing in the two M3 screws</li> </ol> Note: It could be helpful to put a spacer underneath the GT2 pulley to get the motor shaft in far enough. <b>Idler mount</b> <ol> <li>Take the idler mount, GT2 idler, bearing slot, 608ZZ bearing and 3x M3 screws</li> <li>Put the idler inside the idler mount so that it lines up with the hole for the motor shaft</li> <li>Take the stepper motor and press the shaft into the pulley</li> <li>When the stepper motor is attached to the pulley, fasten it to the motor mount by screwing in the two M3 screws</li> <li>Put the idler mount on one end of the slider</li> <li>Run the GT2 belt through the slider and through the motor and idler mount</li> <li>Measure the length of the belt and cut it</li> <li>Take Clip 1 and make the belt a closed loop</li> <li>Fiddle the clip into the slider at one end and slide it all the way to the other end of the slider</li> <li>Attach Clip 2 to the GT2 belt, this way both clips are on either side of the rail</li> </ol> <b>Curtain assembly</b> To assemble the curtain itself, you can just follow the instructions given by IKEA. When that is complete, put the motor and idler mount on the ends of the slider. <h1>Controlling the motor</h1> To control the motor, you can choose between different platforms. It's possible to use an Arduino if you don't need wifi connectivity and just use some buttons to control the curtain. What I do is use an ESP8266 to control the curtain via OpenHAB and MQTT. To control the motor, I use the AccelStepper library. The program I wrote for the ESP8266 can be downloaded from Github. I also made a little PCB for the ESP8266 and some other components. This PCB is just something I quickly put together. I will design a better PCB and associated enclosure later and also link it in here. For now, you can find the PCB I'm using here.
With this file you will be able to print IKEA VIDGA Motorized curtains with your 3D printer. Click on the button and save the file on your computer to work, edit or customize your design. You can also find more 3D designs for printers on IKEA VIDGA Motorized curtains.