IKEA SKADIS MK3 / MK3S / MK3S+ Steel Sheet Holder
prusaprinters
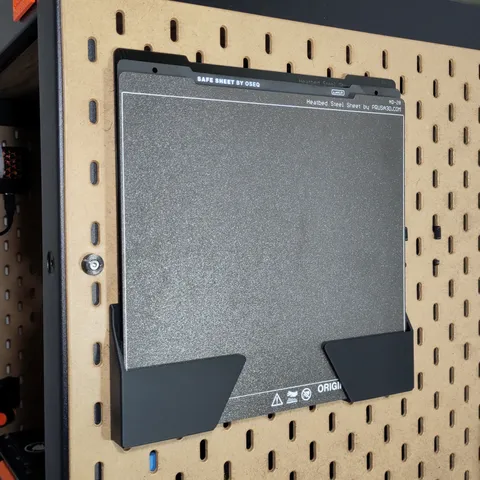
This model is a remix of the great Mk3S+ Steel Sheet SKADIS (V1) by LineArcLine that tries to address some of the short-coming he described there. Some of the modification done includes:Splitting the model in two to help with warping, ease of printing and filament usage.Adding more T-nut slots (as now two are needed per sides).Making the Fusion 360 a bit easier to work with by including the steel sheet parameter directly in the same file. Some feature might still need tweaking if the steel sheet size is updated though, so I wouldn't consider this model fully parametric yet.Rotated the sheet 90° compared to the original model and change stepping between slot to make the top text of each sheet readable.Export multiple sizes depending to fit your needs (2, 3, 4 and 5 sheet versions are available).Thanks a lot to @LineArcLine for helping me while building this model and providing some feedback along the way.As the original, this model uses the wonderful SKADIS T-Nut Mounting system by @6d6178 to secure it to your pegboard which are wonderful to create a secure connection on any type of SKADIS board (regardless of their thickness).Printing & AssemblyYou will first need to select what size of holder you wants and download the matching set of left and right part for it. Each sides should be printed bottom side down (the model have already been exported in the correct orientation). From some testing during design, here is some recommended print settings.Layer Height: between 0.2mm and 0.3mmI've printed mine at 0.25mm layer height using a 0.60mm nozzleAnything higher might make the slated part print poorlyInfill: 15% to 20% (most of the strength comes from perimeters)Perimeters:0.4mm nozzle: 30.6mm nozzle: 2Supports: noBrim: yes (recommended to prevent potential warping)Seam position: rearFinal assembly also requires some extra hardware on top of those initial printed parts:4× M2.5 Printed T-Nuts (available here)4× M2.5 DIN934 Hex Nut4× M2.5 x 12mm Socket Head Cap ScrewAssemble your T-Nuts and install them to each side.You should now be able to attach each sides to your pegboard, leaving 3 visible slot between the bottom part each side. Before tightening the screws, check that both sides are aligned and spaced enough and make sure to have the locating bumps align properly in the slot.NoteThe exported Fusion 360 source file does not include an IKEA SKADIS Pegboard mock as it wouldn't let me export an f3z file with the one I used. I would recommend using @LineArcLine's Parametric SKADIS Board Generator to add one if you want to remix this model.ChangelogV1.0 (2023-04-17): Initial release
With this file you will be able to print IKEA SKADIS MK3 / MK3S / MK3S+ Steel Sheet Holder with your 3D printer. Click on the button and save the file on your computer to work, edit or customize your design. You can also find more 3D designs for printers on IKEA SKADIS MK3 / MK3S / MK3S+ Steel Sheet Holder.