Ikea Skadis Magnetizer Demagnetizer
prusaprinters
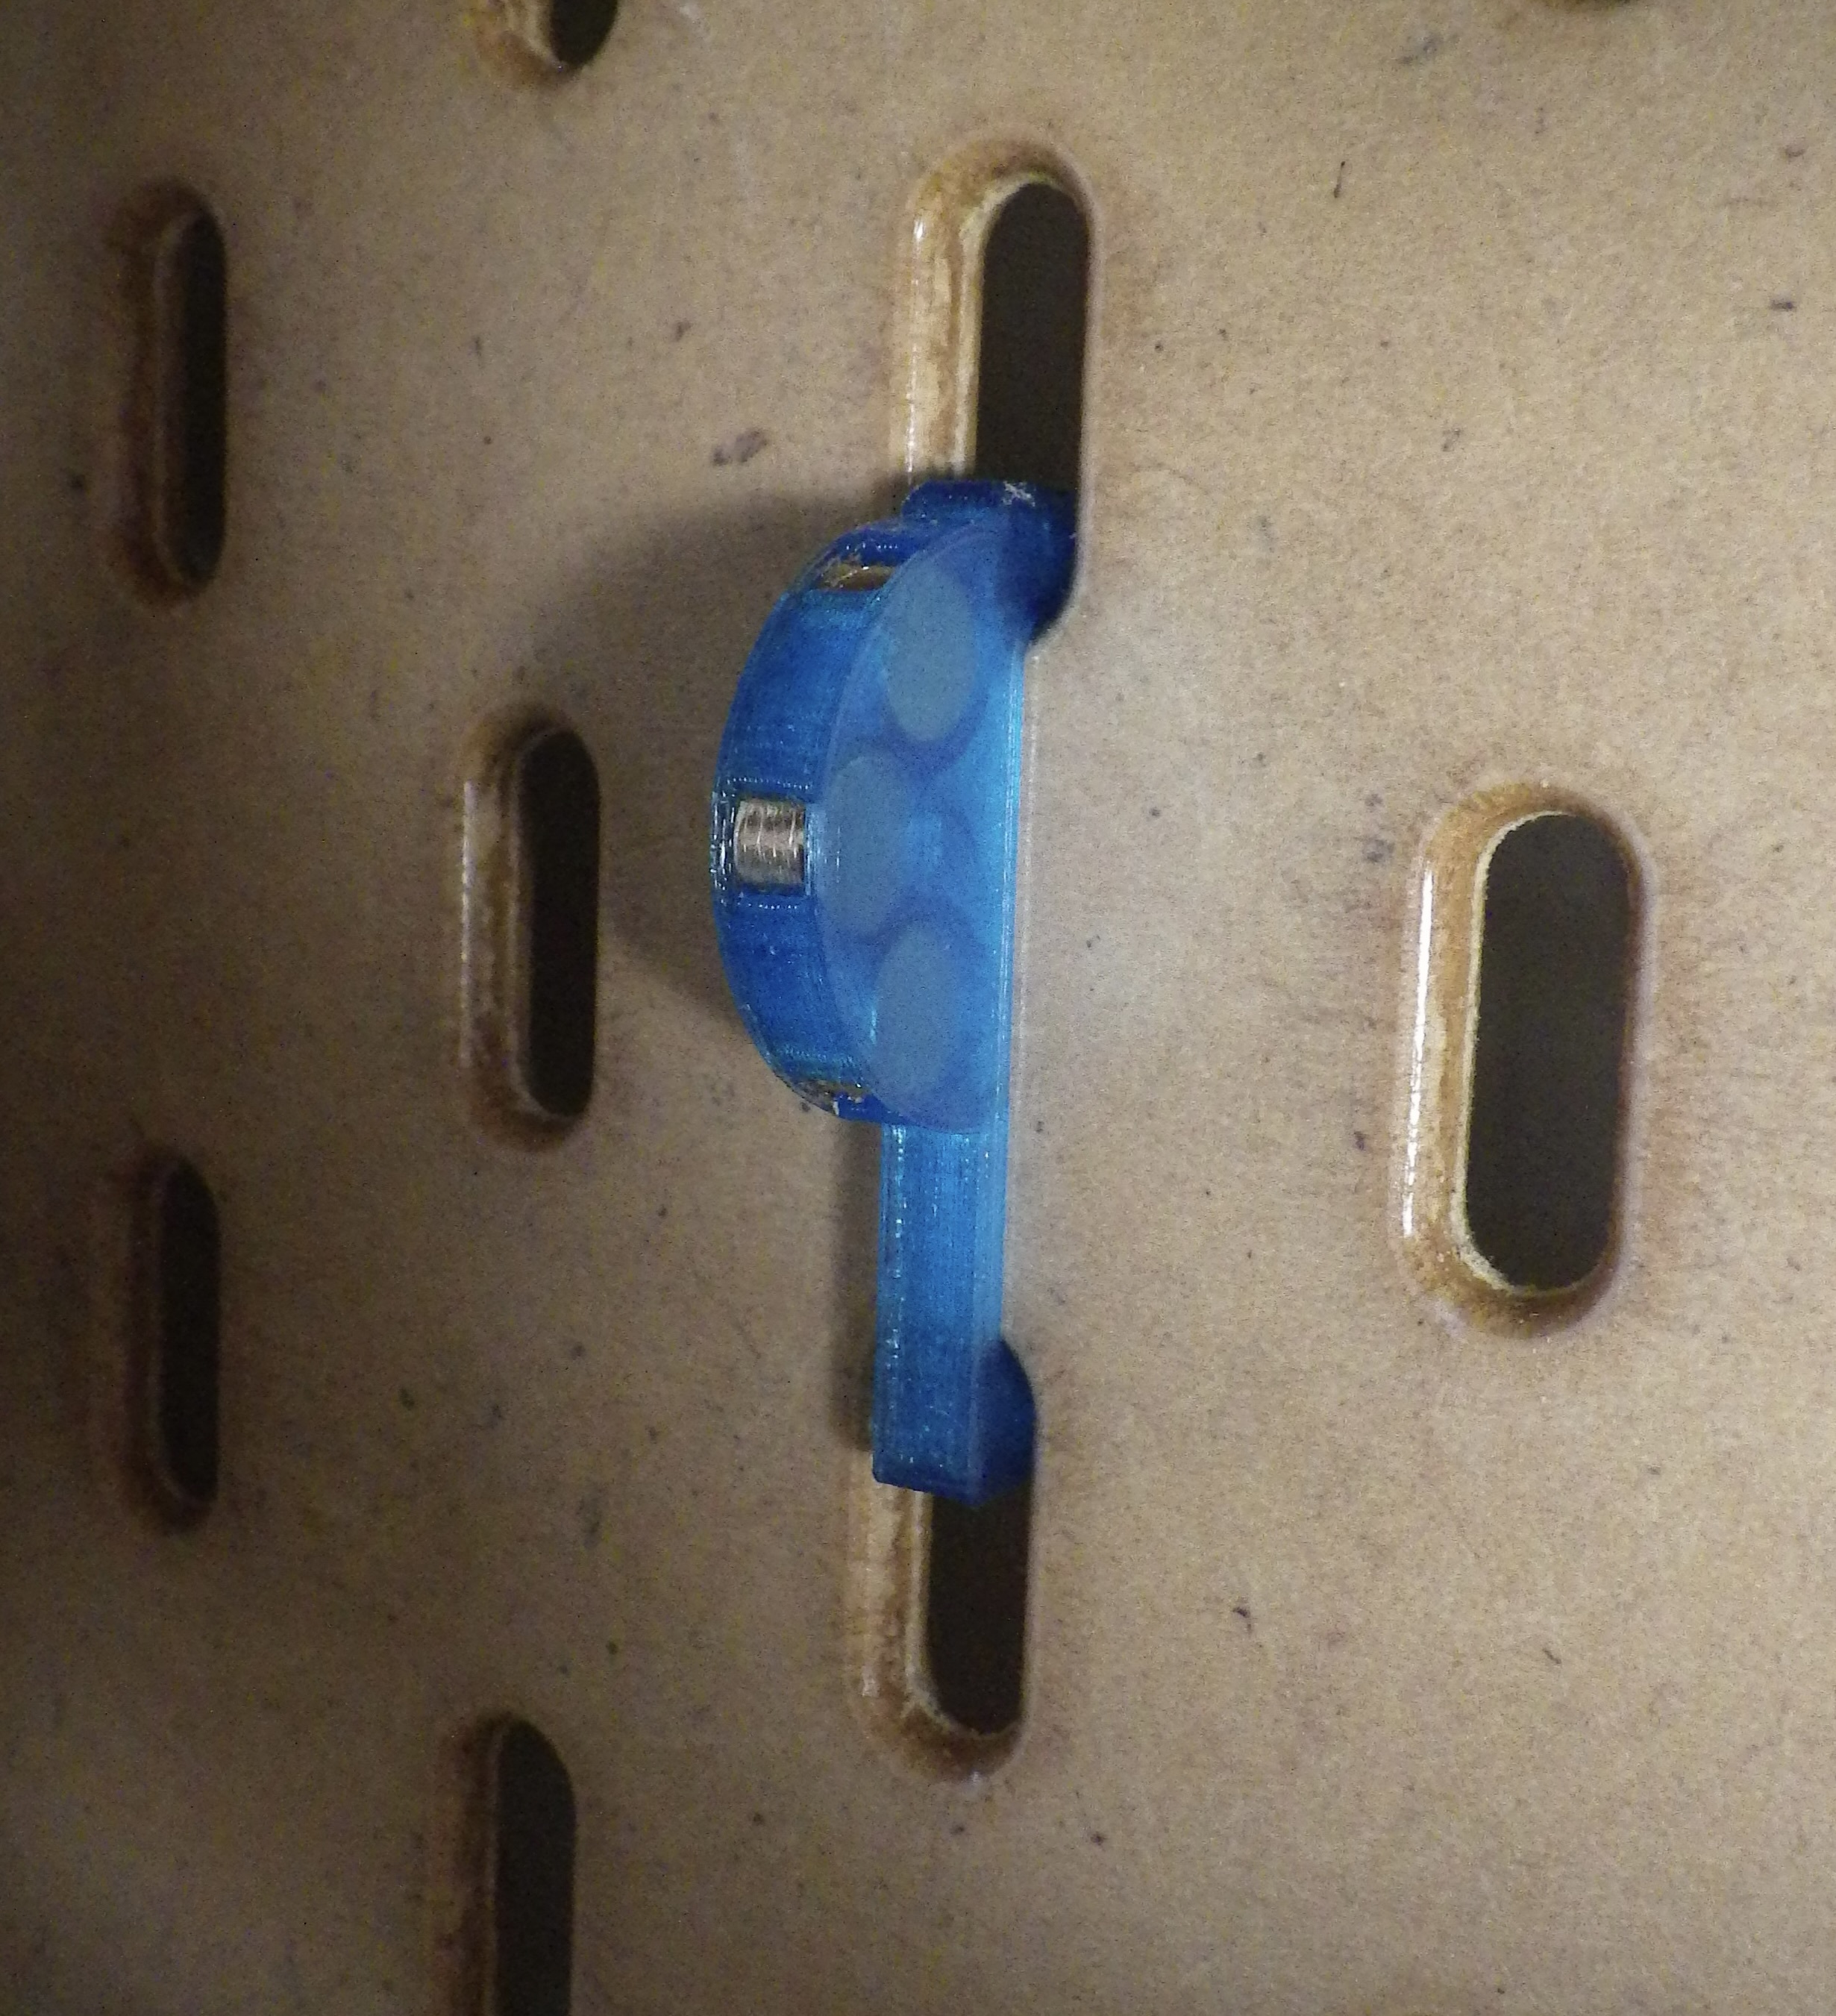
<h5>Overview</h5><p>As I continue to build out my workshop at my new place, I am adding tools that didn't make it to the last version of this workshop. In this case, I wanted a wall-mounted magnetizer/demagnetizer tool – rub your screwdriver across it one way and screws will stick to it. Rub the other way and they won't.<br><br>I could have ordered one online for around $10 CAD + delivery, but then, I had a 3d printer and some leftover magnets so I did what anyone would do… designed one! </p><p>This is a new type of design for me as I'd not tried embedding objects in prints before. Learning!!</p><h5><br><br>Design</h5><p>This is a partial remix of the generic Skadis hook design included in this set (<a href="https://www.thingiverse.com/thing:2853261">IKEA SKADIS Collection (easy print / tight fit) by CSD_Salzburg</a>). From there, I added the half-disc with spaces for the magnets. Designed in Tinkercad. </p><p>For this project, you'll need:</p><ul><li>filament of your choice – I used a nice translucent blue PLA</li><li>three(3) magnets. 6mm diameter x 3mm height.</li></ul><p> </p><p><strong>How to print</strong></p><p>The trick to embedding the magnets in the print is to design spaces for them to fit. Then pause the printing at the last layer that creates these spaces. Then insert the magnets, and resume printing.</p><p>To do that on a Prusa MK3s, you'll need to jump into the PREVIEW view on Prusa Slicer. Then, on the right hand side, slide the indicator up and down the scale until you can see the last layer of printing that includes the spaces. This is where you'll pause the print and embed the magnets.</p><p>To pause the print, hover your pointer to the right of the indicator showing what print layer you're viewing, and click on the (+) sign that appears. This introduces a colour change command. Basically it tells the Prusa to stop printing, elevate the print head, move the print bed, and start the process for a colour change.</p><figure class="image"><img src="https://media.printables.com/media/prints/264095/rich_content/1b863074-0232-4791-8b69-ef21deb5ce94/screen-shot-2022-08-22-at-144326.png#%7B%22uuid%22%3A%227ec70ef0-ddc7-487c-94d6-ae42eedff83b%22%2C%22w%22%3A1668%2C%22h%22%3A848%7D"></figure><p>At this point, after the print bed and head have moved out of the way, you insert the magnets.</p><p>Then remove and re-insert the filament as directed, and resume your print.</p><p>Though it's not visible in the solid view, in the layer/print view, you can see that the magnets actually protrude slightly from the side. This is intentional and not a problem with your print :)</p><p> </p><h5>How to use</h5><p> </p><p>To magnetize your screwdriver, rub it a few times across one of the flat sides. To demagnetize, rub it a few times along the rounded edge. It helps to move the tool in a small circular motion while demagnetizing.</p>
With this file you will be able to print Ikea Skadis Magnetizer Demagnetizer with your 3D printer. Click on the button and save the file on your computer to work, edit or customize your design. You can also find more 3D designs for printers on Ikea Skadis Magnetizer Demagnetizer.