IKEA LACK Table Leg Braces for Latest Table Version with Rackmount Support
prusaprinters
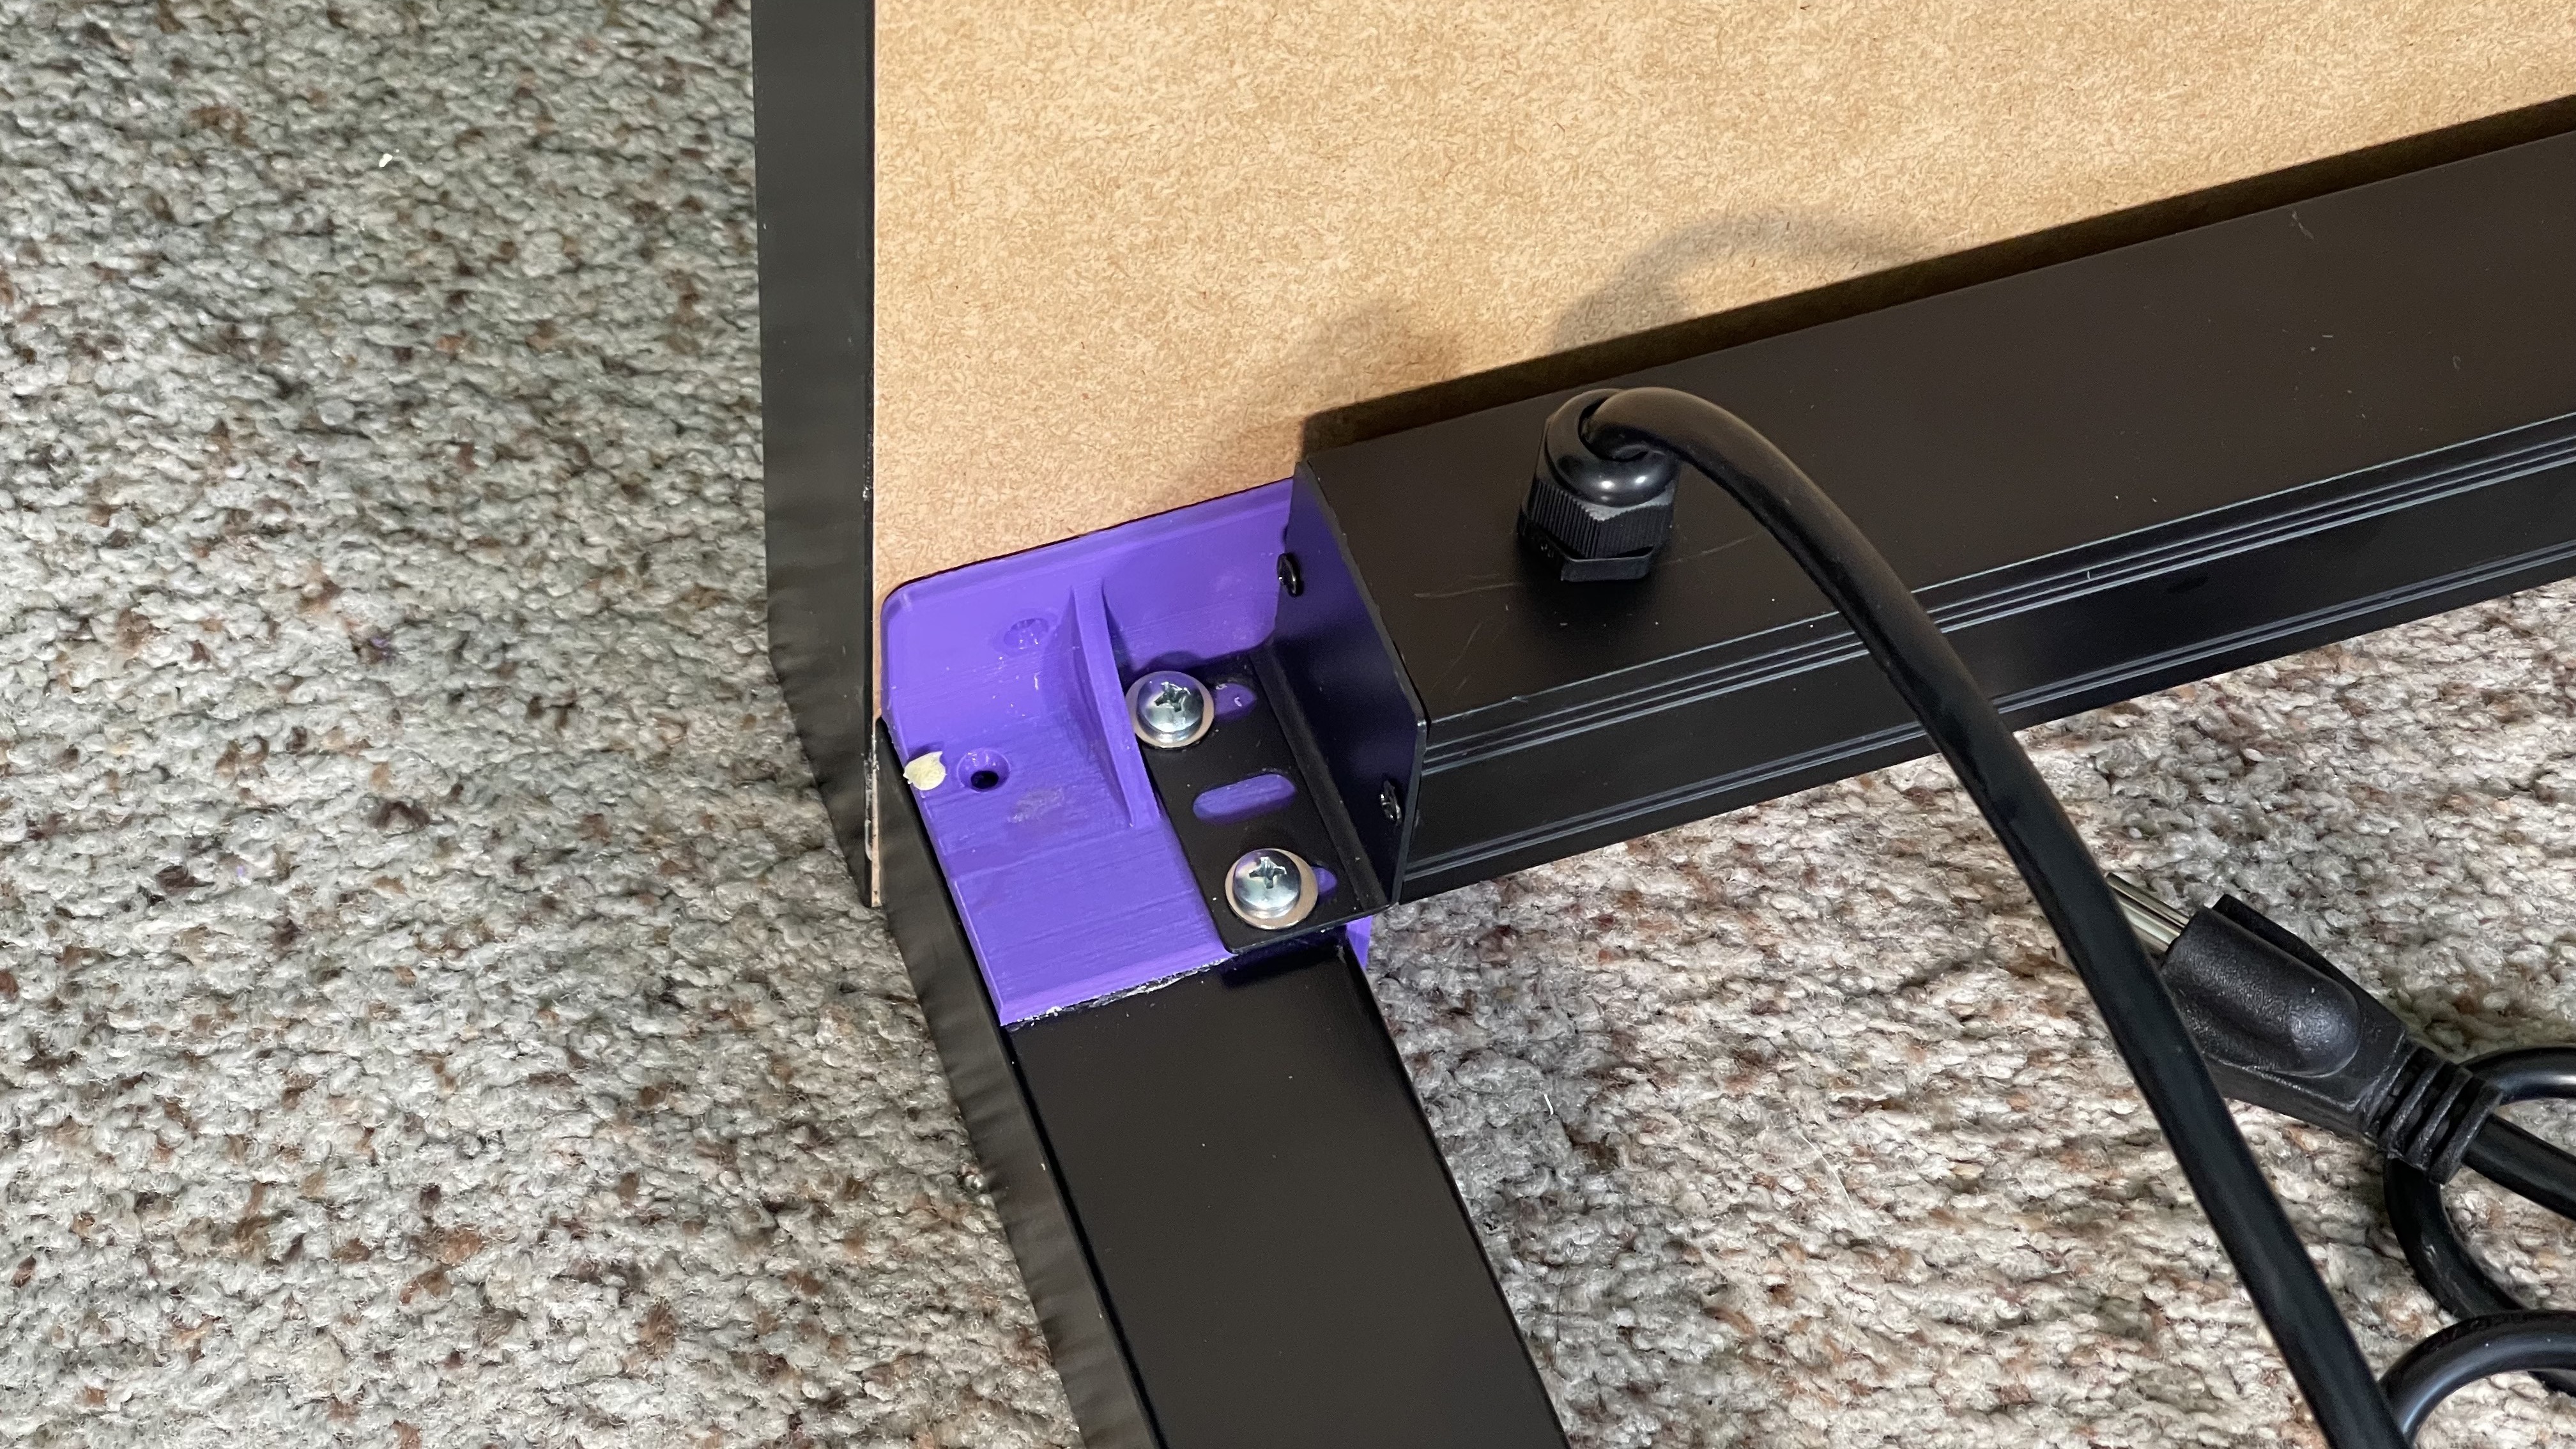
<p>This is my take on the ubiquitous IKEA LACK table leg brace. When I got my LACK table in mid 2021, I tried to use some existing leg brace designs only to find that the mounting screws (in the legs) farthest away from the leg/table joint were not hitting the leg internal solid reinforcement. This is apparently because the solid plug in the legs no longer extends as far into the leg as it once did, and there is no easy way to make it longer.</p><p>The key features in this design are:</p><ol><li>The screw holes that go into the leg have been moved as close as feasible to the leg/top interface, since screws that don't go into the solid plug are useless.</li><li>The rib has been positioned to allow clearance for 19" rack ears, allowing you to screw a device such as a router or power distribution unit directly through the brace into the leg. This guarantees that at least the top screw will go into the solid plug in the top of the leg.</li><li>Purple!</li></ol><p>The photos give an idea of how to set things up with a 19" rackmount power distribution unit. I did add the second screw in the bottom rack ear hole for stability when pushing plugs into the PDU, but for a lightweight device you don't need it.</p><p><strong>Assembly Procedure</strong></p><p>Urethane Gorilla Glue is used to greatly increase strength. Always use a very thin layer so you won't have to cut off a lot of glue that squeezes out of the joints; the glue expands considerably.</p><ol><li>Install the double-ended threaded stud into the leg per the IKEA instructions.</li><li>Put a thin layer of the urethane glue on the end of the leg and screw it into the tabletop.</li><li>Immediately wipe off any glue that squeezes out.</li><li>Now fit the corner brace (don't glue yet!) and match-drill the pilot holes for #8x5/8" wood screws in the leg and table top. If you're adding a rackmount device, you'll need longer screws for the ones that go through the rack ears.</li><li>Smear a very thin layer of urethane glue on the faces of the corner brace, position it, and drive in the wood screws to hold everything together while the glue sets.</li><li>As before, wipe off any excess glue immediately.</li></ol><p><strong>Material: </strong>PETG, preferably purple</p><p><strong>Layer Height: </strong> 0.25/0.20</p><p><strong>Nozzle: </strong>0.40</p><p><strong>Infill</strong>: 100%</p><p>Along with the .stl, I've included a .3mf that will print four braces at one go on a MK3S sized bed, and the Fusion360 CAD file.</p><p> </p>
With this file you will be able to print IKEA LACK Table Leg Braces for Latest Table Version with Rackmount Support with your 3D printer. Click on the button and save the file on your computer to work, edit or customize your design. You can also find more 3D designs for printers on IKEA LACK Table Leg Braces for Latest Table Version with Rackmount Support.
