IKEA Lack Table Angled Leg Reinforcement
prusaprinters
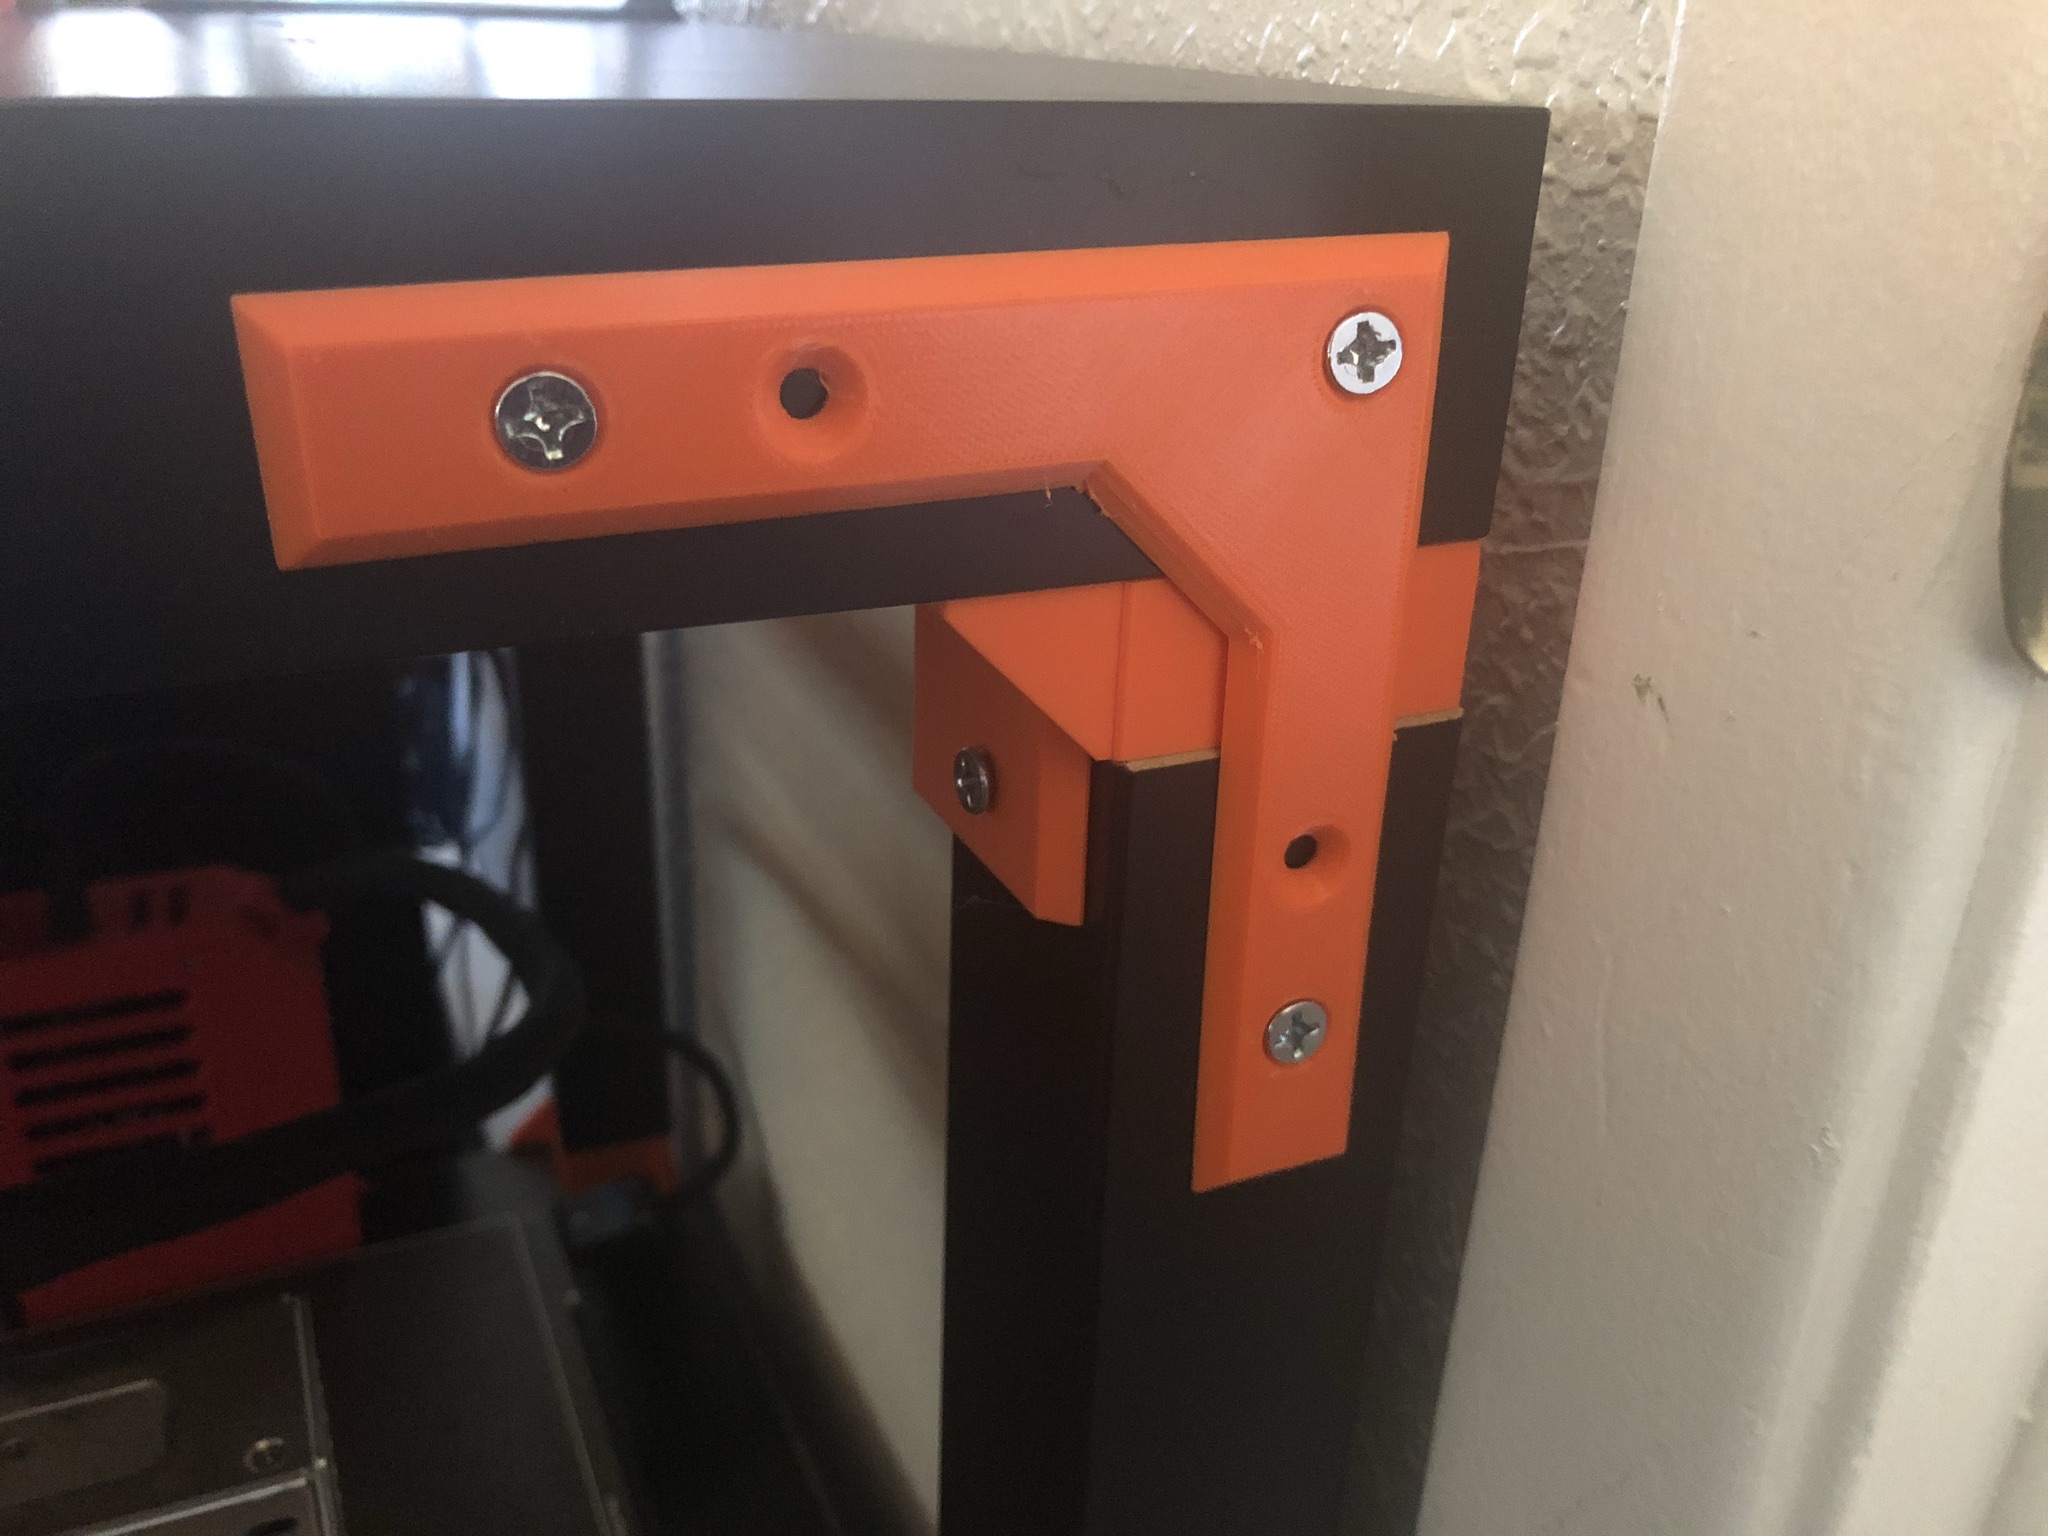
<p>Simply put, I've been using the non-mmu lack enclosure. I found the structure lacking especially in rigidity. Ironically the bottom table was fine, it was the top one that wobbled around. There also didn't seem to be a lot of angle brackets that I liked or that looked decent. </p><p> </p><p>These brackets attach on the exterior of the table, as to avoid conflicting with the brackets on the inside (aka I couldn't be bothered to model this bracket around the existing parts). But there's a fillet to them so at least they're somewhat stylish. </p><p> </p><p>I used #10x¾in wood screws to affix it to the table. I'd recommend going no longer than ¾ inch (19mm) for the screw length. Hole size in the bracket is 5mm, but it can be adjusted. Holes are countersunk to try and create a flush finish once the screws are installed.</p><p> </p><p>The rigidity of the upper table is much better and I no longer have to worry about knocking a filament roll off. </p><p> </p><p>You'll need four of these. You can print this in basically whatever rigid material you want. Mine are in PETG, but PLA or ABS could work just as well. I'd recommend 3 walls and about 5-10% infill to minimize waste plastic. Expect each one to take a little over an hour to print. </p>
With this file you will be able to print IKEA Lack Table Angled Leg Reinforcement with your 3D printer. Click on the button and save the file on your computer to work, edit or customize your design. You can also find more 3D designs for printers on IKEA Lack Table Angled Leg Reinforcement.