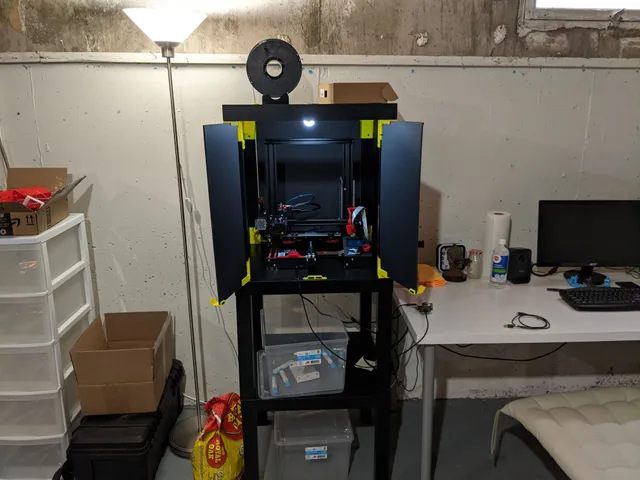
Ikea Lack Enclosure using Foamboard
prusaprinters
EDIT: 4 July 2022I've updated my remix of the Ikea Lack Enclosure (redone in Fusion 360) and have uploaded the Fusion 360 project file for anyone who wishes to customize it even further! While my Fusion 360 skills are still far from even a beginner level, I did attempt to model everything using the user parameter “BoardThickness”, so now if you're using 8mm panels, the design should adapt itself pretty well. (Press S and type “Change Parameters”, then change the “Expression” under User Parameter for Board Thickness) Note that unfortunately the “DoorThickness” parameter currently remains unused.The new files I've uploaded are found under the “V2” folders here and are still for 4mm panels and doors.One minor addition I've made was to include “panel guides”. These are particularly useful when using foam board as it should prevent the board from “warping away” from the lack table itself. Original:This is a remix of the fantastic Ikea Lack Enclosure, but for using foamboard instead of the typical acrylic sheets. This might “Lack” visual appeal, but I decided to enclose the printer with foamboard for it's insulative properties. Acrylic has a typical insulation R-value of 0.082 for 3mm thickness, whereas the typical 4.5mm foamboard has an R-value of 0.673. More insulation = more heat that is kept inside the enclosure. With my Ender 3 printing at 240C and a bed of 100C, I get up to around 55C after about 30 minutes of “soaking”. Not only is this enclosure warm, the use of foamboard over acrylic also means a massive cost saving. All the “panels” cost me roughly CAD 12!I did not remix any of the other parts, only those that required a bigger gap for the thicker materials. Please refer to the original design to find the other parts that are needed.
With this file you will be able to print Ikea Lack Enclosure using Foamboard with your 3D printer. Click on the button and save the file on your computer to work, edit or customize your design. You can also find more 3D designs for printers on Ikea Lack Enclosure using Foamboard.
