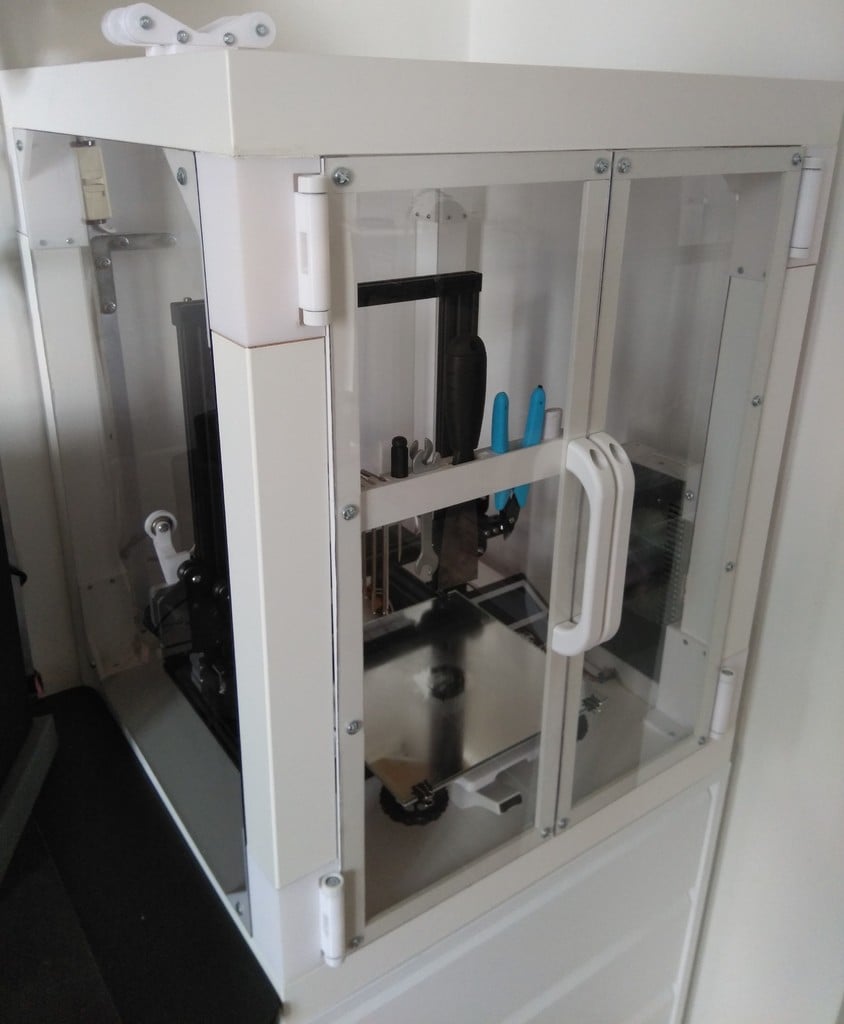
IKEA Lack enclosure for Comgrow Creality Ender 3
thingiverse
Hello, I've remixed the "Woody1978" corner's files to create my own IKEA Lack enclosure with a power supply outside the box. This custom enclosure includes several accessories shown in the picture: Spool holder: https://www.thingiverse.com/thing:4385300 Filament guide: http://www.thingiverse.com/thing:3497633 Extruder knob: https://www.thingiverse.com/thing:3109769 Filament roller guide: http://www.thingiverse.com/thing:3052488 Anti-snag endcap: https://www.thingiverse.com/thing:4404123 Led frame: https://www.thingiverse.com/thing:3485467 Compact handle: https://www.thingiverse.com/thing:4390102 Pressure fitting clip: https://www.thingiverse.com/thing:2994683 Board fan guard: https://www.thingiverse.com/thing:2935204 Cable clips: https://www.thingiverse.com/thing:2960375 LCD Cover: https://www.thingiverse.com/thing:3433735 Cable holder: https://www.thingiverse.com/thing:3034224 Micro-SD card holder: https://www.thingiverse.com/thing:4458209 Optional components for this enclosure include: Tool holder: https://www.thingiverse.com/thing:4475769 Temperature and moisture sensor module: https://www.thingiverse.com/thing:4631069 Hinges with no bearing balls: Available soon! Electrical distribution raceway: Available soon! Bill of materials: * At least 1.5 kg of PLA plastic * Two plexiglass sheets, each measuring 600mm x 1000mm x 2mm * One tube of Pattex Polymer glue and a gun * Double-sided tape * Thirty-four FHM 2.9x16mm self-drilling screws * Sixteen FHM 3.3x16mm self-drilling screws * Fourteen M4x12mm screws * Twenty M4x16mm screws * Four M4x20mm screws * One M4x30mm screw * Sixty M4 washers * Thirty-six M4 nuts * Eight 624ZZ ball bearings * Eight 2x4mm neodymium magnets Assembly instructions: I used Pattex Polymer glue to attach each corner to the IKEA Lack board. I recommend using multiple clamps to ensure accurate positioning. First, glue the eight corners to the boards according to the attached drawing. When the glue is dry, drill screws into the hollow profile of the IKEA board. These screws can be considered as pins. Next, screw the feet of the IKEA table to the bottom part, using clamps to ensure correct positioning. No glue is needed for this step since the screws will be drilling into a plain part. Repeat the same process for the top part. Once done, cut your plexiglass windows by taking measurements directly on the enclosure hull. You can also drill holes in the back of the enclosure to ensure accurate spacing between holes. Now you can assemble the power supply using the original CHC M4x20mm screw. Before mounting the power supply to the hull, extend the wire length and pass it through the corner first. Mount the power supply to the S-E Corner and lock it in place with two self-drilling screws, as shown in the attached drawings. You can now construct the door panels according to the attached drawings. The left and right doors are identical, just rotate one 180 degrees. Cut and drill the plexiglass using the constructed door panels. Finally, set the top and bottom door stops in place, aligning them with the line marker on the part. Use double-sided tape to secure the door stop and replace it if necessary. I hope you enjoy this custom enclosure!
With this file you will be able to print IKEA Lack enclosure for Comgrow Creality Ender 3 with your 3D printer. Click on the button and save the file on your computer to work, edit or customize your design. You can also find more 3D designs for printers on IKEA Lack enclosure for Comgrow Creality Ender 3.
