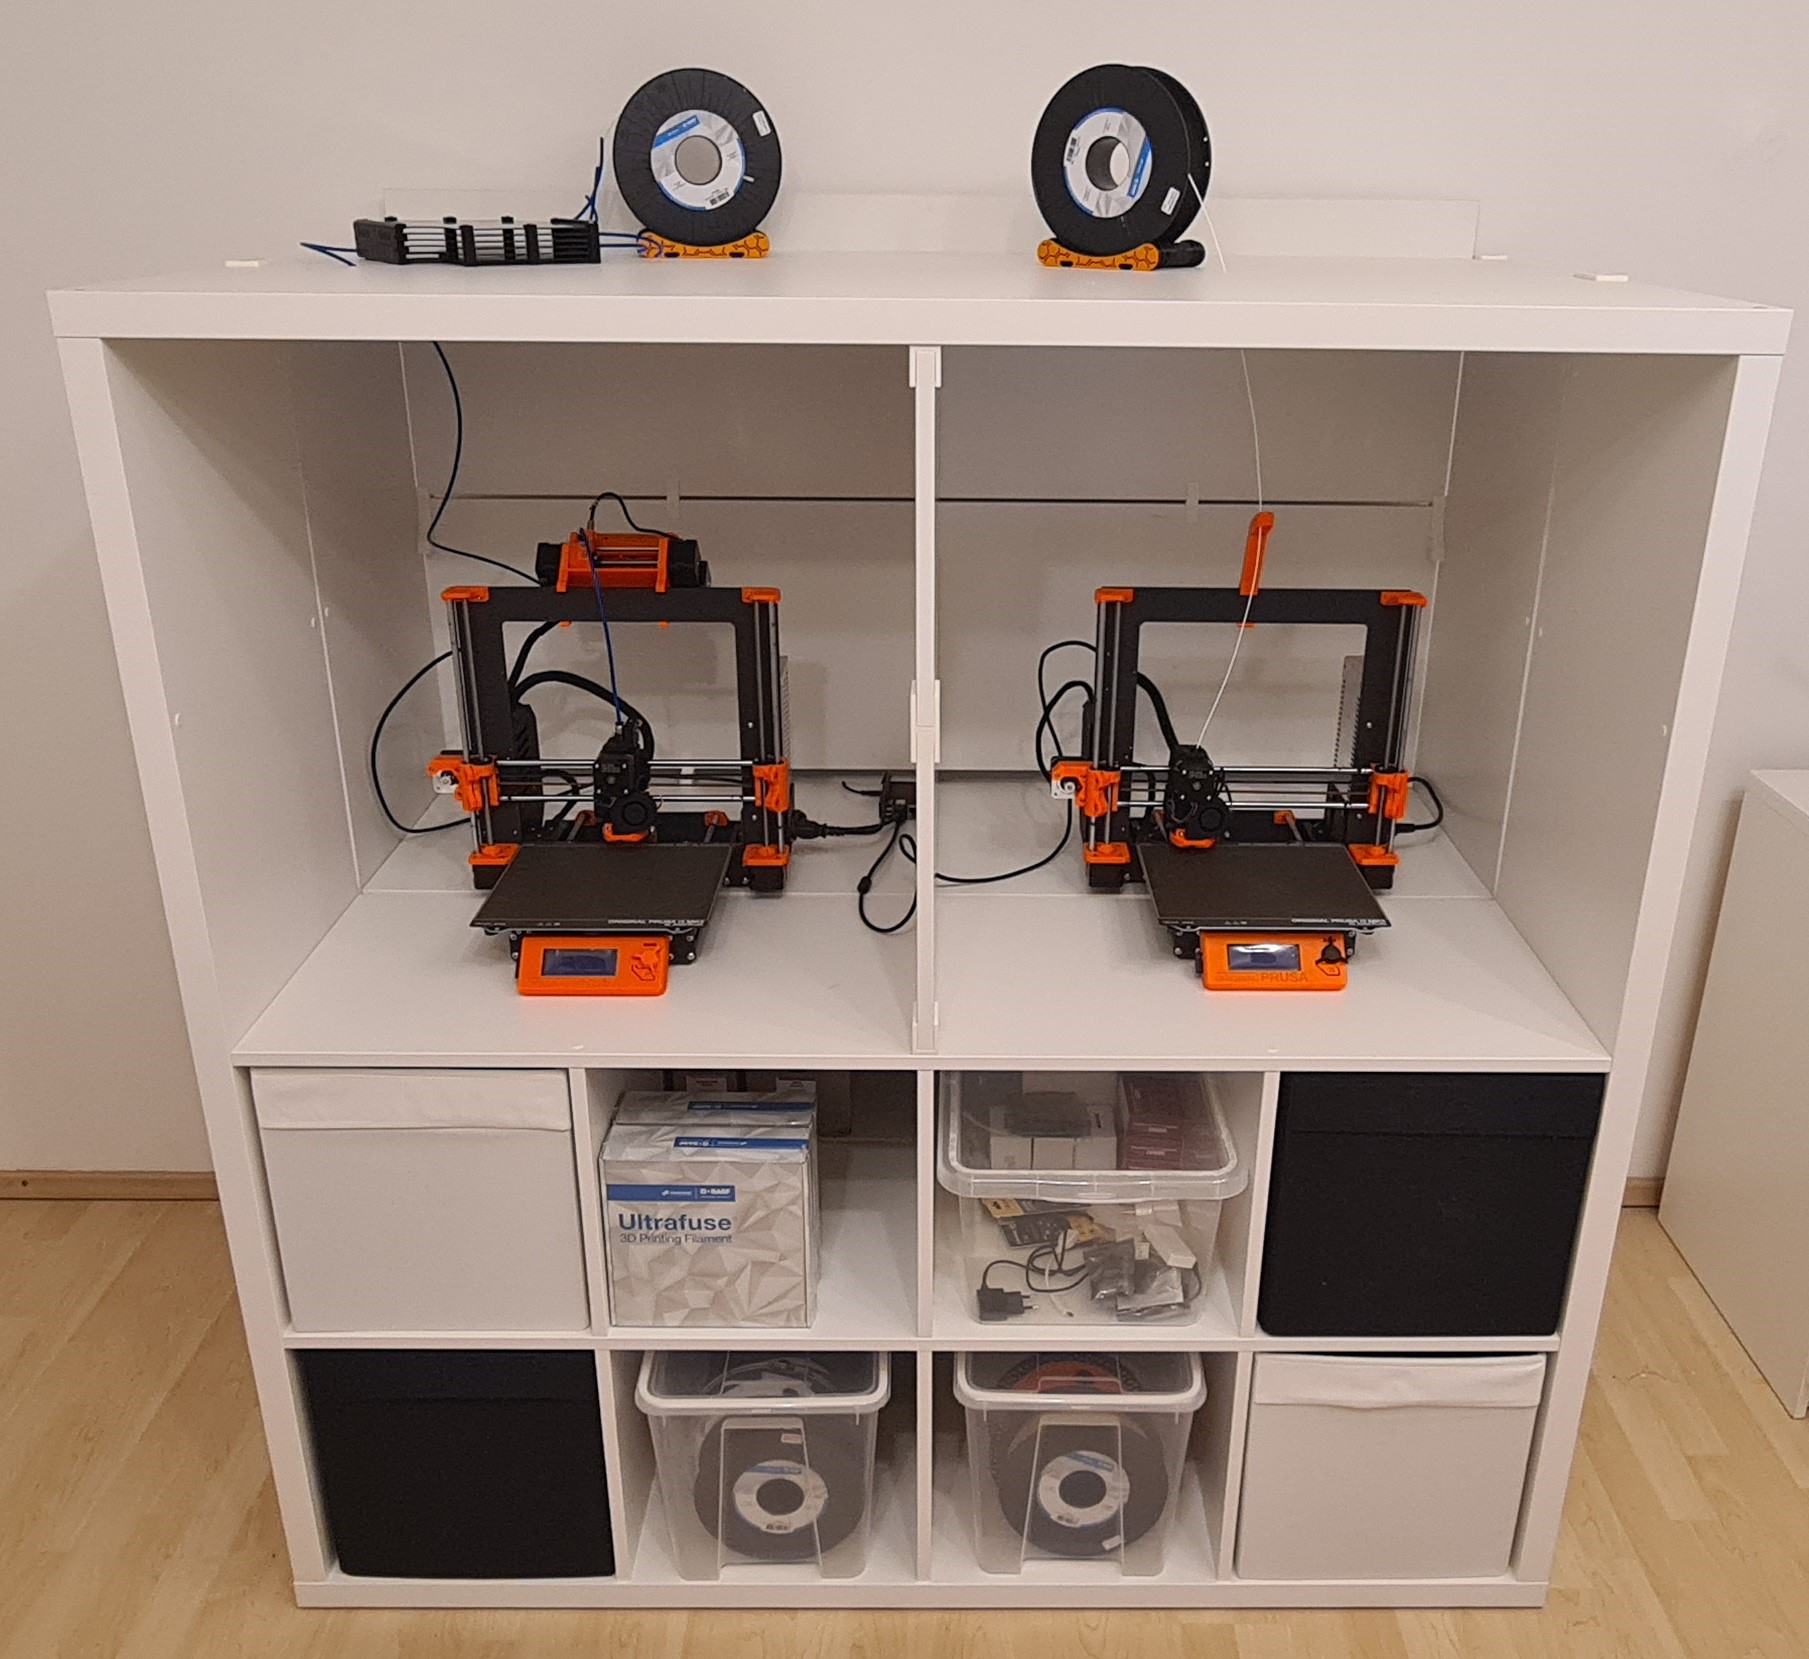
Ikea Kallax printer enclosure
prusaprinters
<h3><strong>Motivation:</strong></h3><p>I have been looking for a suitable, inexpensive, strong, robust and big enough printer enclosure. It should also be inexpensive and easy to build up.</p><h3><strong>Solution:</strong></h3><p>Two Ikea Kallax shelfes. Removed some boards and screwed them together… Without destroying those shelfes! No additional holes, no screws needed.</p><p>I bought two used shelfes on ebay “Kleinanzeigen” for about 100 Euro. They came with some doors, boxxes and other addons. A good prize for what you get ;-)</p><h3><strong>Instructions:</strong></h3><p>This Instruction is written for 4*4 shelfs! Use wooden dowels and compare where you need the printed ones.</p><p><strong>Note:</strong> There are two Kallax versions out there. The shelfes of the newer ones are approx. 15,8 mm (#1) thick, the older ones 16,5 mm (#2). <strong>This is for the 16,5 mm version!!</strong> If desired i could also make a version for newer Kallax shelfes. </p><p>You can use almost every Kallax shelf (like mentioned in the description). Two of the same will be screwed together.</p><ol><li>Stick together both shelfs till second floor (no screw yet, lay down on front side!)</li><li>Install the sides of the shelfs, but not the top!</li><li>Lay down one shelf onto the other one (Holes for the wall mount are in the middle)</li><li>Now install the feet (feet without screws can be applied with double-sided tape)<ol><li>2x "Foot - connector with srewhole"</li><li>3x “Foot - connector without screwhole"</li><li>4x "Foot - with srewhole"</li><li>6x "Foot - without screwhole"</li></ol></li><li>Lift the connected shelfs up (be really carefully, so the connectors will not break (alternatively install the top board for lifting up)</li><li>Install for the separator board <ol><li>"Bracket separator board - 1" (#3.1.1)</li><li>"Connector separator board - 1" (#3.2)</li><li>"Bracket lower back board - 1" (#3.3)</li></ol></li><li>Attach the “Bracket lower back board - 2” (#4.1)</li><li>Now install the lower back board and secure it by installing the "Bracket both back boards - sides" (#4.2)</li><li>Insert two small board for separator</li><li>Install <ol><li>"Bracket separator board - 2" (#3.4)</li><li>"Connector separator board - 2" (#3.5)</li><li>"Bracket both back boards" (#3.6)</li></ol></li><li>Install top rear board and secure it with tape</li><li>Insert two more (upper) small boards for separator</li><li>Install <ol><li>"Bracket separator board - 1" (#3.1.2)</li><li>"Connector separator board - 3" (#3.7)</li><li>"Bracket separator board - 1" (#3.1.3)</li></ol></li><li>Install top Kallax Board. Use 2x "Foot - connector with srewhole" (#4) to connect the shelfs</li><li>Secure upper back board with 2x "Bracket upper back board - sides" (#5)</li><li>Insert everywhere the dowels. Maybe edges of the dowels need to be scratche a bit of with a knife.<br>(Thats the fun part ;-) i am too lazy to write where which one has to be installed, have a look at printing list)</li></ol><p> </p><p><strong>Please enjoy and leave feedback!</strong></p><p> </p><h3><strong>Printinglist:</strong></h3><ul><li>8x Dowel 1 - 2.65x12 (for wall mount holes from shelfes)</li><li>22x Dowel 2 - 3.2x12 (for all other opened holes)</li><li>5x Dowel 3 - 3.2x26.5 (for back board connectors)</li><li>2x Dowel 4 - 3.2x30 (for the front holes; in front of displays)</li><li>2x Dowel 5 - 3.2x40 (for "Bracket both back boards - sides")</li><li>4x Foot - connector with srewhole</li><li>3x Foot - connector without screwhole</li><li>4x Foot - with srewhole</li><li>6x Foot - without screwhole</li><li>2x Bracket both back boards - sides (normal and mirrored)</li><li>1x Bracket both back boards</li><li>1x Bracket lower back board - 1</li><li>2x Bracket lower back board - 2</li><li>3x Bracket separator board - 1</li><li>1x Bracket separator board - 2</li><li>2x Bracket upper back board - sides (normal and mirrored)</li><li>2x Connector both back boards</li><li>1x Connector separator board - 1</li><li>1x Connector separator board - 2</li><li>1x Connector separator board - 3</li><li>2x Connector between shelfes (under printer)</li></ul><p> </p><h3>Printing instructions:</h3><p>I used white BASF Ultrafuse PLA. 3 perimeters and 20% infill are enough.</p><p> </p><h3><strong>Updates:</strong></h3><p>14.11.2022: Added filament guide cause of scratches in shelf. Maybe a PTFE guide is necessary in future.</p><p> </p>
With this file you will be able to print Ikea Kallax printer enclosure with your 3D printer. Click on the button and save the file on your computer to work, edit or customize your design. You can also find more 3D designs for printers on Ikea Kallax printer enclosure.
