Hyperlite Floss 2 Pod
prusaprinters
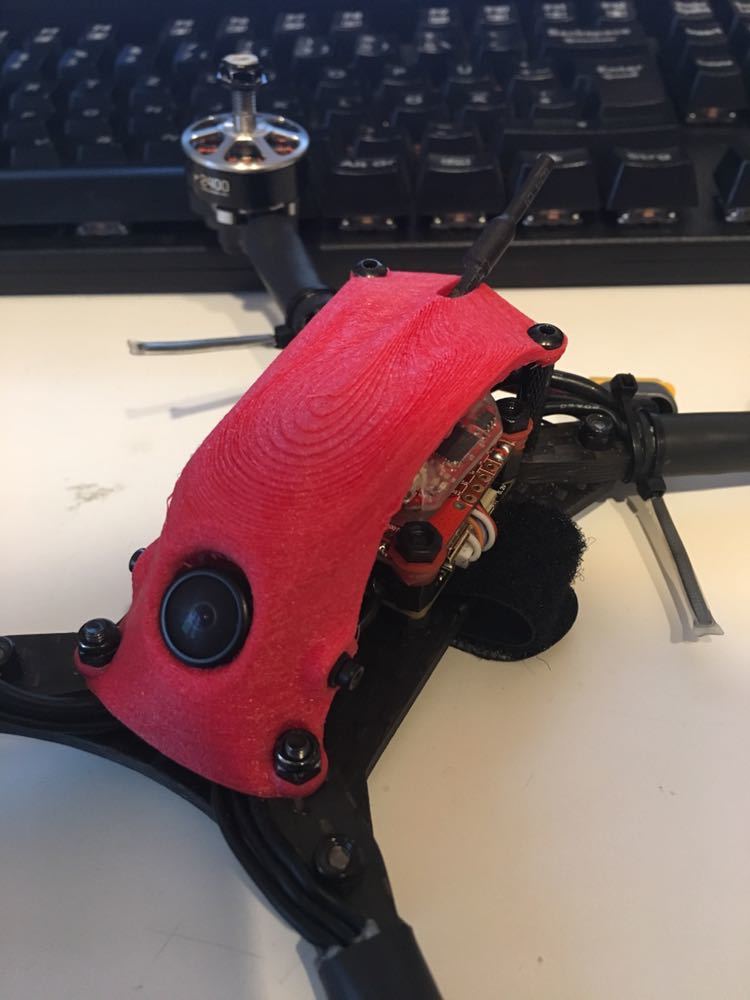
<p>This is a Pod for the Hyperlite floss 2 frame. If you want to use this thing, there are some parts you have to first think of:</p><p>-Your electronics stack can only be 26mm high</p><p>-you need to use a micro size camera</p><p>-it is recommended to use a linear antenna</p><p>-you need to be ok with removing the nuts under the standoffs in the back</p><p>-the cam angle only goes from 47 to 55, but you can melt or cut a bit of the plastic away to make room for another angle</p><p>To install this thing you need extra:</p><p>-2x m2x7mm screw</p><p>-2x m2 washer</p><p>Install:</p><p>First, put the cam in place. Then, use a washer and a m2x7mm screw to secure the camera on one side, then do the same thing on the other side. then tighten the screws to a point, where you still can move the cam up and down, but its sits tightly where it is.</p><p>Installing the pod in the front is simple: Just stick the pod on the 16mm screws and put a self tightening lock nut on it. in the back, just screw it on the standoffs. Finally, put your antenna through the little slot in the back, now it sits in place, has still space to move away when you hit something and can be easily replaced.</p><p>That should be it, now you can enjoy your nice looking, new pod.</p><p>This model was printed in tpu, and it works great with it. ABS/ PLA and Nylon should work too, mabey some fits will be a bit tighter then, and you have to do the antenna install a bit different.</p><p> </p><p> </p><p> </p><p>Category: R/C Vehicles</p>
With this file you will be able to print Hyperlite Floss 2 Pod with your 3D printer. Click on the button and save the file on your computer to work, edit or customize your design. You can also find more 3D designs for printers on Hyperlite Floss 2 Pod.