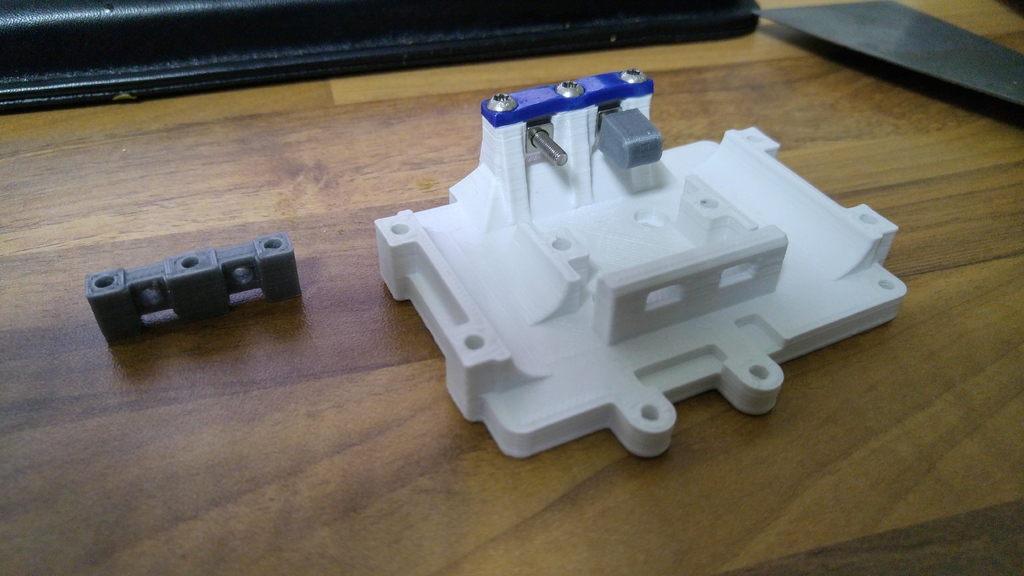
HyperCube X-Carriage - Integrated belt tensioner mod
thingiverse
First and foremost, a huge shoutout is owed to both @Tech2C for his incredible printer and also @bagwan for this fantastic tensioner mod that I really got to appreciate a lot! ### What is This? This is a modification of the most recent v1.2 X-carriage of the original [HyperCube by Tech2C](https://www.thingiverse.com/thing:1752766), which combines it with the [Hypercube easy Belt tensioner by bagwan](https://www.thingiverse.com/thing:2092237) built right on top, providing additional strength with bulkier walls and pillars, and also fixes a problem with the nut mounting I had with the original carriage for quite a while. ### Why is This? So as I said, I love bagwan's belt tensioner; it's really convenient to use and that's exactly what the original hypercube belt tensioning has been missing. Unfortunately, his modification is only held down by 3 screws on top of the original carriage, which to me seems to be quite unstable under heavy belt pull. Hence the bulkier build in this mod. The other thing which I already mentioned above is that the three nuts you're supposed to insert into the x-carriage for the screws holding down the belt clamp, at least for me, tended to strip and run loose in their mount, making it impossible to screw the belt down tight (and eventually leading to having to print a whole new carriage...). That is why I modified the mount in such a way that you insert the nuts (I use square nuts) from the bottom of the carriage into a rock-solid mount and as usual screw the belt clamp down from the top. This way, the nuts can't move one bit. You may notice that my X-carriage mod is just a tiny bit wider than the original (~5mm) but that's not a problem at all, since even the inductive probe mount protrudes much further than that. ### PPP - Post-print Preperation 1. Drill all holes with a 3mm drill as usual, including the ones of the belt tensioner. 2. Insert a nut from the bottom of the carriage. 3. Take a long M3 screw (25mm+), insert it into the belt clamp holes on the top until it reaches the nut from above. When turning the screw, you'll pull the nut further into the mount. For the Square Nuts part, you'll feel slightly less resistance right before the end but screw it in until it can't move any further. 4. Pull the screw out, proceed with the other two, and then assemble the rest according to bagwan's post. If you don't have a long screw laying around, you can always get a soldering iron to push the nut in that way. ### Things Needed / Other Notes 1. The hex nuts version is untested so far, please confirm if you print one! 2. You'll obviously need the flat **belt clamp** printed part and also the half round **idler** caps, either the long or short ones (I recommend the long ones, though). 3. You'll need at least **3x M3x20 screws** for mounting the belt clamp, and **2 more** (or longer ones) for the belt idlers. I use 5 of the M3x20 and it works just perfect. 4. You'll also need at least **5x M3 nuts**, square or hex doesn't matter. You should also be able to use 3x hexs nuts and 2x square nuts, or the other way around. Just print the part for which you have the **3** nuts. 5. I'd recommend to double up on the zip ties holding the belt on the other side of the carriage. Or use other methods of fixing them, like printed belt clips.
With this file you will be able to print HyperCube X-Carriage - Integrated belt tensioner mod with your 3D printer. Click on the button and save the file on your computer to work, edit or customize your design. You can also find more 3D designs for printers on HyperCube X-Carriage - Integrated belt tensioner mod.
