Hypercube Evolution Z axis adjustable flag for optical endstop
thingiverse
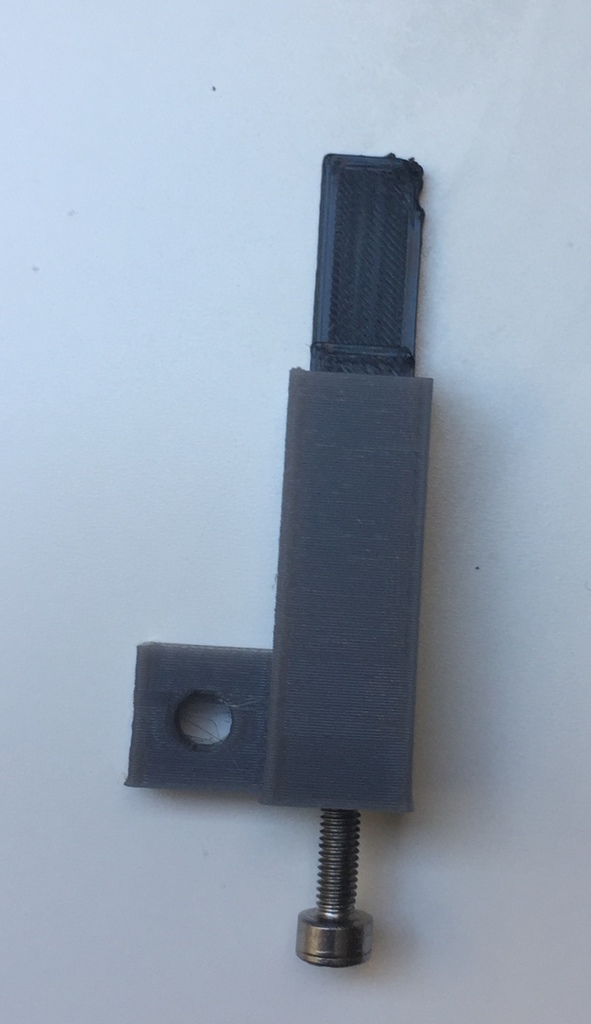
This thing is designed to adjust an optical Z endstop for a Hypercube Evolution. The main reason for its creation was that I experienced both steppers not running exactly in sync on my dual Z Hypercube Evolution (https://www.thingiverse.com/make:532085), which caused problems with the first layer after printing. As a result, I had to check the bed leveling on each side every time I finished printing, wasting valuable time. To eliminate this issue, I decided to install an endstop on each side of the printer, allowing it to level itself automatically during homing of the Z axis. To do this, simply adjust the endstop flag to the correct height for your hotend in the homed Z position on each side, and that's it. The next time you print, the homing procedure will take care of leveling the bed for you. To mount the optical endstop, I used an endstop mount from this thing: https://www.thingiverse.com/thing:2512807 So, why create a new design? I use an E3D v5 clone, which is slightly larger than the v6 and doesn't fit with the mentioned thing on my printer. I needed one for the left side, of course. I also wanted to practice my TinkerCad skills in this project. The design itself is simple and easy to assemble. Just decide if you need a left or right side (or maybe both like mine). BOM: - M3 brass insert (you might have some leftover from your Hypercube build) - M3 bolt (length depends on your needs) - M4 bolt and hammer nut to mount on the 2020 extrusion used for my Z bed Insert the brass into the bottom hole. Why I have two colors on my picture? With a grey flag, the endstop didn't trigger. The black one works fine.
With this file you will be able to print Hypercube Evolution Z axis adjustable flag for optical endstop with your 3D printer. Click on the button and save the file on your computer to work, edit or customize your design. You can also find more 3D designs for printers on Hypercube Evolution Z axis adjustable flag for optical endstop.