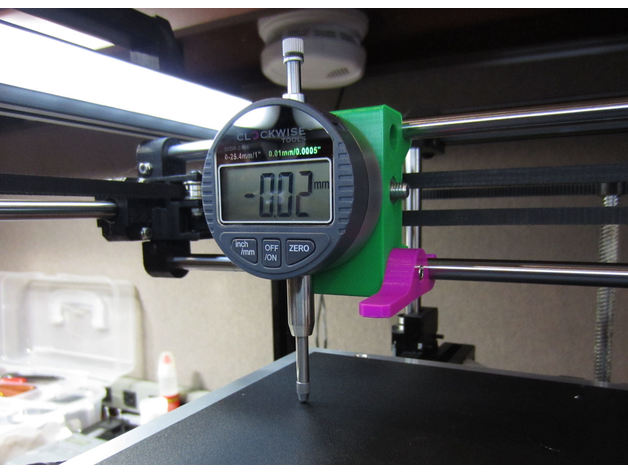
HyperCube Dial Indicator Mount
myminifactory
This tool makes it easy to get a perfectly level HyperCube bed, which is exactly what I'm looking for since auto bed leveling isn't my thing. Auto bed leveling moves the Z axis up and down as it travels across the bed, and I just don't think that's right. What I want is a perfectly level bed without relying on auto bed leveling. This tool gives me just that. I found a great design on Thingiverse and gave it a total makeover to make it work with the HyperCube bearing rod spacing of 41.5 mm. The dial indicator does an incredible job of leveling the bed, far better than using the drag paper method. I've noticed that my first layer is now much more consistent, and it's especially helpful for bigger prints. It's also way quicker to check all four corners with the dial indicator compared to using paper because I don't have to bring the x axis close to the bed. All I need to do is zero out the dial indicator on one corner and adjust the other three corners to match. Here's how I do it: Attach the dial indicator to the left side of the X axis and move the carriage backward so that the indicator is in the rear corner. Zero out the indicator, then move the carriage forward and take a reading on the front left corner. Adjust the bed leveling screw until the dial indicator reads zero. Next, move the dial indicator to the right side of the X axis, being careful not to zero it out. Take a reading on the front right side of the bed and adjust the bed leveling screw until the indicator reads zero. Move the carriage backward and take a reading on the rear right corner. Adjust the bed leveling screw until the dial indicator reads zero. Finally, move the extruder to the middle of the bed and do your normal Z height adjustment. Since all four corners are level, you shouldn't need to check anything other than the middle of the bed. Assembly requires a 6 mm x 35 mm Philips head screw and 6 mm nut for the dial indicator mounting, as well as a 3 mm x 15 mm cap head screw and a 3 mm Nylock nut for the lever. I used this dial indicator, but you can get a similar unit from Harbor Freight.
With this file you will be able to print HyperCube Dial Indicator Mount with your 3D printer. Click on the button and save the file on your computer to work, edit or customize your design. You can also find more 3D designs for printers on HyperCube Dial Indicator Mount.
