HUMMbug REmix for TAZ 4/5 Mutant Mount
prusaprinters
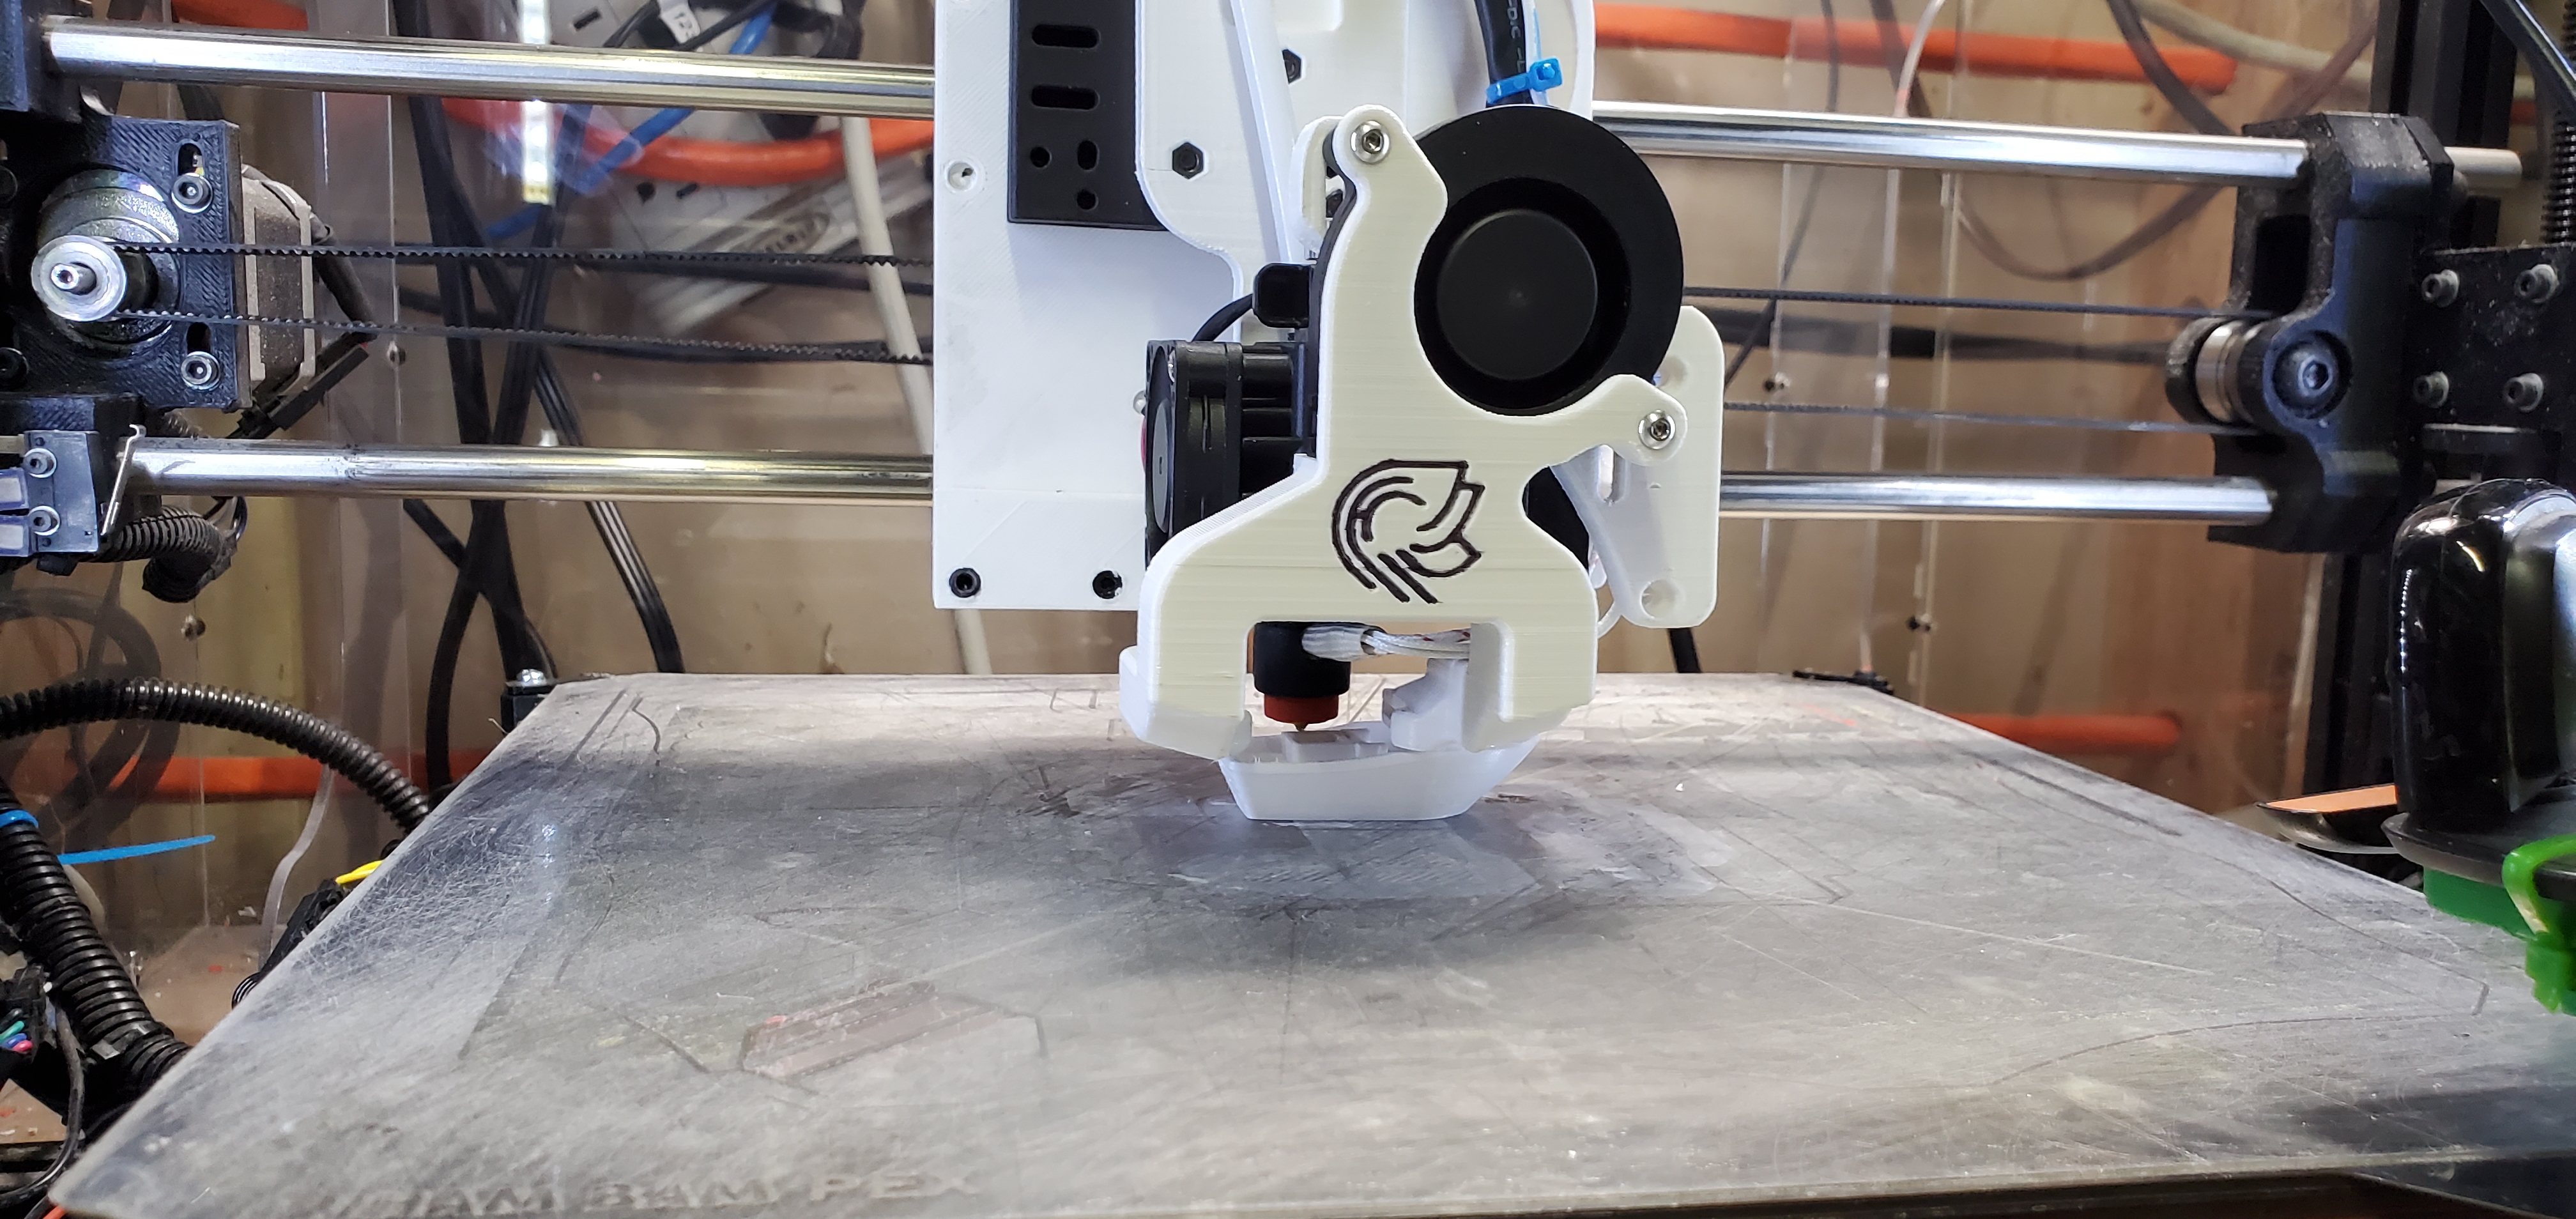
<p>I have had a Wham Bam Systems Mutant V2 in my hands for quite some time now. Once I received the new E3D Revo Hemera Lightweight hot end, I knew it was time for an upgrade.<br><br>Most of the reference pictures were taken from V1 of the mount, but as you can see, it took 5 more revisions to get it right. <br>Included are the modified TAZ 4 X carriage (simple removal of the top side retainers), the mounting spacer that goes on the bottom of the X carriage to keep the lower part of the Revo mount from just hanging out in space, and the 6th generation (first iteration was V0) of the mount. I used the same fan duct as the original HUMMbug and most of the same required hardware. Assembly should follow the original directions, except for the Mutant Fixed Plate.<br> </p><p><a href="https://www.printables.com/model/107574-hummbug-the-hemera-unibody-mutant-mount">https://www.printables.com/model/107574-hummbug-the-hemera-unibody-mutant-mount</a></p><p><a href="https://www.thingiverse.com/thing:4042492">https://www.thingiverse.com/thing:4042492</a><br><br><strong>Mutant Fixed Plate Assembly</strong><br>Fasteners required:</p><ul><li>M3x8 cap head bolt, quantity2</li><li>M3x10 socket head bolt, quantity 2</li><li>M3 brass threaded heat inserts, quantity 4<br> </li></ul><p>Assembly instructions:</p><ol><li>Use a soldering iron with appropriate tool to insert the M3 brass threaded inserts into the TAZ_X_carriage_for_MUTANT, into the holes marked in the last picture.</li><li>The X carriage will need other inserts as well, to match those in the X carriage you removed from your TAZ printer. 12-M3 threaded inserts, installed in the same orientation as those from the old X carriage.</li></ol><p> </p><p>I printed these parts using Overture PETG White, using an E3D Titan Aero 2.85mm hot end, with a 0.4 brass nozzle. 0.2 layer height with a 15% grid infill, 3 top/bottom layers, and 3 outlines. I also used support as I printed it in the vertical orientation as laying the mount flat always resulted in the front portions breaking off during assembly.</p><p>I have also included the Fusion 360 project files so you may remix at your pleasure (and see all my ugly mistakes!).</p><p>Yes, that is the e-step setting for this particular print head in the second to last picture. I put it on all my hot ends, as well as coding it into the print profile for each one in my slicer. Then I never have to worry about having the wrong setting and I can check it quickly at the printer without having to look in the slicer settings.<br><br>I have added the shortened version of the cooling fan. I found that the original didn't seem to give me enough clearance from the bed. I cut about 5mm out of the middle and stitched everything together.</p>
With this file you will be able to print HUMMbug REmix for TAZ 4/5 Mutant Mount with your 3D printer. Click on the button and save the file on your computer to work, edit or customize your design. You can also find more 3D designs for printers on HUMMbug REmix for TAZ 4/5 Mutant Mount.