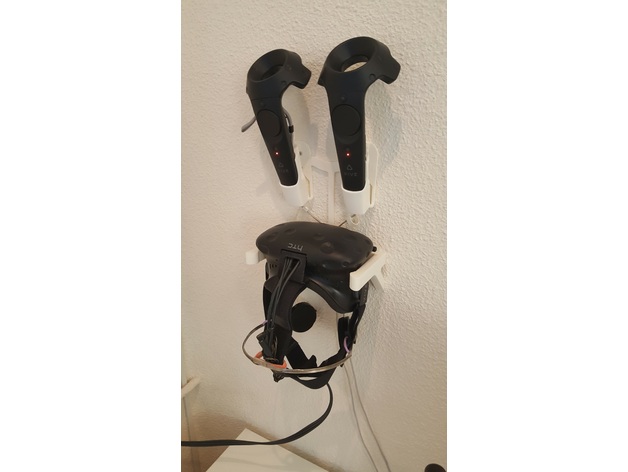
HTC Vive Mount HMD + Controllers + charging
thingiverse
These are additional parts that can be used to transform your HTC Vive HMD Wall Mount Lite, HTC Vive controller wall mount, and charging station into a comprehensive all-in-one wall mount for the HTC Vive. This wall mount requires only three screws to secure it, as opposed to six. The aforementioned components may also be utilized independently; however, they would necessitate two screws each to ensure proper mounting. Given my rental apartment's constraints, I opted to devise this design where a central "bridge" can connect these three components, providing stability and preventing them from rotating while using only one screw for each. To assemble the full wall mount, you will need to print the bridge and four clips. It is essential to note that the bridge part has limited strength; therefore, do not use it carelessly. Print Settings: Printer Brand: Prusa Printer: Prusa Steel Rafts: No Supports: No Resolution: 0.20 Infill: 20% Notes: The bridge printed flawlessly in PLA using Prusa's default normal settings (with ZHop). The clips, however, require a print resolution of 0.20 to ensure proper fitment. Printer model: Prusa MK2 Post-Printing: Following the printing process, insert the four clips into the slots located at each end of the bridge. Next, attach the HDM bracket to the wall using only one screw in its center. Ensure that you guide the USB cables through the slots in the back; this will be impossible once the bracket is securely fastened. Fasten the bracket lightly so it can still rotate with a moderate amount of force (refer to the second photo). Subsequently, position the bridge on top of the bracket, ensuring that the USB cables are routed through the slots in its back. Verify that the HMD bracket is level (refer to the third photo). Now, carefully attach one of the controller mounts to the bridge by sliding the clip on the bridge's arm into the slot located on the side of the controller mount's back plate. Exercise caution not to apply excessive force since the bridge has limited strength; it merely needs to prevent rotation and does not require supporting any weight. Mark the location of the top mounting hole of the controller mount on the wall, then remove the controller mount again. Drill a hole at the marked spot. Reattach the mount to the bridge and fasten it lightly to the wall. Repeat this process for the other controller mount. Once you have completed both, tighten the three mounting screws while taking care not to damage the plastic (refer to the fourth photo).
With this file you will be able to print HTC Vive Mount HMD + Controllers + charging with your 3D printer. Click on the button and save the file on your computer to work, edit or customize your design. You can also find more 3D designs for printers on HTC Vive Mount HMD + Controllers + charging.
