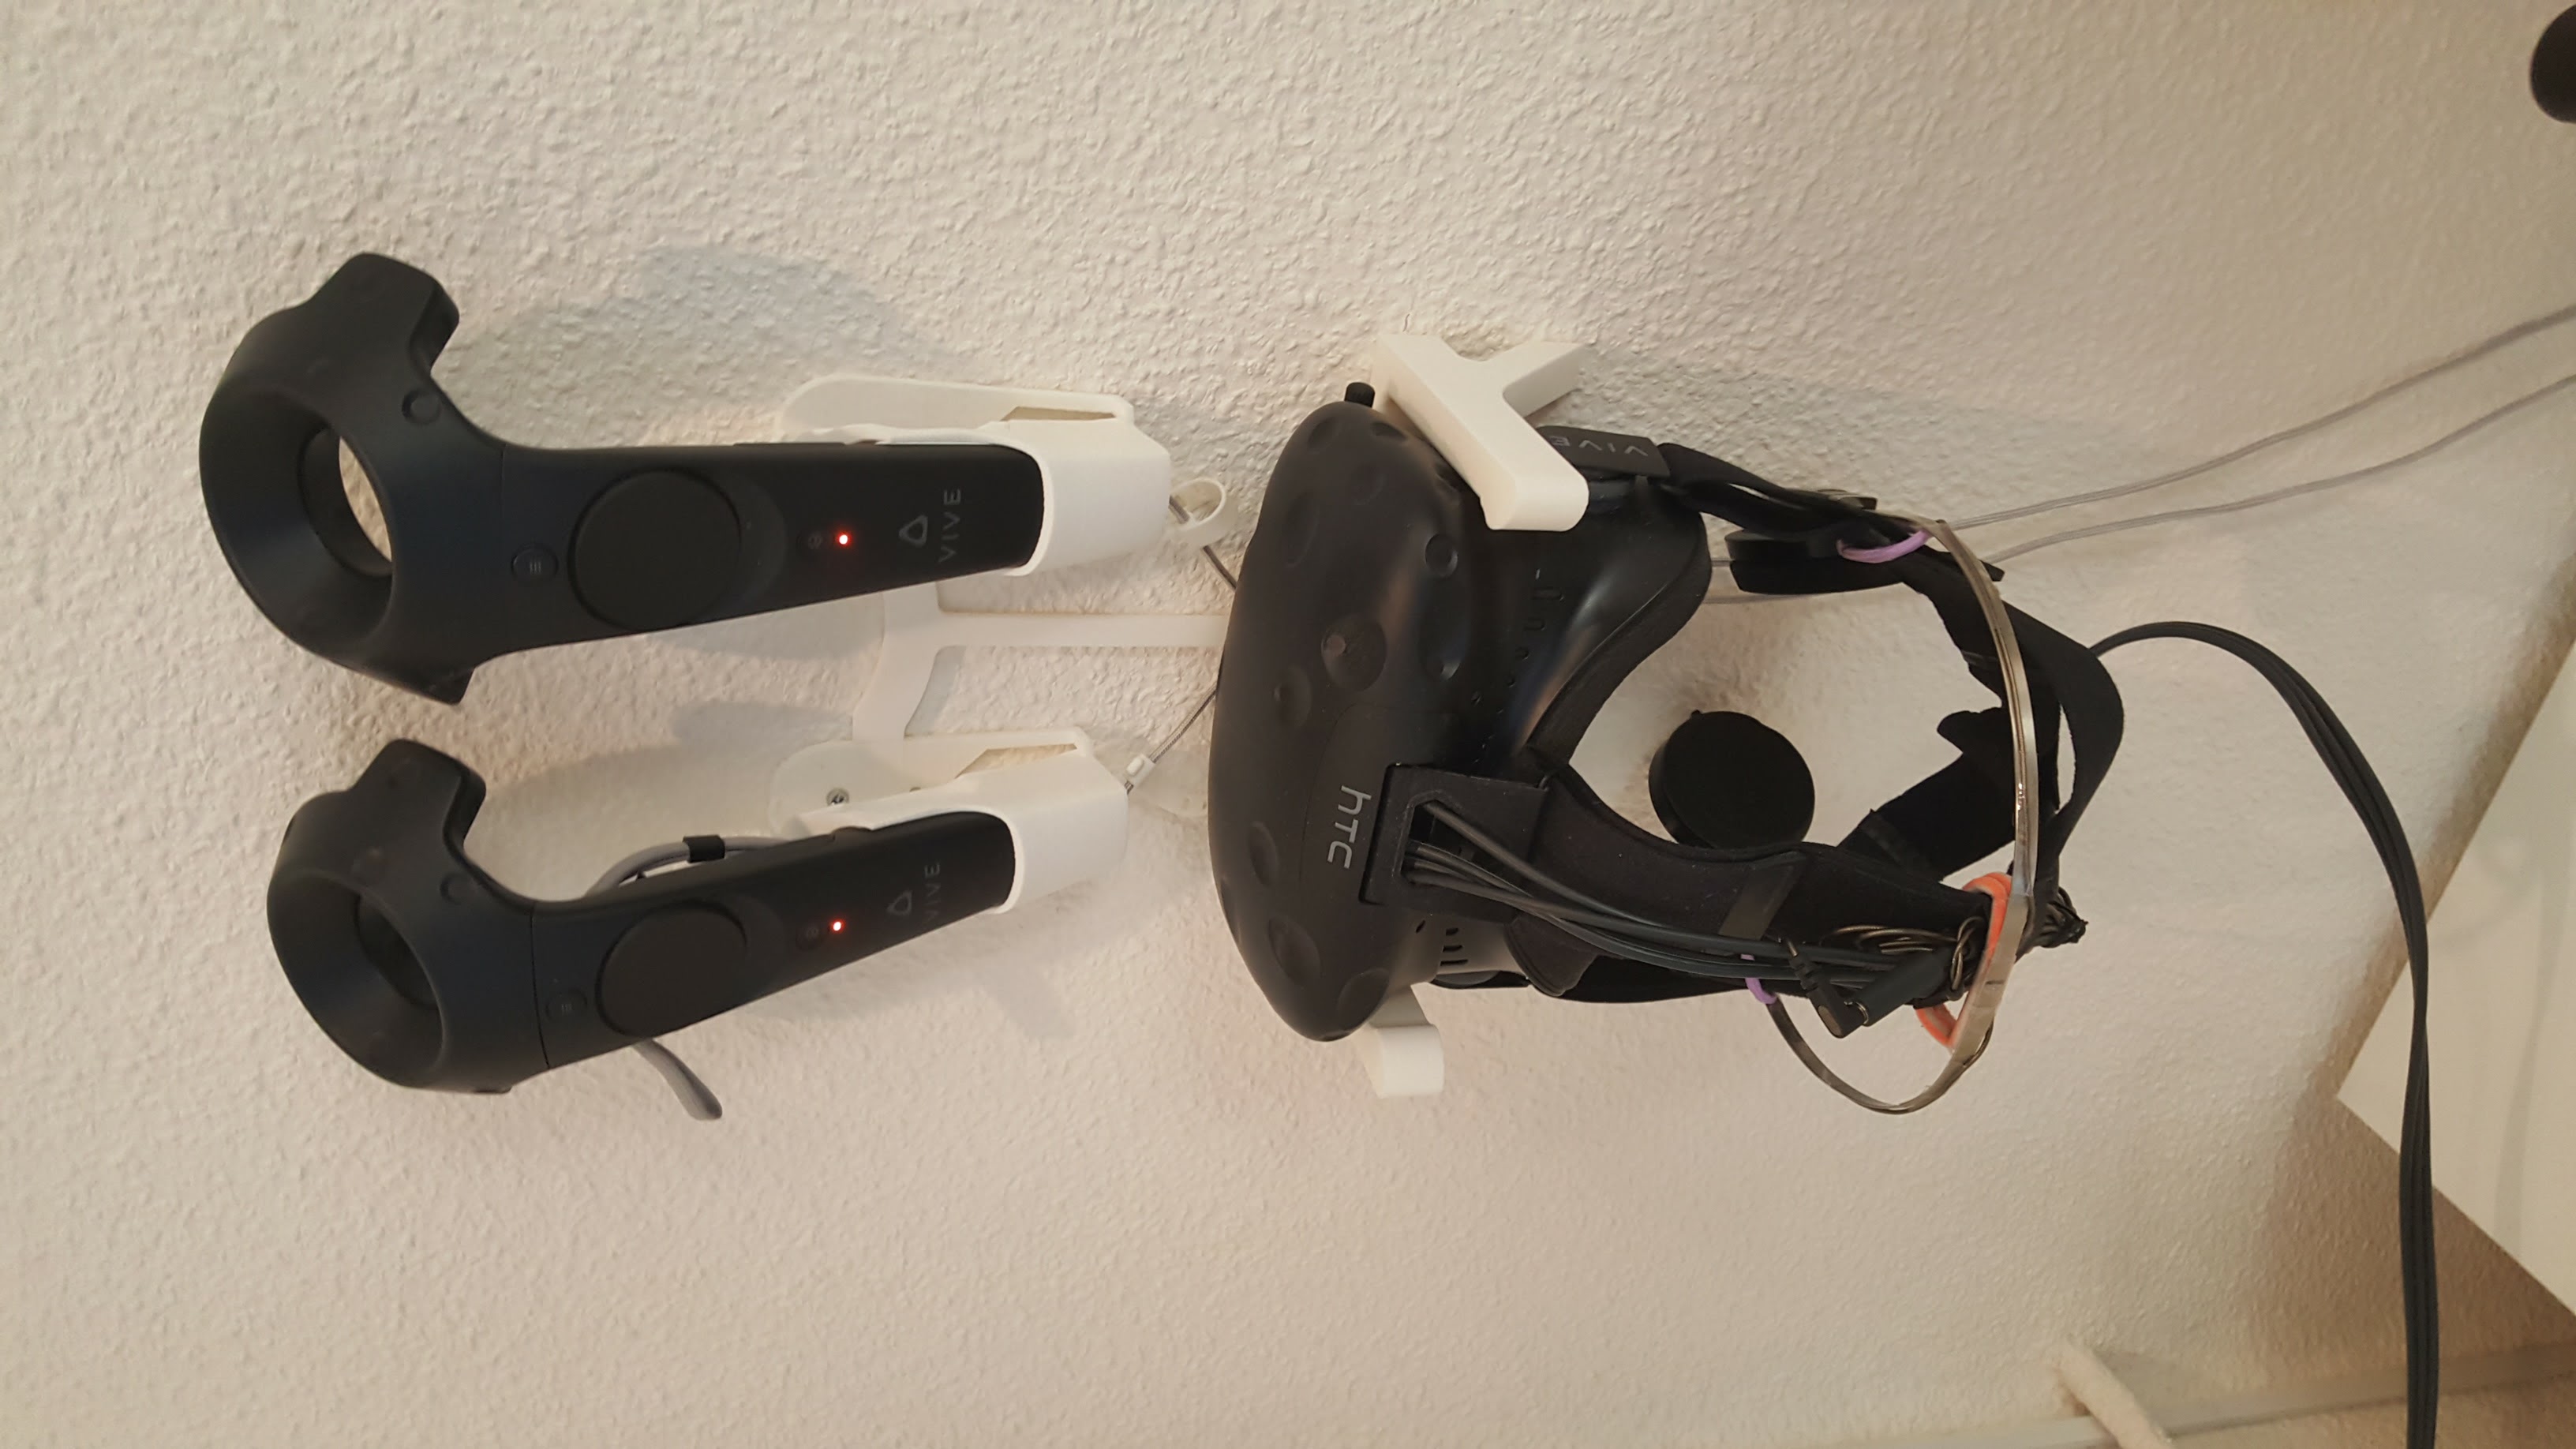
HTC Vive Mount HMD + Controllers + charging
prusaprinters
<p>These are extra parts to turn my <a href="/prints/7590-htc-vive-hmd-wall-mount-lite">HTC Vive HMD Wall Mount Lite</a> and <a href="/prints/7589-htc-vive-controller-wall-mount-and-charging-statio">HTC Vive controller wall mount and charging station</a> into a full all-in-one wall mount for the HTC Vive that needs only 3 screws to fasten instead of 6.</p> <p>The above parts can be used separately of course but then each would need 2 screws to be mounted correctly and being in a rental apartment I'd rather make as few holes as possible. So I came up with this design where a central "bridge" can connect the 3 parts providing some stability to prevent the parts from rotating while using only a single screw for each.</p> <p>You'll need to print the bridge and 4 clips.</p> <p>NB: the bridge part isn't particularly strong, don't expect it to hold up if used carelessly.</p> <h3>Print instructions</h3><p><strong>Printer Brand:</strong> Prusa</p> <p><strong>Printer:</strong> Prusa i3 MK2</p> <p><strong>Rafts:</strong> No</p> <p><strong>Supports:</strong> No</p> <p><strong>Resolution:</strong> .20</p> <p><strong>Infill:</strong> 20%</p> <p><strong>Notes:</strong></p> <p>The bridge printed perfectly in PLA using Prusa's default NORMAL settings (with ZHop).</p> <p>The clips really need to be printed at .20 I think otherwise they won't fit correctly.</p> <p>Remix of: <a href="https://www.thingiverse.com/thing:1619580">https://www.thingiverse.com/thing:1619580</a></p> <h3> Post-Printing</h3> <p>After printing the bridge insert the 4 clips into the slots in the four ends.</p> <p>Then I'd suggest to first mount the HDM bracket on the wall using just a single screw in the center (don't forget to lead the USB cables through the slots in the back, you won't be able to do so once mounted). Fasten lightly so the bracket can still rotate somewhat with a bit of force. (See second photo)</p> <p>Then insert the bridge on top of the bracket, again making sure the USB cables are guided through the slots in its back. Make sure the HMD bracket is as level. (See third photo)</p> <p>Now carefully connect one of the controller mounts to the bridge by sliding the clip on the bridge's arm into the slot in the side of the controller mount's back plate. Don't use a lot of force because the bridge isn't very strong (just strong enough to prevent the parts from rotating, it doesn't need to carry any weight). Mark the place of the controller mount's top mounting hole on the wall, remove the controller mount again and drill a hole. Now reattach the mount to the bridge and fasten it to lightly the wall.</p> <p>Do the same for the other controller mount. Now tighten the 3 mounting screws (taking care not to break the plastic). (See fourth photo)</p>
With this file you will be able to print HTC Vive Mount HMD + Controllers + charging with your 3D printer. Click on the button and save the file on your computer to work, edit or customize your design. You can also find more 3D designs for printers on HTC Vive Mount HMD + Controllers + charging.
