HPI Venture Head and Tail Light Set
pinshape
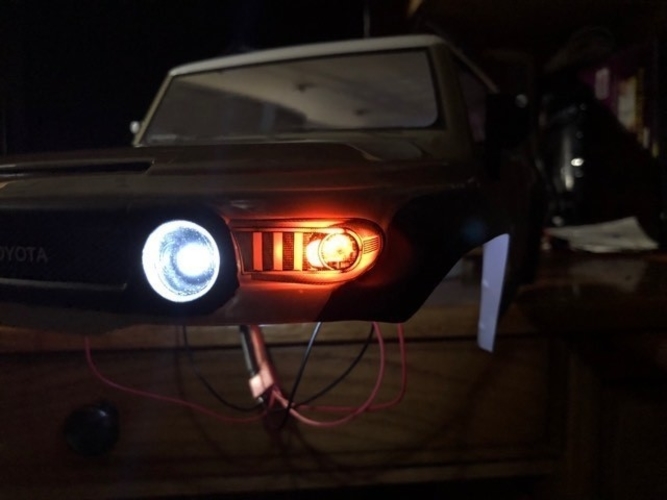
Since the RTR has stickers where the lights go, I used a pure acetone-based nail polish remover and some Q-tips to remove the paint behind the sticker, allowing the light to shine through. For the headlights, shipping damage cracked the body in the headlight area, so I removed the light section with a Dremel sanding disk and cut Lexan circles to fit before installing the buckets. The end result looks good. I secured the light buckets with hot glue and finished the job. To replicate this project, you'll need 2x 5mm white LEDs, 2x red 5mm LEDs, 4x 3mm yellow LEDs, 2x 3mm white LEDs, a light controller, and you're done! Check out the video for more details.
With this file you will be able to print HPI Venture Head and Tail Light Set with your 3D printer. Click on the button and save the file on your computer to work, edit or customize your design. You can also find more 3D designs for printers on HPI Venture Head and Tail Light Set.