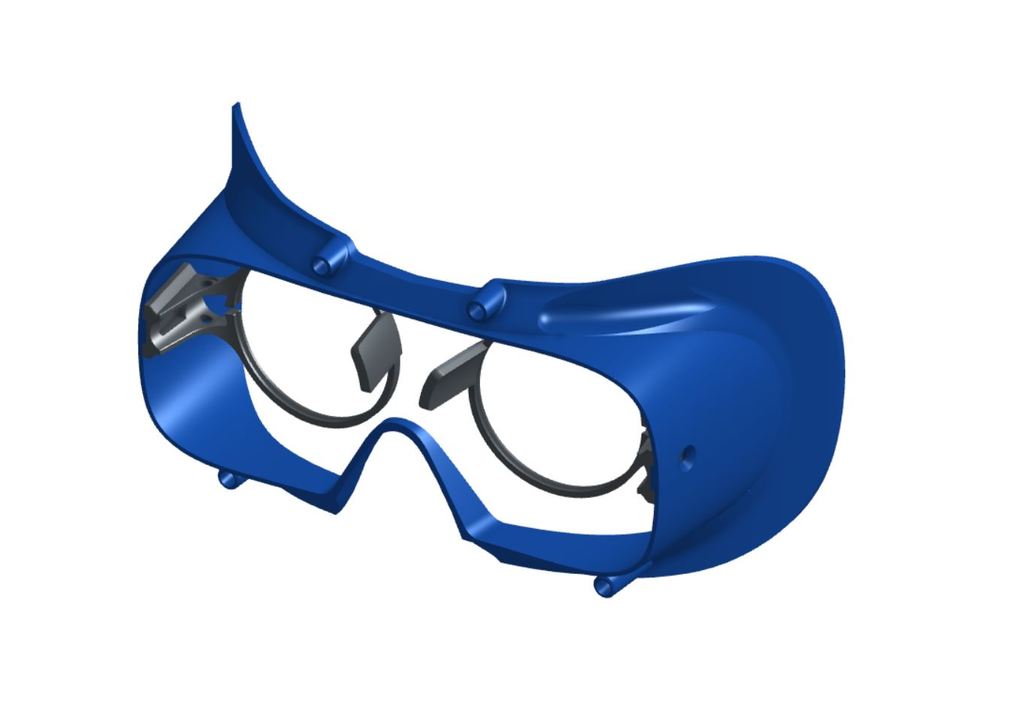
HP Reverb G2 Face Cover with/without Spectacle lenses Inserts - better FOV / SweetSpot / wider Version - supportless - even easier to print
thingiverse
Version 2 of my supportless - easy to print - HP Reverb G2 Face Cover. It's optimized for even easier printing and other improvements. Version 1: https://www.thingiverse.com/thing:4700782 There are two Versions. A Wide and a normal Version (a bit wider than the original Face Cover). Both Version are available with or without the mounting point for the lens inserts. Normal Version with lens insert mount point: V2G Normal Version without lens insert mount point: V2 Wide Version with lens insert mount point: V2GW Wide Version without lens insert mount point: V2W I designed lens inserts that attach to the cover rather than the lens of the G2. It should be easier to find the perfect sweet spot between the eye, lens and G2 lens/display. There are two supports to keep the lenses from hitting each other, lens bumpers are not required. The inserts are adjustable in height. I bought the cheapest glasses with my values and "near round" lenses for about 25€ and dismantled them. The inserts are round and have a standard V-slot for the lenses. Just measure the circumference of your lenses and choose the right STL. 147.65mm-L.stl for example if your left lens has a circumference of 147.65mm. Screw it together with a M3x14 screw/nut and the insert takes the shape of the lens. If you need a lens inserts with a different size (circumference and distance to the Face cover mounting point) please kontakt me. Before dismantling the glasses, it is best to mark the IPD and the orientation (top / inside) with a marker. What is needed: - 2x M3x6 countersunk screws (for lens inserts) - 2x M3x14 screws (for lens inserts) - 4x M3 nuts (for lens inserts) - Your glasses (for lens inserts) - 4x cylinder magnet 4∅x10mm - Velcro Strip 50-60cm (Klett, Häkchen) - 150x50x10mm of soft foam material or some thik fabric for the nosecover - depending of your nose ;-) - double sided tape or glue for the nose cover. - HTC Vive Face Pad - HP Reverb G2 ;-) After the print: - remove the two pillars (see picture with red parts). Just cut it away with a side cutter. - press the magnets into the holes. The lower Magnets will fully stick in the hole, the upper magnets should stay out for arround 2.2mm. - remove no Supports ;-) - put the Velcro strips on - glue the nosecover in place (see below how to make it) Foam nose cover: There is a template included to cut the foam parts (for my nose). Buy a bit more to try to get the best size for you. Cut the foam, and glue the round side together. The foam will shape like a nosecover - great ! Put some double sided tape or glue to the cover and place the nose cover according to your needs. I use double sided tape without foam or paper (only glue), sticks like hell ! Fabric nose cover: The second template is designed to cut a pice of fabric (~2.5mm). Just cut the fabric, tack the round edge together and flip inside out. Update 12.02.2021: - added some lower version of the Lens mount with different diameter !!! PLEASE BE VERY CAREFULL THAT THE GLASSES DO NOT TOUCH THE LENSES !!! Update 26.02.2021: - added versions with a Brim arround the breakable support pillars (requested by turboleak, see comments) Update 15.06.2021: - added a 138mm version of the Lens mount
With this file you will be able to print HP Reverb G2 Face Cover with/without Spectacle lenses Inserts - better FOV / SweetSpot / wider Version - supportless - even easier to print with your 3D printer. Click on the button and save the file on your computer to work, edit or customize your design. You can also find more 3D designs for printers on HP Reverb G2 Face Cover with/without Spectacle lenses Inserts - better FOV / SweetSpot / wider Version - supportless - even easier to print.
