Honeycomb Stratocaster Body (repositioned pieces)
prusaprinters
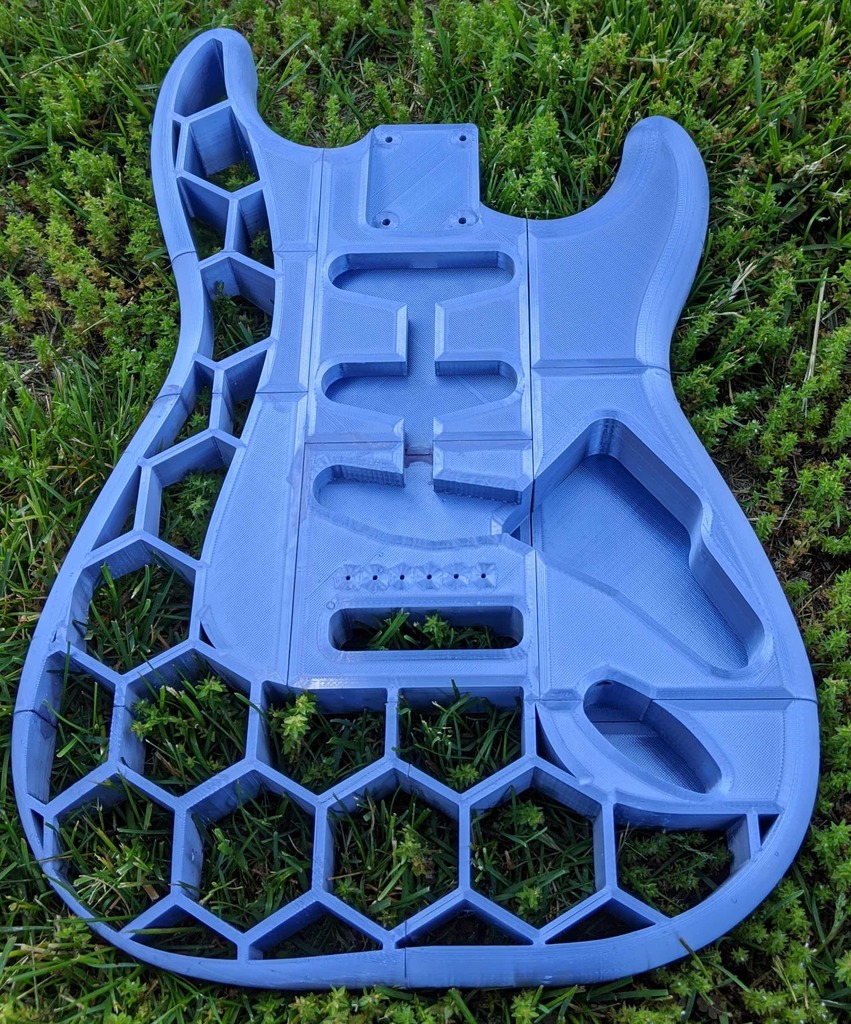
<p>This is a light remix of the Honeycomb Stratocaster Body by Conceptor. (<a href="https://www.thingiverse.com/thing:3174465">https://www.thingiverse.com/thing:3174465</a>)</p> <p>I resliced the body into 9 pieces rather than the original 6 so that there is only 1 seam under the strings where the tension is the highest, there is no longer a seam where the screws for the bridge meet, and the pieces will now fit on a smaller print bed.</p> <p>I also added pegs / holes in the joints to give the body some additional mechanical strength in addition to the glue.</p> <p>The naming convention for the files is this:</p> <p>Each main body piece has a number, 1 through 9, as well as a brief description of what each piece is.</p> <p>Each peg has a pair of numbers to indicate which pieces it connects, as well as a description if there are multiple pegs connecting the same pieces.</p> <p>Edit: 16 July 2021</p> <p>I have seen comments that 'mid-upper.stl' is corrupted. It looks fine on my end, but if you see the same, try 'mid-upper-reuploaded.stl'</p> <h3>Print Settings</h3> <p><strong>Printer Brand:</strong></p> <p>Creality</p> <p class="detail-setting printer"><strong>Printer: </strong> <div><p>Ender 5</p></div> <p><strong>Rafts:</strong></p> <p>No</p> <p class="detail-setting supports"><strong>Supports: </strong> <div><p>Yes</p></div> <p><strong>Resolution:</strong></p> <p>.2</p> <p class="detail-setting infill"><strong>Infill: </strong> <div><p>20%, 40% for pieces 8 and 9, </p></div> <p><strong>Notes:</strong></p> <p>I used gyroid infill, and at least 10 wall/top/bottom layers for extra strength.</p> <p>20% infill for most of the body, but I used 40% for pieces 8 and 9, since that is where the string tension falls.</p> <p>Print orientation for the pegs can be either on their sides or standing up, depending on what gives you better adhesion, since some of them are quite small.</p> <p>I also recommend printing the pegs at 90-95 percent scale, otherwise you will need to do quite a bit of sanding to get them to fit into the holes.</p> <h3>Post-Printing</h3> <p><strong>Step 1: Sanding</strong></p> <p>Sand the mating surfaces and pegs to ensure a good glue bond</p> <p><strong>Step 2: Glue</strong></p> <p>Glue the pieces of the body together.</p> <p>I used the following sequence when glueing.</p> <ul> <li>1-2-3 (group 1)</li> <li>8-9 (group 2)</li> <li>5-6 (group 3)</li> <li>4-7 (group 4)</li> </ul> <p>Let them dry</p> <p>Then glue the groups together</p> <ul> <li>group 1, groupe 2 and groupe 3</li> </ul> <p>Let them dry</p> <ul> <li>glue group 4 onto the bottom</li> </ul> <p><strong>Final Guitar assembly</strong></p> <p>After sourcing your guitar parts, lay them all out in the guitar and mark/drill any holes you will need for the pick guard and output jack.</p> <p>Note: Squier parts are sized differently than Fender parts, so if your source guitar is a Squier, you may need to do additional sanding / post-processing to the neck or neck pocket and pickup / control cavities to get everything to fit properly.</p> </p></p></p> Category: Music
With this file you will be able to print Honeycomb Stratocaster Body (repositioned pieces) with your 3D printer. Click on the button and save the file on your computer to work, edit or customize your design. You can also find more 3D designs for printers on Honeycomb Stratocaster Body (repositioned pieces).