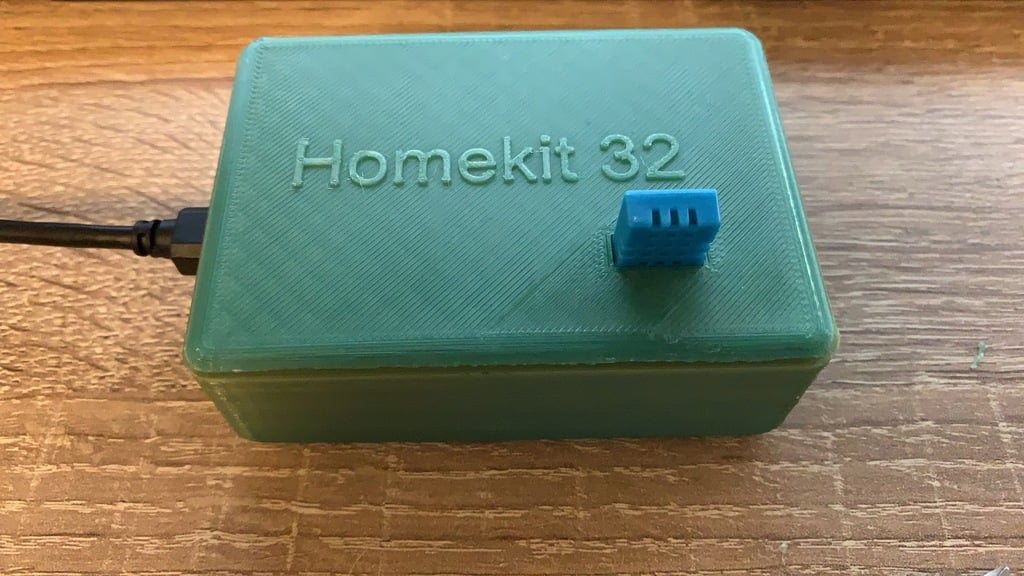
Homekit32 - ESP32 Case - DIY Smarthome Steuerung
thingiverse
Homekit32 - ESP32 Case - DIY Smarthome Control ============================================= I'd like to introduce you to my small DIY Smarthome project. In this project, I only wanted to control some of my plug sockets using Siri or through the iOS app "Home". Additionally, I wanted to automate a small electric heater depending on the room temperature. Here's the case I designed for it. Maybe it can be used in other applications as well. If anyone is interested in this project, here are more details. ### The Rough Flow of How the Components Work Together: The Homebridge, installed on a Raspberry Pi (I used an old 2 Model B), acts as a control center for the individual devices in this scenario. After setting it up, it's registered in the Home app on the iOS device. With two additional plugins, the Homebridge is then able to connect and control multiple devices provided by the ESP32. On the ESP32, an asynchronous web server runs that provides various HTTP endpoints, which are displayed as individual devices in the Homebridge. When one of these endpoints is called by the user ("Hey Siri, turn on the light"), an action is performed, such as turning on the plug socket where the light is connected. Another endpoint provides data from the DHT11 sensor in JSON format, which is recognized by the Homebridge as another device or sensor. If you have an Apple TV or an iPad (with iOS version 10 or later) at home, you can create automations like this: when the room temperature drops below 18 degrees Celsius, turn on the plug socket of the electric heater and turn it off again once a desired temperature is reached. If you don't have one of these devices at home, you can easily program this yourself and give the responsibility to the ESP32. ### The Components I Used: For controlling the sockets (the actual "Homekit device"): * AZDelivery ESP32 NodeMCU CP2102 (Amazon) * 400 Pin Breadboard (Amazon) * DHT11 temperature and humidity sensor (ebay) * 433M Hhz transmitter and receiver (Amazon) * And my custom case For the Homebridge (control center for all Homekit-enabled devices): * Raspberry Pi 2 Model B (I had one lying around) * Case: https://www.thingiverse.com/thing:922740 ### The Software I Used: The software for the "Homekit device", i.e., for the ESP32, to control the sockets and read data from the DHT11 sensor was written by me, using the following libraries: * RCSwitch for sending and receiving 433mhz signals * DHT for the DHT11 sensor * ESPAsyncWebServer to provide URL endpoints for the Homebridge For the Homebridge running on the Raspberry Pi: * Operating System: Raspbian Buster Lite without GUI * Homebridge * Homebridge Plugin: Homebridge Config UI X for the GUI * Homebridge Plugin: Homebridge Advanced Http Temperature Humidity for sensor data * Homebridge Plugin: Homebridge Http Accessory to register HTTP endpoints as a Homekit device For setting up the Homebridge, I recommend following this guide: https://smartapfel.de/homebridge/homebridge-installieren/ ### Links to the Components: ESP32: https://www.amazon.de/gp/product/B071P98VTG/ref=ppx_yo_dt_b_asin_title_o00_s00?ie=UTF8&psc=1 Bread Board :https://www.amazon.de/gp/product/B073X7GZ1P/ref=ppx_yo_dt_b_search_asin_title?ie=UTF8&psc=1 433Mhz transmitter and receiver: https://www.amazon.de/gp/product/B00R2U8OEU/ref=ppx_yo_dt_b_search_asin_title?ie=UTF8&psc=1 DHT11: https://www.amazon.de/digitaler-Feuchtigkeit-Temperatur-Arduino-Raspberry/dp/B01N1EYTUN/ref=sr_1_13?__mk_de_DE=%C3%85M%C3%85%C5%BD%C3%95%C3%91&dchild=1&keywords=DHT11&qid=1587563601&s=ce-de&sr=1-13 It would make me happy if I could inspire someone with this small project. Please feel free to leave a comment for feedback.
With this file you will be able to print Homekit32 - ESP32 Case - DIY Smarthome Steuerung with your 3D printer. Click on the button and save the file on your computer to work, edit or customize your design. You can also find more 3D designs for printers on Homekit32 - ESP32 Case - DIY Smarthome Steuerung.
