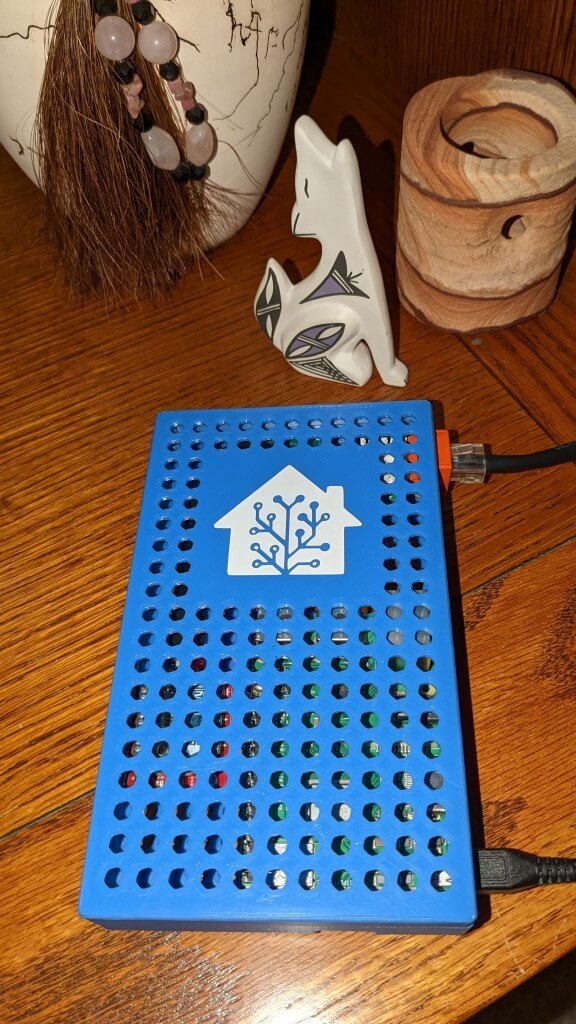
Home Assistant Case
prusaprinters
<p>An enclosure for my Raspberry Pi 3 Model B based Home Assistant.</p> <p>This is a two-piece case with no fasteners. The top half friction fits to the bottom half. Plenty of holes in both halves provide good ventilation. My wife cut the vinyl sticker for me on her Cricut machine.</p> <p>The only exposed R-Pi ports are the SD card and USB power. I used an RJ45 keystone jack to route the Ethernet connector to the same side as the USB port. This allows me to unplug the Ethernet without opening the enclosure, plus both cables hang off the shelf from the same side of the box. Probably not necessary, but I had it laying around.</p> <p>The XBee module is a Digi Zigbee radio mounted on a SparkFun XBee Explorer. The USB stick is a Zooz Z-Wave radio (removed from the plastic cover).</p> <p><a href="https://hub.digi.com/support/products/digi-xbee/digi-xbee-s2c/">https://hub.digi.com/support/products/digi-xbee/digi-xbee-s2c/</a> <a href="https://www.sparkfun.com/products/11812">https://www.sparkfun.com/products/11812</a> <a href="https://www.thesmartesthouse.com/collections/zooz/products/zooz-usb-700-series-z-wave-plus-s2-stick-zst10-700">https://www.thesmartesthouse.com/collections/zooz/products/zooz-usb-700-series-z-wave-plus-s2-stick-zst10-700</a></p> <p>The photos show my prototype print. I've moved the XBee mounting holes to account for the shorter USB cable. And I've routed the Ethernet wires away from the Z-Wave antenna. If you don't mind opening the case, you could easily plug the cable directly into the R-Pi and feed it out the side opening.</p> Category: Electronics
With this file you will be able to print Home Assistant Case with your 3D printer. Click on the button and save the file on your computer to work, edit or customize your design. You can also find more 3D designs for printers on Home Assistant Case.
