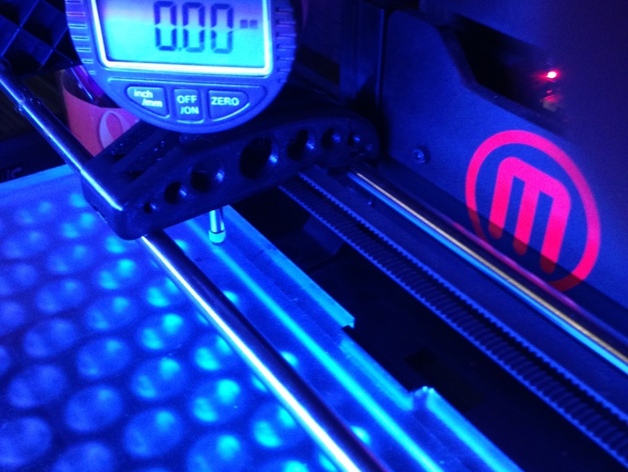
Holy Dial Indicator Jig FlashForge Creator Pro,X and Makerbot Rep2
thingiverse
If you have more than one cartesian 3d printer, this is a simple solution to hold your dial indicator. This jig uses magnets to securely hold the Harbor Freight Dial Indicator. It keeps the indicator far enough above the table so that the spring in the indicator does not interfere with your reading. The magnets are genuine -10 Piece Neodymium Super Magnets by MASTER MAGNETICS, Model # 07045, Item # 587715. To get a press fit, slide two magnets in while the part is still hot, and insert the third after it cools down by opening the hole slightly with a flat screwdriver. Use a quarter or wrench to achieve a tight fit. The rear hole is fragile, so it is slightly larger. Wedge the magnet in with support material or a drop of glue. Make sure to clean up any burrs inside the area that comes into contact with the rails. I had trouble getting Simplify3D to recognize the holes, but a huge hires .stl file eventually worked. A low-res version is included, which may work depending on your slicer. This jig should slide freely while being held downward by the magnets. The box for the dial indicator can be modified so that this fits too. If you're looking for a similar model without support during printing, try this: http://www.thingiverse.com/thing:1377989. Thanks, fdk. Print Settings: Printer: FlashForge Creator Pro Rafts: No Supports: Yes Resolution: .20 Infill: 20% Notes: 3 top layers, 3 bottom layers, 2 outline perimeter shells printed on a 95-degree bed at 235 extrusion temperature with ABS.
With this file you will be able to print Holy Dial Indicator Jig FlashForge Creator Pro,X and Makerbot Rep2 with your 3D printer. Click on the button and save the file on your computer to work, edit or customize your design. You can also find more 3D designs for printers on Holy Dial Indicator Jig FlashForge Creator Pro,X and Makerbot Rep2.
