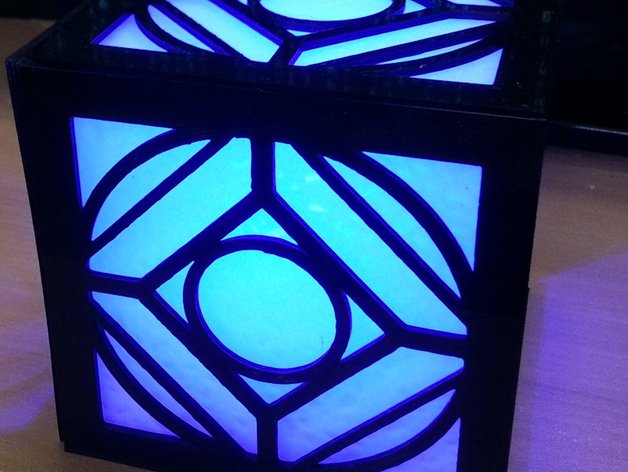
Holocron Lighted
thingiverse
First off, big thanks to Hambone211 for inspiring me with his face design; I built upon that but went my own way. This is my very first creation, taking several weeks to finish, tweaking dimensions, redesigning the concept, and fine-tuning it until it fit just right. I designed this beauty using Autodesk 123Design. Key components you'll need to pick up are pictured below: Radio Shack's on/off switch, which will cost you around $3-$4; LED bulbs in a kit from AutoZone for 12-volt applications – a steal at $15; or if you prefer, you can buy them separately on eBay, and I scored two for $3 with shipping because I was impatient and happened to spot this kit at the store. I made use of the supplied battery pack within the packaging that lets you test the light while sealed. Inside this pack lies a single 10 AG13LR44 battery – extremely affordable when purchased in bulk on eBay. In addition, I've included a base design for using a standard 9-volt battery. While it works just fine and might last longer, it isn't as bright due to its lower voltage. You'll also find an LED mount included if you choose to buy the bulbs on their own from eBay – this mount takes the bulb directly, allowing you to solder the wires right onto the bulb itself. The faces feature guides that ensure a proper fit (I upgraded Hambone's flat edges design) and are specifically set up to accommodate 2mm plexiglass or acrylic. I scored some leftover scraps at our local plastics shop, Tap Plastics – just pick your favorite color or style! All you'll need is a bit of soldering for the wires, and that's it. The whole project prints beautifully as shown in the picture. To print this correctly, note the following settings: print one instance of "Top," two instances each of "Side 1" and "Side 2." Be sure to bevel the faces so they accommodate your chosen 2mm plexiglass or acrylic perfectly. If you're in a pinch, visit Tap Plastics for some quick scraps! One final step: solder those wires! This entire project was designed and printed within 12 hours – what an achievement! The amount of filament used calculated out to approximately 44,300 millimeters (or 43,500 milliliters if you'd like!) using "3D Printer Calculator." Calculating at $27 per kilogram roll, the estimated total filament cost would come in under $4 – not too shabby! UPDATE: Please be aware that my build plate is 200x200. Originally designed for single prints, it now can handle multiple thanks to some adjustments I made (narrowing it down to 90mm). Also note the new "smaller" file settings tailored for a 9-volt battery and individual bulbs – no kit needed this time! This makes building it quicker, easier, and a lot cheaper.
With this file you will be able to print Holocron Lighted with your 3D printer. Click on the button and save the file on your computer to work, edit or customize your design. You can also find more 3D designs for printers on Holocron Lighted.
