Hobart Welding Helmet Suspension Ring Attachment Parts
thingiverse
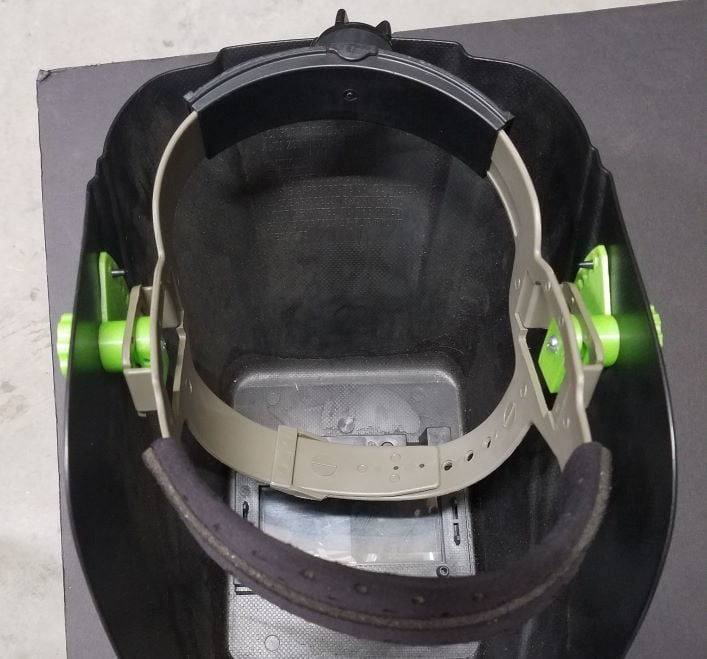
This is a total overhaul of the three suspension ring mounting components for a budget-friendly Hobart welding helmet. I wanted to fix an old helmet that had lost the screw-pin piece and stripped the knobs. I tried NuRxG's parts (https://www.thingiverse.com/thing:2839844), but the main part I needed was the screw-pin, and his printed one didn't turn out very well, so I decided to spend a lot of time making my own parametric version. A minimum of one 1-1/4" long screw (or 30-35mm) is required for assembly of each side, along with either a matching nut or another short screw (~1/4" or 6mm long). The main screw should be a US #6-#10 or M3-M5 (#6 is what I'm using and what customizer defaults are set for), while the set screw (if used) should be a #6 or M3. There are three ways you can use these, depending on the hardware supplied: 1. Screw and nut: Friction with the plastic keeps the screw in place, but a nut is required to reduce friction on the knob. Be aware that the screw may start spinning over time. 2. Screw and set-screw: File or grind a small flat next to the head of the screw (see picture) and hold it in place with a set-screw. The knob does not need a nut, but will need to be tapped before use (using the screw or an actual tap and drill), and would probably benefit from a drop of grease. 3. Screw, set-screw, and nut: This combination will likely hold up the best over time. If you get the hole sizes too small, you can easily drill them out, just make sure to leave enough plastic for the screws to retain a firm grip where required.
With this file you will be able to print Hobart Welding Helmet Suspension Ring Attachment Parts with your 3D printer. Click on the button and save the file on your computer to work, edit or customize your design. You can also find more 3D designs for printers on Hobart Welding Helmet Suspension Ring Attachment Parts.