Hinges for the Old Dresser
thingiverse
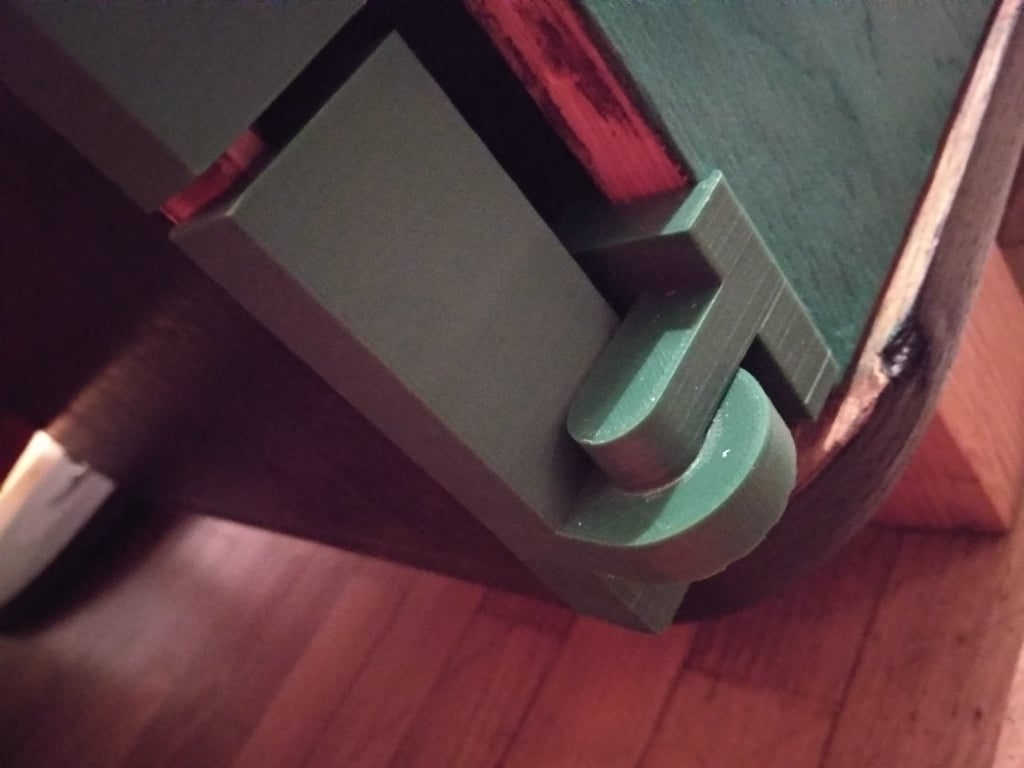
Here are the Hinges for the Old Dresser, a DIY project that's sure to bring a touch of nostalgia to any room. To create these unique hinges, start by opening up Tinkercad and navigating to the "New Project" page. From there, click on the link provided to access the design files. Once you have the files open, select the "Edit" button in the top-right corner of the screen and begin making adjustments as needed. For this project, we'll be using a combination of 3D printing and woodworking to bring the hinges to life. First, print out the hinge mechanism using your preferred 3D printing method. Make sure to calibrate your printer correctly before starting, as misaligned prints can lead to poor results. Next, take the printed hinge and attach it to the dresser using a strong adhesive. You may need to use a combination of screws and glue to secure it properly. Finally, add some decorative touches by staining or painting the dresser in a style that complements your home decor. With these hinges, you'll be able to add a touch of vintage charm to any room in your house. Here's a video demonstrating the process: https://photos.app.goo.gl/uAsgpuqNUigTyjBJ6
With this file you will be able to print Hinges for the Old Dresser with your 3D printer. Click on the button and save the file on your computer to work, edit or customize your design. You can also find more 3D designs for printers on Hinges for the Old Dresser.