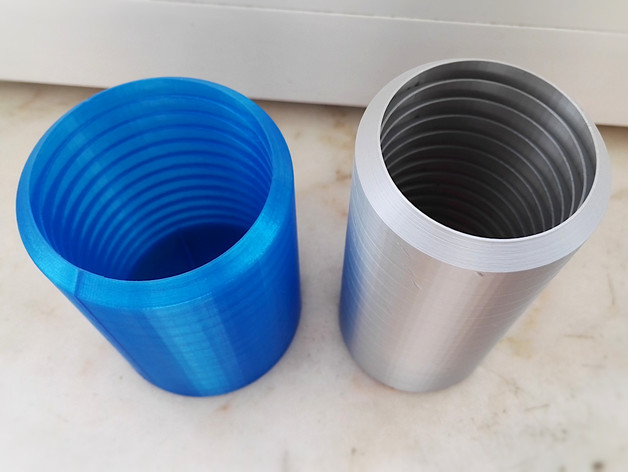
High-Tech Soda Can Cooler
thingiverse
Note: This design has become fully customizable, allowing users to create their own custom koozies for any cylindrical can or bottle by visiting the designated website. Alright, I admit it's just a piece of plastic, so "high-tech" might be a bit of an exaggeration. Still, this isn't your average soda can cooler; instead, it relies on the can itself to seal the air inside and minimize contact with the plastic, relying heavily on air for insulation. Moreover, the walls are divided into horizontal compartments to reduce convection. Whether all these features really make a difference in keeping drinks cool compared to simpler designs is uncertain, but they certainly look cool when printed in a semi-transparent material and are very light. To test this, I placed a can inside the cooler next to a bare can, both starting at 3°C in a room at 23°C. After one hour, the can in the cooler was at 10.4°C, while the other was at 14.6°C. This was with the cooler starting out at room temperature. If you would refrigerate the koozie before using it, it would keep your drink cool for a slightly longer time. There are three variations provided - one for standard 330ml cans, one for 355ml (12 US fl oz), and one for tall 250ml energy drink cans. The model assumes standard can diameters of 66.3mm and 53.3mm. If your favorite brand has a slightly different diameter, scale accordingly to provide a tight fit. A full can should slowly slide into the cooler by itself (or with a slight push), but an empty can should not come out by itself when held upside down. For each model, there is an "xBtm" variant that has a thicker bottom; you may want to use this if you're going to print it in a more flexible filament like PETG or something truly flexible like TPU. Print Settings: Printer Brand: FlashForge Printer: Creator Pro Rafts: No Supports: No Resolution: 0.2mm Infill: Any Filament: FlashForge, 3D Eksperten PLA Blue, silver Notes: Because there are basically no solid volumes in this model that contribute to strength, infill doesn't really matter. Use 100% if you want some extra strength in the bottom; use 0% to save a tiny bit of weight and filament. Some slicers may omit too much material at 0% and cause the model to have gaps; use 1% in that case. To ensure the bottom is printed completely solid, configure your slicer with a sufficient number of top and bottom layers. The wall thickness should provide 2 perimeters when printed with 0.4mm contour width. If your slicer only generates one contour or dithers between one and two contours, find the setting for extrusion width and set it to a value close to 0.4mm. If you're using Slic3r/PrusaSlicer, I recommend turning off "detect thin walls." Depending on the filament, the object might shrink enough when it cools down after printing such that the can won't fit. If this is the case, scale up the model before printing; a typical scale factor needed for ABS is 100.8%. When unsure, you can do a short test print of only the bottom part to see if scaling is required, before committing to a whole print that will take several hours and require quite a bit of filament. Updates: 2018/07/01 - Added a slight chamfer to the models to make the bottom edges less sharp, and provided "xBtm" models with a thicker bottom. 2019/07/13 - Added model for 250ml energy drink cans. 2019/10/20 - There is now a customizable remix of this Thing, making it much easier to generate this kind of koozie for any (cylindrical) shape of can or bottle.
With this file you will be able to print High-Tech Soda Can Cooler with your 3D printer. Click on the button and save the file on your computer to work, edit or customize your design. You can also find more 3D designs for printers on High-Tech Soda Can Cooler.
