High-Capacity Hard Drive Adapter for Mac Pro 5,1 Bays
prusaprinters
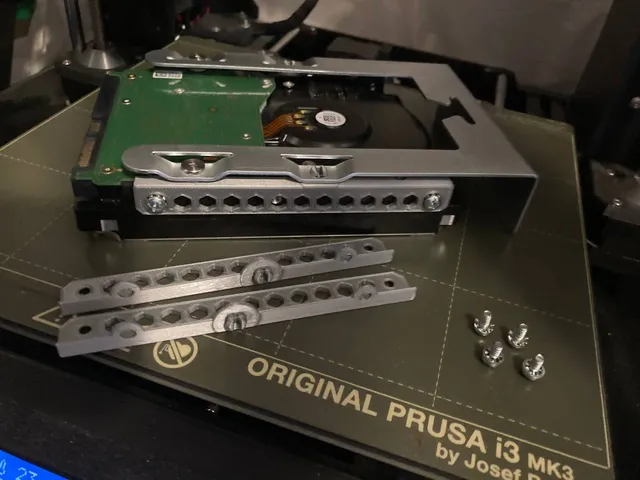
New 3.5" conventional platter hard drives with a capacity of 6TB or greater have different screw placements than old ones with less capacity. The sled trays that go in the bays of an Apple Mac Pro tower computer will not fit these drives, so I made this adapter. Compatible with Mac Pro 4,1 and Mac Pro 5,1.My version is not quite as sturdy as the aftermarket adapter from Other World Computing, but international shipping and exchange rates make those impractically expensive for many folks outside the US. If you want really solid ones, I recommend these. OWC Hard Drive Tray For Mac Pro (2009-2012): https://eshop.macsales.com/item/OWC/MPRODBKTLG6/I have all four of my original sleds, so I only needed an adapter. If you want to print the full sled in plastic, try a model like this: https://www.printables.com/model/465600-mac-pro-41-and-51-universal-35-hdd-sled Supplies Needed: • Two hard drive mounting screws (#6-32 UNC).• #2 Phillips screwdriver. Printing Notes:• Any rigid plastic (such as PLA).• Supports on build plate only.• Brim not needed. • Infill ≥ 15%. Assembly: • Power down computer and remove tray sled. • Leave front (nearest SATA connector) two screws in sled, but pull the ones in the middle of the sled arms out. Push the now-empty rubber washers out gently with a Phillips screwdriver.• Place adapters on sides of hard drive. Install screws in back and front of adapter. (If you reverse them, the screws will go in, but the sled won't fit in place.) • Optional: Install screws on the sides of mount. If you have full-size hard drives in adjacent bays, standard dome-headed computer screws may stop the tray from going in. Flat-headed screws do not have this problem. • Place the sled on top of the adapters. Press down gently, using a side-to-side rocking motion until the tabs push into the empty screw slots.• Tighten front screws. • Install tray sleds. • Carefully put sled back in computer to make sure everything is assembled properly. Usage Notes:• If you intend to move your Mac Pro regularly, I recommend securing the back of the hard drive to the tray with a zip tie. • If the tabs are too loose (either worn from use or because they printed slightly too small), assemble the mount and insert a flat-head screwdriver into the slot in the tab and twist gently to spread the tab. If this is not enough, repeat the process while warming it a little with a heat gun or hair dryer. • Remember that newly-manufactured ≥6TB SATA/SAS hard drives in the Mac Pro 5,1 may not mount during restart, only shutdown. This problem is not due to poor connection. It seems to be cased by the new “power disable” feature. You can manually force them to appear with the mount button in Disk Utility. Placing the new drives in bay #1 or in an unused optical bay may fix this problem permanently. For more information on this issue, see this thread: https://forums.macrumors.com/threads/macpro-5-1-high-capacity-hard-drives.1971809/ Today I Learned:Desktop computers mostly use the same three screw types. 1) #6-32 UNC screws for 3.5" hard drives and expansion slot covers. 2) M3 screws for 3.5" optical drives and 2.5" hard drives. 3) #4-40 UNC thumb screws for external ports, like VGA and SCSI.https://en.wikipedia.org/wiki/Computer_case_screws
With this file you will be able to print High-Capacity Hard Drive Adapter for Mac Pro 5,1 Bays with your 3D printer. Click on the button and save the file on your computer to work, edit or customize your design. You can also find more 3D designs for printers on High-Capacity Hard Drive Adapter for Mac Pro 5,1 Bays.