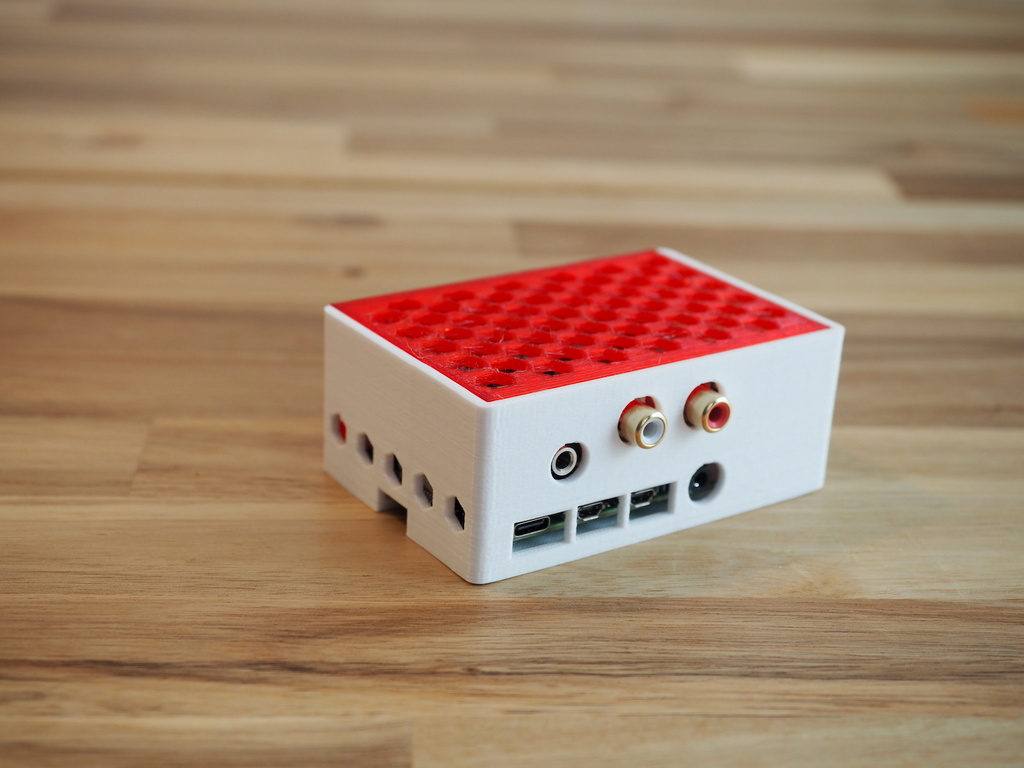
HifiBerry DAC+ ADC (Pro) case for RPi 4
prusaprinters
<p>Case for a Raspberry Pi 4 with a HifiBerry DAC+ ADC or HifiBerry DAC+ ADC Pro hat. Designed in OpenSCAD.</p> <p>With the provided OpenSCAD files, it is easy to modify for other HifiBerry models. Comes in three variants:</p> <ul> <li>one with a print-in-place hinge</li> <li>one with a sliding cover.</li> <li><p>one with a sliding top cover and two XLR/Jack combo plugs</p> <h3>Sliding cover</h3> <p>The sliding cover variant is easy to print in any material, without supports, at 0.2mm layer height or smaller. Be sure to enable 'Detect bridging perimeters' in your slicer. For the sliding cover, 'detect thin walls' makes the thin plates that screw to the raspberry pi just a little bit stronger. The sliding cover screws shut with just the nylon spacers, nuts and screws that come with the HifiBerry. See the instructions below.</p> <h3>Hinged</h3> <p>The hinged version is a single print in place print that allows for easy access to your hifiberry, and allows for extra cooling capacity by just opening the case. Enable detect bridging perimeters, and use paint on supports to add support for the SD-card slot only. Note that the hinged version in the pictures is a slightly earlier model then the one included here. The model included here is an improvement, with a better fit. It has not been test-printed yet, so if you encounter problems, be sure to send a message.</p> <h3>XLR/Jack combo connectors</h3> <p>If you want to make the XLR-version, you need the following components:</p> </li> <li><p>two Neutrik combo xlr/jack connectors, either the NCJ6FI-S or the NCJ6FI-S-O.</p> </li> <li>four Neutrik plastic A-screw-1-8 s, or other similar 2.9mm parker screws, about 8-10mm length.</li> <li>jumper wires/dupont cable</li> <li><p>a soldering iron and tin. Future improvements could be:</p> </li> <li><p>the hinge version properly tested</p> </li> <li>variants for more types of HifiBerries</li> <li>the front of the XLR one is moved closer, and the top has been improved. A better regular version should arrive soon.</li> <li>make the XLR version screw together with more Neutrik A-screws, since you're likely to order more than four anyway.<h3>Print Settings</h3> </li> </ul> <p><strong>Printer Brand:</strong></p> <p>Prusa</p> <p><strong>Printer:</strong></p> <p>Prusa Mk2</p> <p><strong>Rafts:</strong></p> <p>Doesn't Matter</p> <p><strong>Supports:</strong></p> <p>No</p> <p><strong>Resolution:</strong></p> <p>0.2mm</p> <h3> Post-Printing</h3> <p>The images below are for the simple sliding top version. rnThe hinge version is very straightforward to install.rnrnFor the XLR version, the steps are the same as for the images below, except that you need to solder the wires to the XLR connectors and install the XLR plugs. Sliding on the cover can be a bit more tricky because you cannot see what you are doing, but should be possible.</p> <p><strong>First, put the spacers on the hifiberry, and tigthen with the nuts on top. Then attach the HifiBerry to the Raspberry Pi 4. Do not use the screws yet!</strong></p> <p><strong>Put the Raspberry Pi + HifiBerry in the case. You'll have to tilt the board a bit as you insert it for the slide cover version, and perhaps slightly flex the sides of the case.</strong></p> <p><strong>Insert and tighten the two screws closest to the audio connectors. Do not tighten the other two screws yet.</strong></p> <p><strong>Slide the cover on. Those two tabs should easily slide right between the screw holes and the raspberry pi.</strong></p> <p><strong>Insert and tighten the last two remaining screws</strong></p> <p><strong>Insert the microSD-card.</strong></p> <p><strong>Done!</strong></p> Category: Computer
With this file you will be able to print HifiBerry DAC+ ADC (Pro) case for RPi 4 with your 3D printer. Click on the button and save the file on your computer to work, edit or customize your design. You can also find more 3D designs for printers on HifiBerry DAC+ ADC (Pro) case for RPi 4.
