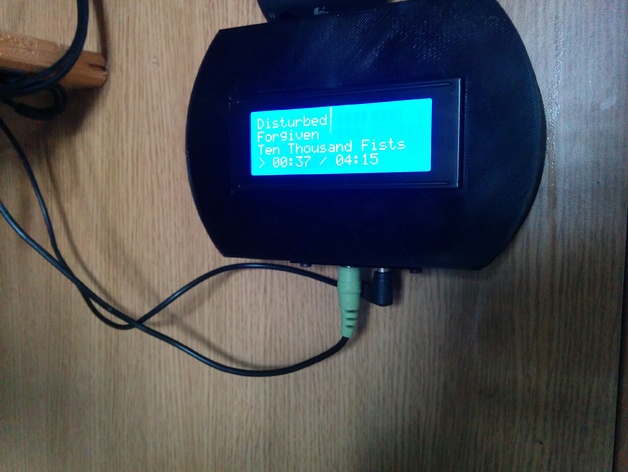
HiFi-Pi
thingiverse
The ultimate solution for your Headless Raspberry Pi with Display/Volumio-Pi/MPD-driven mediaplayer quest! Behold, the HiFi-Pi! **What is the HiFi-Pi Case?** A smartly designed case that snaps together seamlessly, perfect for wall-mounting. With all essential I/O ports neatly arranged at the bottom and just the necessary connectors on the outside - power and audio, you'll love how sleek it looks. **Required Tools and Materials:** 1. A Raspberry Pi (Model B is recommended; B+ might also work, but untested) 2. A USB DAC (This one from Amazon works great, I used the following model: [http://www.amazon.com/gp/product/B00BBCXVG6/ref=oh_details_o00_s00_i00?ie=UTF8&psc=1](http://www.amazon.com/gp/product/B00BBCXVG6/ref=oh_details_o00_s00_i00?ie=UTF8&psc=1)) 3. A display (STLs are compatible with the hd44780-20x4; but you can use a 20x2 or 16x2 by modifying the corresponding part in the scad file) 4. A small USB Wi-Fi adapter (cheap Edimax ones work fine) 5. A DC-hollow-jack (2.1mm, for powering your Pi) 6. An audio distribution for your Pi, such as Volumio (or self-configured, whatever suits you best) 7. M3x6 screws and washers, nuts 8. Old short USB cables or their parts for routing **The Power of Flexibility:** Modify the case to suit your needs through the scad file; it's not fully parametric, but I included it for smaller adjustments like changing the display size. **Innovative Features:** * I created a little tray as an extra part to avoid hours of reprinting if your soundcard or power jack doesn't fit. It's easily redesigned to accommodate different hardware. * Remix and let me know if you successfully build one of these cases, and I'll add the top-part with buttons soon. **Step-by-Step Instructions:** Be cautious when snapping together the two parts; breakage can occur depending on your layer-lamination quality. 1. Attach the Power jack securely for optimal connection. 2. Zip-tie (or better yet, hot-glue) the soundcard to the tray. 3. Add a ~150ohm resistor (dependent on display requirements) between P15 and VCC for adequate contrast (for hd44780 displays). **Cable Routing Simplifications:** * Remove unnecessary cables for better fitment within the closed case. * Solder the power-in-usb-jack directly to a DC-jack; also, re-route the USB-DAC using an USB cable. **Print with Precision:** * Print in black PLA with moderate speed (~50mm/s) and 20% infill. * Use a 0.35mm nozzle and 0.25mm layers for best results.
With this file you will be able to print HiFi-Pi with your 3D printer. Click on the button and save the file on your computer to work, edit or customize your design. You can also find more 3D designs for printers on HiFi-Pi.
