HICTOP Prusa I3 Power Switch Enclosure
thingiverse
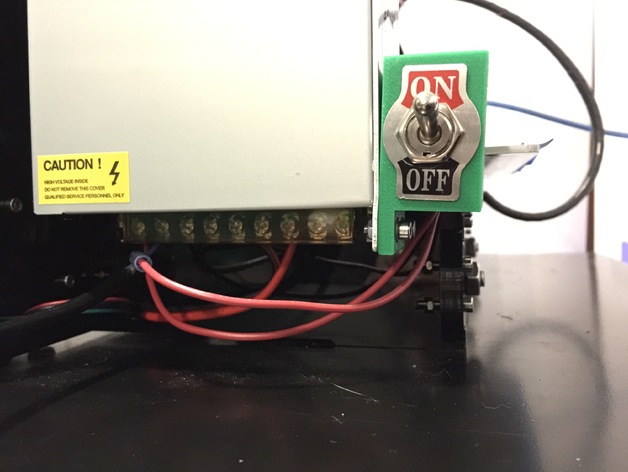
I designed a power switch housing for my HICTOP Prusa I3 3D printer, mounting it to the side of the power supply via two pre-existing holes and securing it with the printer's frame at the rear. It prints in two parts: the main housing that holds the switch and the cover, which is slightly oversized to ensure a snug fit. Materials: A 20A 125V Power Switch - available on Amazon (http://www.amazon.com/gp/product/B0002ZPBRA?psc=1&redirect=true&ref_=oh_aui_detailpage_o02_s00) Approximately 12 inches of 16awg wire Two 16awg #6 Ring Terminals One 16awg Butt Connector Two M3x10 Socket Head Cap Screws (leftover from the printer kit) Two M3 Nuts (leftover from the printer kit) Two M3 Washers Edit 12/17/2016: A detailed wiring diagram was added using MS Paint. Print Settings: Printer: HICTOP Prusa I3 Rafts: No supports Resolution: 0.2 layer height Infill: 50% Notes: The housing should be oriented with the switch mounting hole facing downwards on the bed.
With this file you will be able to print HICTOP Prusa I3 Power Switch Enclosure with your 3D printer. Click on the button and save the file on your computer to work, edit or customize your design. You can also find more 3D designs for printers on HICTOP Prusa I3 Power Switch Enclosure.