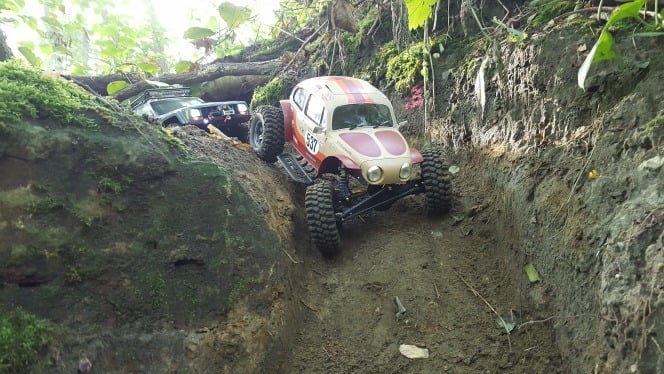
HG P402 Sand Scorcher build
thingiverse
Here's several parts to enable you to fit a (heavily dremeled) Tamiya Sand Scorcher body onto your HG P402 chassis. It was a big challenge for me to make everything fit neatly and function properly, but it looks very promising! Still a work in progress, so I can't wait to drive it properly! If you use all the files here, you can convert your stock HG P402 chassis into a shorter, sturdier chassis featuring a rear 4-link setup, 3-link + panhard front suspension and a larger steering angle. Note that I moved all four shock hoops inwards. Mount the front end of the shock hoop into the rear hole (if that makes sense). Slightly bend the hoop down and drill a new hole in your chassis beam to mount the other end. I also cut off the front of the chassis beams where the servo mount ends. I will probably also cut up the rear end of the chassis beams, but more on that later. The parts to print: * Servo Mount * C-hubs with 8 degrees of caster and a panhard mount. Mirror one of these accordingly. * Upper link mounts - let's get rid of those nasty Y-spaghettis * Battery mount * Body mounts Everything bolts up with M3 (mostly M3x14) hardware. I also used M3x8 to connect the c-hubs to the axles, M3x16 and M3x20. Because of my earlier experiences with PLA, I decided to design the holes to be very easily drilled out to 2.5/2.6mm. You can then either tap a thread or just "force" your bolt in there (use quality hardware if you decide to do this). I made all the suspension linkage using M4 threaded rod and Traxxas 5347 rod connectors. Adjust the length to the tire size and body you're using. I finished the lower links and steering links off with some 4x6mm aluminum pipe. For the upper links and panhard link, I cut up some 4mm shrink tube (no shrinking required) and forced it around the threads. I had to use a 1.25" or 32mm servo horn to get the right linkage angle and steering throw. To make the panhard bar fit, you'll have to bend and twist the link or it will either hit the axle or your chassis beam/servo mount. It takes a bit of fiddling, but it'll work in the end! For this build I managed to get my hands on some Axial Icon 90mm oil shocks and fitted some softer lower springs I had randomly laying around. This build took me a lot of figuring out and I may not have covered everything, so feel free to ask any questions!
With this file you will be able to print HG P402 Sand Scorcher build with your 3D printer. Click on the button and save the file on your computer to work, edit or customize your design. You can also find more 3D designs for printers on HG P402 Sand Scorcher build.
