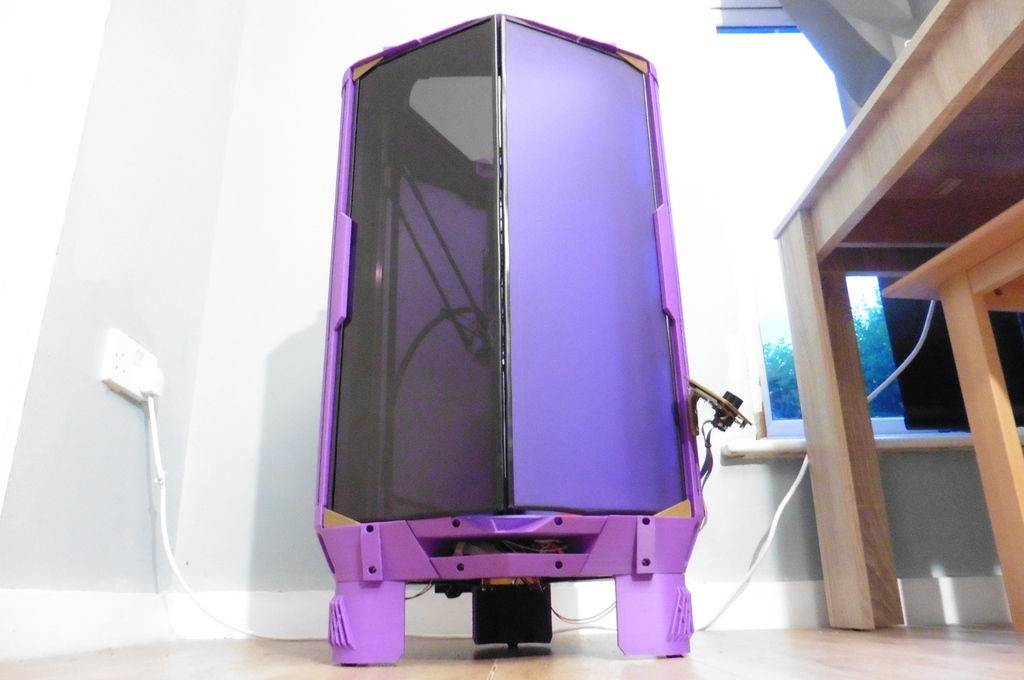
HexaDecimal r9 | Anycubic Linear Plus Acrylic Enclosure
thingiverse
What Are You Doing? I am currently designing an enclosure, utilizing 210*597mm acrylic panes. Theoretically, you could employ 4 A4 panes or every long panel except for the front two (the doors). There is a 2020 style extrusion profile on the beams so that you can mount things using t nuts. You don't have to tighten them much to get them to bolt on. Please comment any feedback. r[X] represents the revision number of the thing. Here's The Timeline [¬ = Updated, + = Added, - = Removed, ! = Currently being designed] 8th May 2020 - [¬] Renamed HexaDecimal - [¬] Added r9 (revision 9) to the title - [¬] Changed filtration device - [ ! ] Realigning corner brackets 10th Feb 2020 - [¬] Officially named HexaDecibel 15th Oct - [+] Added LED ring to BOM list - [¬] Hinge 25th Sep - [+] Fusion 360 Source File - v58 has a few issues but should be fine for most uses. 21st Sep - [+] Bottom Cover - [¬] Hinge - [¬] RGB Screen Holder - [¬] Bottom Corner Front - [¬] Top Corner Front - [¬] Top Corner Back 10th September - [¬] Print list to correlate with names of the files. 22 August - [¬] Feet - Added extrusion profile 16 July - [+] Door clip 22 June - [+] Images of Stage 1/3 complete - With 2 being the spool holder and 3 being the lighting and filtration systems - [¬] Bottom Corner Back - [¬] RGB LCD holder 21 June - [¬] Feet - [¬] Top Front Corner - [-] Bottom Corner Base - [¬] Top Front Tile - [¬] Hinges 20 June 19 - [¬] All existing files (had to be redesigned twice) - [+] Remaining files needed for the main enclosure part of the project - [Not fully printed and tested] 12 May 19 - [+] Created Thing - [¬] Top Corner Front - [+] Font Beam Middle Print List Main Prints: - 2 Back Beam and 1 Back Beam Middle - 4 Front Beam (mirror 2 for other side) and 2 Front Beam Middle - 1 Bottom Corner Front, 1 mirrored Bottom Corner Front and 1 Bottom Corner Back (same for top) - 1 Filament Guide (to insert short PTFE) - 3 Bottom Tiles - 2 Top Tiles and 1 Front Top Tile - 2 Bottom Tile Top and 1 Front Bottom Tile - 1 Fysetc RGB LCD Screen (I'm using a BIQU SKR so I can use a graphical display) Parts List Main Enclosure - Quite a lot (100pcs should be ok) of 8mm M4 bolts and t-nuts: https://ebay.us/cgqGtb and https://ebay.us/MUGbMK - 6 21x59.7cm 3mm panes: https://plasticonline.co.uk/cut-to-size-plastic/acrylic-sheet/acrylic-sheets.html - You should also be able to use 8 A4 3mm panes for the back panels - 33ft/10m Car U Shape Seal: https://ebay.us/f0RQQN - 20mm square rubber adhesive feet Light, Filter and Filament Holder: - 1 20cm diameter 3mm thick acrylic disk. Opal or frosted. - 2 6" / 6.3" 5V LED rings - Filtr8 CF1 / Carzone: https://www.aliexpress.com/item/32910386694.html Printer Configuration - Control Board upside down so that the PSU can be mounted on the back. Print https://www.thingiverse.com/thing:2941653 for cooling. - Alternatively, you could extend the wires from the PSU, or mount it on one of the the front towers. - FYSETC RGB LCD Screen (I'm using a BIQU SKR so I can use a graphical display)
With this file you will be able to print HexaDecimal r9 | Anycubic Linear Plus Acrylic Enclosure with your 3D printer. Click on the button and save the file on your computer to work, edit or customize your design. You can also find more 3D designs for printers on HexaDecimal r9 | Anycubic Linear Plus Acrylic Enclosure.
