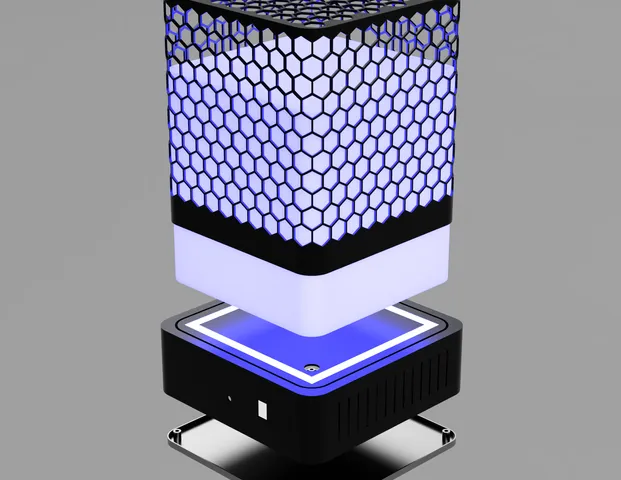
Hexa Glow: The Easy-Print 3D Printed LED Lamp
prusaprinters
Create a captivating centerpiece with this modern 3D printed lamp! Measuring 200 millimeters wide, 200 millimeters deep, and 280 millimeters tall, this lamp features a striking hexagonal frame pattern.Easy to print and assemble, this lamp is a great project for DIY enthusiasts. Simply print the provided files, populate the designated holes in the base with M3 brass inserts for added stability, and attach the LED strip, power supply, and ESP32 controller. The frame then slides neatly into the base, completing the lamp.Personalize your lighting experience! This lamp is designed for an ESP32 controller and a 5V 10amp power supply, allowing you to control the LED strip's color and brightness for a customized lighting effect.With its modern design and customizable lighting effects, this 3D printed lamp is a sure conversation starter. It adds a touch of sophistication to any room, making it a beautiful statement piece for your home.Build Your Own Glow: 3D Printed LED Lamp Assembly GuideMaterials:3D printed lamp filesM3 brass inserts (quantity depends on designated holes in base)LED strip (length to fit lamp design)ESP32 controller5V 10amp power supplyPhillips screwdriverTools:3D printer (to print lamp files if not already printed)Soldering iron & solder (for attaching LED strip to controller - optional, some may use connectors)Assembly:Print the lamp files. Ensure all parts are printed successfully.Prepare the base. Use the screwdriver to install the M3 brass inserts into the designated holes in the lamp base.Assemble the electronics (optional). If using a soldering method to connect the LED strip to the ESP32 controller, follow the specific instructions for your chosen components. Alternatively, some LED strips may use connectors, eliminating the need for soldering.Attach the LED strip. Secure the LED strip to the designated channels within the lamp frame. Ensure the arrow on the LED strip aligns with the intended direction of light flow.Mount the electronics. Place the ESP32 controller and power supply inside the base of the lamp. Ensure proper cable management to avoid clutter.Complete the lamp. Slide the assembled frame with the attached LED strip into the base. The frame should fit snugly.Power on! Connect the power supply to a wall outlet and enjoy your customized LED lamp.Customization (Optional):Explore different colored LED strips to create your desired lighting effect.Utilize resources like https://www.youtube.com/watch?v=TOEnFKLm9Sw to learn more about customizing LED strip behavior through the ESP32 controller (requires additional configuration).Safety:Always follow the instructions provided with your LED strip, ESP32 controller, and power supply.Ensure a stable placement for your completed lamp.Do not overload the power supply with excessive LED strip length.Enjoy your creation! This 3D printed LED lamp is a stunning addition to any space. With its modern design and customizable lighting effects, it's sure to become a conversation starter in your home.
With this file you will be able to print Hexa Glow: The Easy-Print 3D Printed LED Lamp with your 3D printer. Click on the button and save the file on your computer to work, edit or customize your design. You can also find more 3D designs for printers on Hexa Glow: The Easy-Print 3D Printed LED Lamp.
