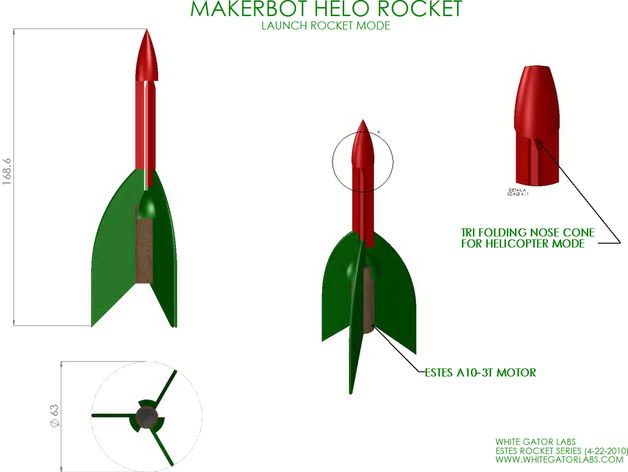
Helo model Rocket & Launch Pad (Estes Style)
thingiverse
This DIY Helo Rocket project is a work in progress, requiring 3D printed parts, household items, tools, and assembly. The rocket consists of 3X Helo Rocket Model Bottom, 3X Helo Rocket Model Top, 4X Rocket Launch Pad Arm, and 4X Rocket Launch Pad Base. Necessary household items include a clothes hanger, M6 nuts (optional), rubber bands, aluminum foil, miscellaneous wires, a 9-volt battery, and an Estes "A series motor." Tools needed are a MakerBot Cupcake, cutters, super glue, and 400-grit sandpaper. To build your Helo Rocket, print all six parts, remove them, lightly sand them down, glue the rocket top to bottom, bend the active hinge on the rocket top, cut notches for rubber bands, glue three nose cones together, and sand down the rocket for aerodynamics. Attach the rubber band to the active hinge so it bends, test fit the rocket, and install the rocket motor. For the launch pad, print the Rocket Launch Pad Arm and Base, acquire a clothes hanger, aluminum foil, and M6 nuts (optional). Assemble the parts, and your Helo Rocket is ready for takeoff!
With this file you will be able to print Helo model Rocket & Launch Pad (Estes Style) with your 3D printer. Click on the button and save the file on your computer to work, edit or customize your design. You can also find more 3D designs for printers on Helo model Rocket & Launch Pad (Estes Style).
