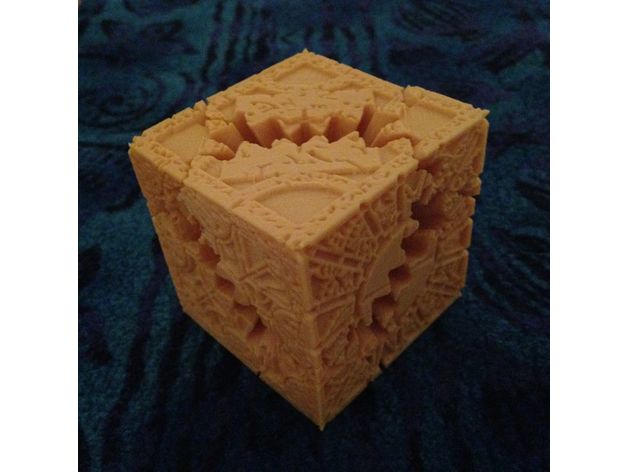
Hellraiser Cube Gears
thingiverse
You know, for kids! This is a remix of the Lament Configuration graphics from the XScreenSaver "lament" module (by Jamie Zawinski), processed by the PLA Gear Kit (by whpthomas). The file xscreensaver-5.36/hacks/glx/lament.c contains the following license text: /* xscreensaver, Copyright (c) 1998-2014 Jamie Zawinski * Permission to use, copy, modify, distribute, and sell this software and its * documentation for any purpose is hereby granted without fee, provided that * the above copyright notice appear in all copies and that both that * copyright notice and this permission notice appear in supporting * documentation. No representations are made about the suitability of this * software for any purpose. It is provided "as is" without express or * implied warranty. */ How I Created This Prepare the cube model Collect images for each of the cube faces. I manually divided the lament512.xpm file into six JPEG images, but you can use images from anywhere you like. Make the final images black and white and as sharp as you can. These will be stamped into the side of the cube model. When I did this I prepared the images so that 100% white indicated where the design should be fully carved into the surface, and 100% black indicated where the surface should be left alone, but then I later mistakenly generated the displacement so that the white parts were left alone and the black parts were raised out of the surface. More about this later. I think it worked out okay in the end though. Go into Blender and create a cube. Repeatedly subdivide the edges until all faces have been replaced with a very fine mesh. Select the mesh on each side individually and create a vertex group for each one. You will need the vertex groups to use the Displace modifier. Now add one of your cube face images to your Blender cube as a Displace texture. Go to the Image Sampling panel and bump up the image sampling Filter Size to 5, this seemed to help with the quality of the displacement. Set your Image Mapping Extension to Clip, so that you won't be working with a repeating texture. Add a Displace modifier to your cube, using the vertex group that represents the top of the cube (that is, the face entirely in the +Z space) and the texture you just added. Set the direction to Z. Set the Midlevel value to 1.0 (meaning that a value of all-white should be left alone) and the Strength to -0.050. Since all of the non-white pixels will have a strength lower than 1.0, they will have a negative displacement, but since Strength is also negative, this will result in the black parts being raised out of the surface. I think I was hitting swap pretty hard though. I'm sure someone who understands Blender will know of a better way to do this, but this is what worked for me.
With this file you will be able to print Hellraiser Cube Gears with your 3D printer. Click on the button and save the file on your computer to work, edit or customize your design. You can also find more 3D designs for printers on Hellraiser Cube Gears.
