Helipad Building Sticky Note Holder
prusaprinters
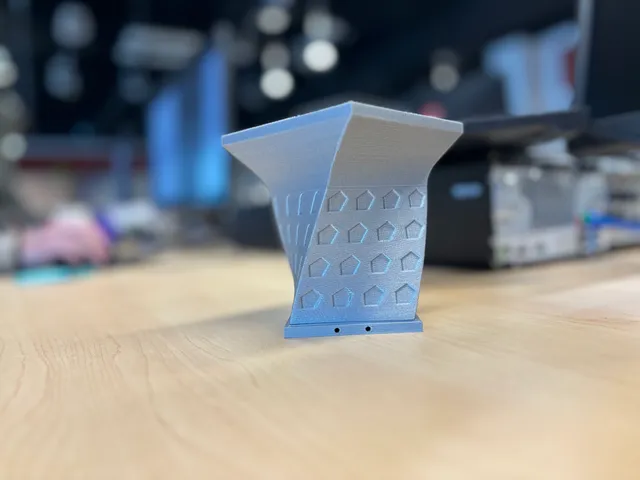
Summary Section: Use this cool, unique city building to spice up your desk! The innovative 9x9cm helipad serves as the perfect place to hold sticky notes, water bottles, and whatever else you want! I completed this project with my partner Shkeffy, whose Printables page can be found here, and serves as a component of a set of city-themed office supplies. The building, along with the base is sure to liven up any office desk!Lesson Plan and Activity:Recent analysis by the Staples finance department has concluded that sales for desktop organization products have declined in recent years. The company would like to ramp up their profits in this area by enhancing the aesthetic nature of these products. Your group of two has been hired to design a set of theme-based organizational products. Your team will design a set of office supplies that are tied together with a common theme. You must be able to justify the theme that connects the products together. The idea is that the customer will not want to buy just one; they will want to buy the whole set.Assembly/Construction Instructions Section (if needed):If you would like to connect this building to the other buildings included in this set, you will need the base as well as the building itself.Line up the edges of the base with the bottom edges of the building using the small road that touches the perimeter of the base. 2. Carefully glue the two pieces together. Make sure that the building is lined up with the base, as if not it may not connect to the other buildingsCongratulations! You can now connect this sticky note holder to the other city-themed office supplies in this set. I have also attached a step-by-step guide on how to make this model in Solidworks.Design Choices: The HelipadOriginally, we planned on creating a separate extrusion for the helipad in order to fit the sticky notes. We also decided that we would only flex the building, and keep the helipad straight. This was how our original model looked:However, after speaking with the instructor, we figured out that we would not be able to print the helipad and building as a singular piece, as the hanging part of the helipad would need to have supports.To fix this problem, we tried a few things. First, we attempted to filet the building so that it would be connected to the helipad. However, the filet constraints didn’t give us the results we wanted. After much deliberation, we finally came to the realization that the easiest and simplest solution to our issue was to create a new plane at the height we wanted the helipad and then to loft up to it. Here is the following sketch we created for the new plane:2. The Flex on the BuildingThis was a minor change to our model, but vastly changed the look of our original vision Originally, we had planned for just the building to have a flex on it, and for the helipad to be straight on top of it. However there is no way for this model to print, so we had to do something different.After deciding to loft the helipad on instead of doing a separate extrusion, we found that we were able to flex the entire model as a singular piece:While this wasn’t a significantly hard change to make, this greatly improved the model both aesthetically and structurally. It also made the building ever more unique, as flex was far more noticeable than before.
With this file you will be able to print Helipad Building Sticky Note Holder with your 3D printer. Click on the button and save the file on your computer to work, edit or customize your design. You can also find more 3D designs for printers on Helipad Building Sticky Note Holder.