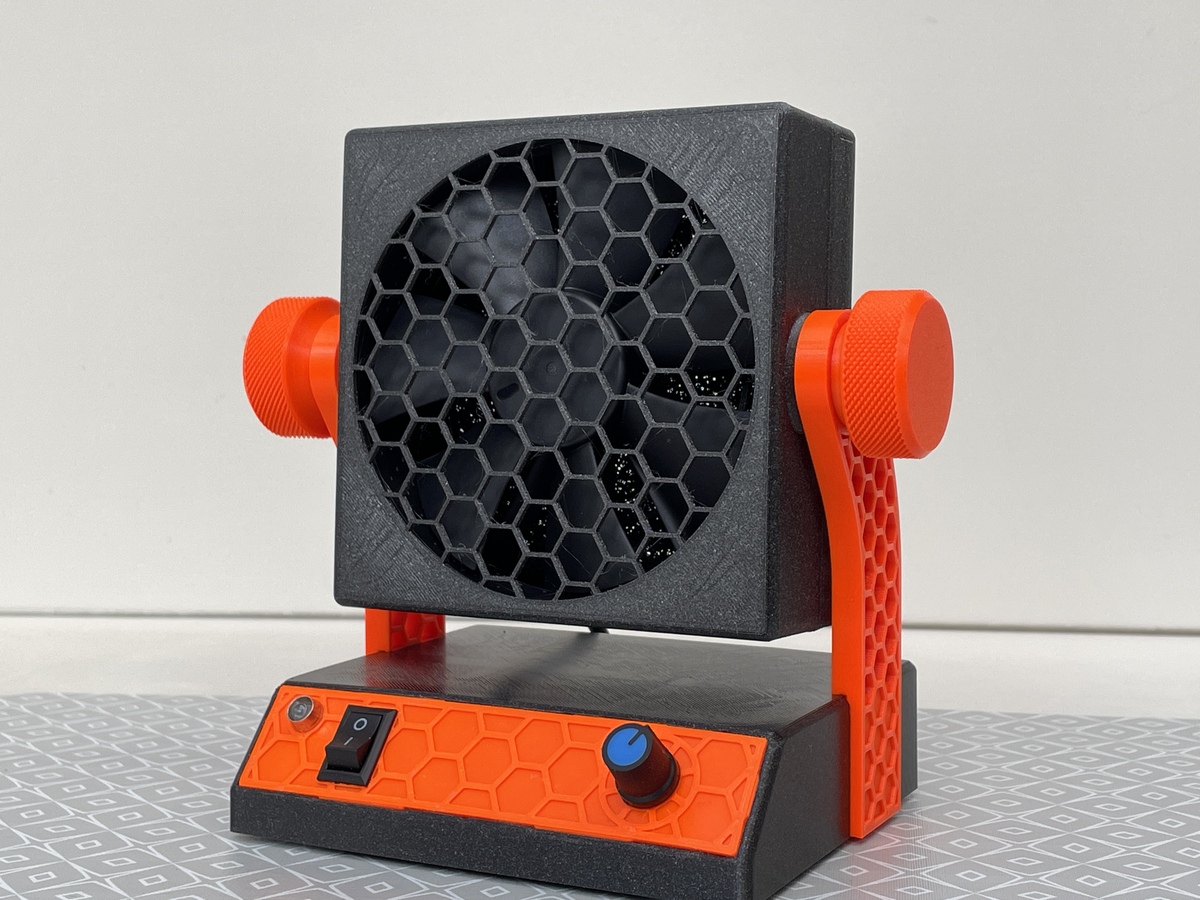
Heavy Duty Battery Powered Solder Fume Extractor
prusaprinters
<p>Yes I know, it's tempting to use a discarded PC fan as a solder fume extractor, but it usually doesn't do the job quite well. That is why I opted for an industrial fan with impressive specs. The <a href="https://www.amazon.de/gp/product/B00KESS6O0">Noctua NF-F12 industrial PPC-3000 PWM</a> has it all, although it does have some drawbacks: it is not very quiet (43.5 dB) and quite pricey. Some specs:</p><ul><li>min.-max. speed: 750-3000 RPM</li><li>airflow: 186.7 m3/h (about 110 CFM)</li><li>static pressure: 7.63 mmH2O</li><li>size: 120x120x25 mm</li><li>12V - 0.3A, 3.6W</li></ul><p>I wanted a powerful soldering fume extractor that looks good with no visible screws and that also runs on batteries that last all day.</p><p>Specifications:</p><ul><li>dimensions: 188x182x130 mm (WxHxD)</li><li>exchangeable active carbon filter in a slide, can be easily replaced from the outside</li><li>adjustable fan speed</li><li>on/off switch and control led</li><li>power level indicator</li><li>tilting fan</li><li>powerful 12V battery (3s1p), capacity 40.8 Wh. Theoretically, it can run more than 11 hours on 1 load (not tested).</li></ul><h4> </h4><h4>What parts do you need?</h4><p><strong>Plastic parts:</strong></p><p>You can use the print files if you have an MK3S or you can use the model files and set everything up yourself. The photos show the position of the parts on the print bed. No support is needed.</p><ul><li>Base (1)</li><li>Base Front (1)</li><li>Base Bottom (1)</li><li>Fan Housing (1)</li><li>Fan Filter Housing (1)</li><li>Filter Compartment (1)</li><li>Filter Grid (1) - only when using carbon filters with a thickness of less than 8 mm</li><li>Knob (2)</li><li>Arm (2, L & R)</li><li>Spindle (2)</li></ul><p><strong>Electronics:</strong></p><ul><li><a href="https://www.aliexpress.com/item/32324914059.html">Batteries NCR18650 3.4Ah Li-Ion (3)</a></li><li><a href="https://www.aliexpress.com/item/33012749011.html">PWM motor speed controller (1)</a></li><li><a href="https://www.aliexpress.com/item/32865611285.html">LED 5mm 12V (1)</a></li><li><a href="https://www.aliexpress.com/item/1000005493981.html">Battery Management System 3S 40A 12.6V (1)</a></li><li><a href="https://www.aliexpress.com/item/1005001444613340.html">DC Power Jack M/F (1)</a></li><li><a href="https://www.aliexpress.com/item/4000910843882.html">LCD Display Level Indicator (1)</a></li><li><a href="https://www.aliexpress.com/item/4000028403603.html">Plastic Battery Holder for 3x18650</a> (1)</li><li><a href="https://www.aliexpress.com/item/32987717201.html">Rocker Switch 250V 3A (1)</a></li><li><a href="https://www.amazon.de/gp/product/B00KESS6O0">Noctua NF-F12 iPPC-3000 120mm (1)</a></li><li><a href="https://www.amazon.de/gp/product/B08KRVB1KZ">DC Adapter for Li-Ion 18650, 12.6V (1)</a></li></ul><p><strong>Miscellaneous:</strong></p><ul><li><a href="https://www.amazon.de/gp/product/B07WR72S4Y">Active Carbon Filter (1)</a></li><li><a href="https://www.amazon.de/gp/product/B08RDSHCQZ">Brass inserts M4</a></li><li><a href="https://www.amazon.de/gp/product/B08335MK6J">Some screws M4</a> and <a href="https://www.amazon.de/gp/product/B07PFCRMKR">these ones</a></li></ul><p> </p><h4>Assembling</h4><p>Some parts, such as the base and fan filter housing, have a built-in support that must be removed before assembly. Carefully break these parts apart and clean the opening. Some cutting and sanding may be required.</p><p><strong>Base:</strong></p><p>Place all brass inserts M4 on the base and arms. Mount the battery box on the base bottom with M4 bolts and nuts. Use a glue gun to glue the BMS to the battery holder and solder the connections.</p><p>Assemble the base front. If necessary, use a bit of super glue to secure it. Glue the battery indicator on the back of the base.</p><p><strong>Fan housing:</strong></p><p>Place the two spindles in the fan housing and push the Noctua fan into place. Do not remove the rubber corners from the fan, it should fit snugly. Make sure the cable is on the bottom of the housing and place it in the cable recess. Now place the fan filter housing on the fan housing and press the two parts to snap together. </p><p>Cut the active carbon filter to size, place it in the carriage and slide the assembly into the fan housing. You can use the filter grid when the carbon filter is thinner than 8 mm.</p><p><strong>Assemble base and fan housing together:</strong></p><p>Cut off the 4-pin connector from the fan. You only need the black wire (GND) and the yellow wire (+12V). You can cut off blue and green.</p><p>Mount the arms on the fan housing and slide the assembly onto the base. Secure along the inside with some screws. Use the knobs to secure the fan housing.</p><p><strong>Electronics:</strong></p><p>Soldering the electronics is pretty straightforward. For those who don't know how to get started, I found a schematic online. It's not complete though, but it does put you on the right track.</p><figure class="image"><img src="https://media.prusaprinters.org/media/prints/84614/rich_content/024ed16c-9f03-4ed0-944d-cb16c31fe3e9/wiring.jpg#%7B%22uuid%22%3A%22edaed064-8a71-41aa-a944-bf7cbc1e4ddc%22%2C%22w%22%3A1920%2C%22h%22%3A1300%7D"></figure><p>Source: <a href="https://www.creativesolutions.pt/diy-portable-soldering-fume-extractor/">CreativeSolutions</a></p><p> </p><h4>Print instructions</h4><ul><li>no support</li><li>Infill 20-30%, filter grid 100%</li><li>layer height: 0.2mm, knob & spindle 0.15mm</li></ul><h4>Filament</h4><ul><li><a href="https://shop.prusa3d.com/en/prusament/711-prusament-pla-prusa-galaxy-black-1kg.html">Prusament PLA Galaxy Black</a></li><li><a href="https://shop.prusa3d.com/en/prusament/801-prusament-petg-prusa-orange-1kg.html">Prusament PETG Prusa Orange</a></li></ul>
With this file you will be able to print Heavy Duty Battery Powered Solder Fume Extractor with your 3D printer. Click on the button and save the file on your computer to work, edit or customize your design. You can also find more 3D designs for printers on Heavy Duty Battery Powered Solder Fume Extractor.