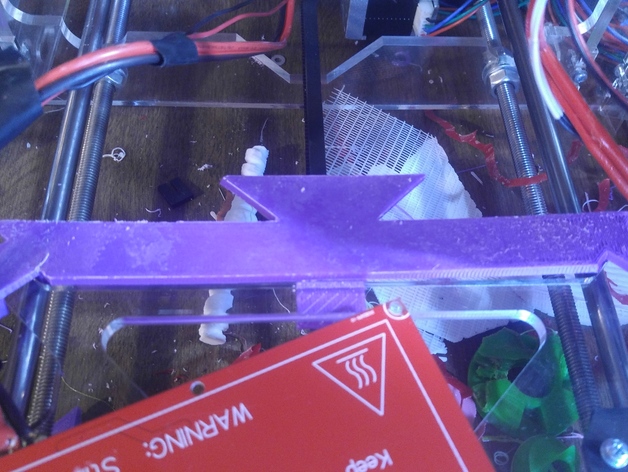
Heated Bed wire holder for Reprap heated bed
thingiverse
I've had three prints ruined because a wire to my heated bed broke due to metal fatigue at the copper wires soldered to the PCB heater bed. On my printer, the wires just hang loose. As I move the printer in the Y direction, the wires bend and eventually break. A few weeks ago, I thought of this design flaw but had taped the wires into a bundle thinking it would fix the issue. Yesterday, one wire broke anyway and a pokeball peeled up on one side. So I printed this. This was my fourth attempt. Changes I made were: Properly fitting hooks to the X frame. Making the main structure thinner to reduce warping, speed up printing, and reduce material used. The second-to-last attempt fit except it wasn't "tall" enough, putting stress on the X frame. Installing it revealed it would possibly warp the hot plate and make leveling harder. I added a box under the central tab for a relaxed fit. I printed the part in ABS since it will be used by the heated bed and is more resistant to heat. I used the "fantail" so wire ties could be used without holes, but instead decided on electrical tape. The fantail and appendages make it look vaguely like an abstract thunderbird. If I knew how to make this parametric, I would set: The distance of the straight line (the long rectangular piece). The angle of the arms. The size of the diamond arms that go to the corners of the bed so the hook size could be adjusted. The thickness of the piece (distance between the top of the hook and flat tab). Optional: The size of the fantail. This object is sized for my RepRap printer kit, hoping it will work for you. Print Settings Printer Brand: RepRap Printer: reprapguru kut Rafts: No Supports: Yes Resolution: 0.4mm nozzle, 0.2 layer Infill: 22% Notes: I used 3 layers on the sides (1.2mm) and started with 6 layers on top and bottom (1.2 mm) but then changed it to 5 (1.0) for better results. The filament took 3 layers to bridge and fill in with 15% infill, but changing to 22% infill relieved bridging problems. Printing it in that orientation with a wide brim on adhesive-coated glass on a hot build plate finally got the item to print without warping. It took 1 hour, 27 minutes to print. I printed it diagonally - it probably would have barely fit oriented long way X or Y but placement seemed easier this way. Again, I used ABS since it's said to be more resistant to hot environments. Post-Printing Installation Other than removing the brim and supports, no trimming was required. The heat plate had to be completely removed to install it. If the x frame is warped at all, you shouldn't leave it installed as bending might cause insurmountable leveling issues. If you can't remix it on Tinkercad, give me the Thickness (z direction of your X frame and/or the distance along the straight piece) and I'll try to build one for you. The support should be slightly loose on the X frame and then wires can be attached to the support using your favorite method. How I Designed This I had two goals in designing this: To eliminate flexing at solder joints, and to allow for a wire management system like chains to have a place to mount, so that wires would be protected from abrasion.
With this file you will be able to print Heated Bed wire holder for Reprap heated bed with your 3D printer. Click on the button and save the file on your computer to work, edit or customize your design. You can also find more 3D designs for printers on Heated Bed wire holder for Reprap heated bed.
