Heart Shaped Box and Lid
prusaprinters
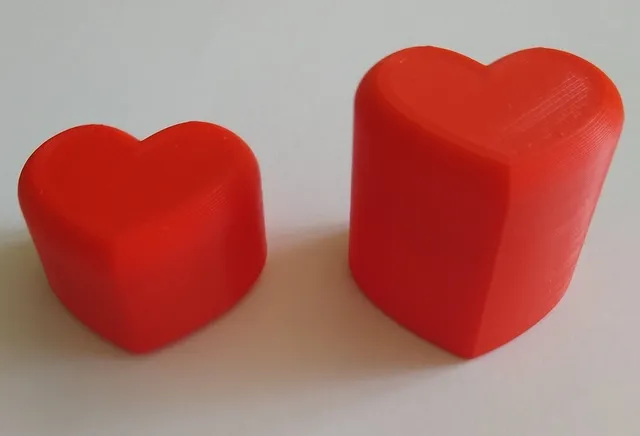
This is a partly parametric box with cup and lid. My first multi-component design in Fusion360 so I'm still learning the ropes. I started with a spline sketch for half of the heart shape and mirrored it, extruded and offset it for the cup and the lid, and added fillets.To avoid printing the lid inverted (which would have left the textured imprint of my PEI printing bed on the top), I designed the box-fitting insert separately and glued it to the lid. Insert and lid are glued back-to-back (print-bed surfaces together) for optimum finish. You can get by with just printing three files (Cup, Lid, Insert) but if you want the finish to be superb then you need the two jigs too. These are simply to align the insert precisely, and are then discarded or used to align more boxes if desired. When done with the jigs, the box should close without any visible seam, at least it does when printed on my Elegoo Neptune3 Pro.I didn't design any tolerance gap between the insert and the box internal size because my printer prints these as a good snug fit. Rather than tweak for tolerance on a tricky shape, if the insert is too tight in the smaller jig (and therefore the box cup) then just dust the edges off with fine sandpaper before glueing it to the lid.Assembly - Press the insert fully into the smaller jig on a flat surface so it's flush. One face will have a very slight gap where I've filleted it, put that face down (print bed face is then upwards). Press the larger jig into place around them, and press that down so it's flush on the bottom - that'll leave a hollow in the top to fit the lid. You can do a trial fit at this stage to make sure the lid goes in ok, my printer makes the parts fit very snugly so one or two trials helps free them up a little, but then you'll need to push quite hard from the bottom to disassemble again. Once you're ready for the glue, put it on the LID and avoid going too near the outer 2mm wall or you'll end up glueing the jigs as well and then you'll have to start again from scratch :o) I used very runny superglue on PLA+ parts, which seems to work really well. Once you have the lid glued in place, leave it a few hours to make sure it's thoroughly set, and then pull off the jigs. You should now have a supremely aligned lid for the cup! Careful not to damage the lid while removing the inner jig.I used no supports at all to print the parts, orientated as they are in the files. I do use “bed adhesion” lines but only as a non-attached “skirt” which is just to make sure the extruder nozzle is spotlessly clean before starting the nearby item. I used standard infill of 15%.I've made available my F3D file from Fusion360, you can use the Modify/Fx Change Parameters section to adjust the lid and cup heights, with advice notes on sensible values. The STL files were done with 7mm lid and 12mm cup which makes a nicely proportioned box (also used for the photos attached) that's big enough to conceal a couple of small stud earrings. After trying an engagement ring in it I realised that's a bit small so I have included a 16mm cup in the STL files for anyone who wants that but doesn't have Fusion360. If you're really lucky you might be able to scale everything up to get a bigger heart, I haven't tried that. If you like this, please hit the LIKE button. If you REALLY like it, please consider visiting https://www.buymeacoffee.com/gigabeast :o)
With this file you will be able to print Heart Shaped Box and Lid with your 3D printer. Click on the button and save the file on your computer to work, edit or customize your design. You can also find more 3D designs for printers on Heart Shaped Box and Lid.
