Heart Frame for 4x6 Photo
thingiverse
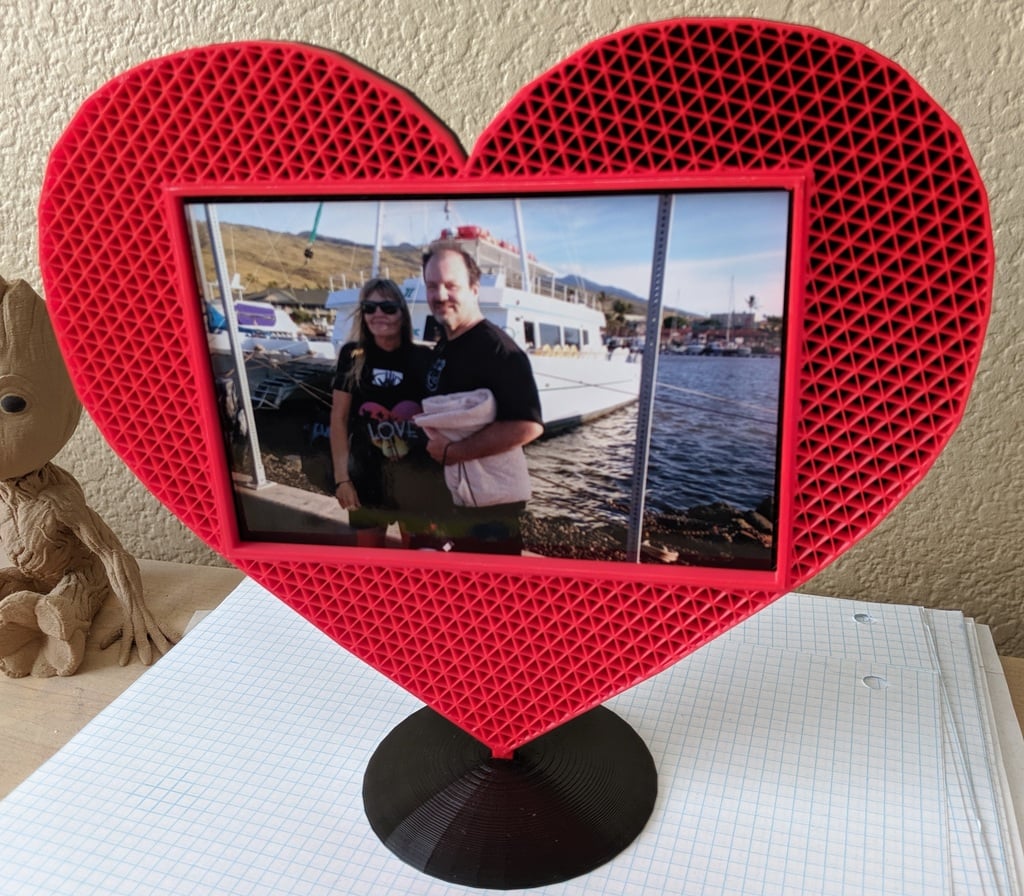
My wife adores this heart frame that I designed! I printed a few of them for her, and now she can't get enough. To assemble it, you'll need to print the heart frame, insert, and stand. Place a 4x6 photo in the photo cutout of the heart, then slide the insert over the photo to secure it inside. Finally, position the heart frame with the photo into the stand. For added flair, try these advanced options: * Adjust your slicer's "Top Layer" setting to zero to reveal the intricate infill geometry effect that my wife loves so much. I used a triangular pattern for the infill. * Print in two colors by switching from black to red at layer 23. The result is stunning! Check out the photo to see the vibrant red triangles on a sleek black background. I printed the stand in black and the insert holder in bright red. If you're familiar with Mesh, you can tweak the heart frame's design for added durability. In Cura 4.0, add a box and change the infill settings for the part that slides into the stand. Here's a helpful tutorial: https://www.youtube.com/results?search_query=cura+infill+mesh+tutorial Feel free to remix these Tinkercad models if you'd like: Heart Frame: https://www.tinkercad.com/things/d8pcwGwHyIJ-heart-frame-frame-only Heart Frame with Love: https://www.tinkercad.com/things/dUQ6vpTVVCD-heart-frame-frame-and-love Heart Frame Insert: https://www.tinkercad.com/things/axxK9W5VlKQ-heart-frame-insert Heart Frame Stand: https://www.tinkercad.com/things/aIncLArcQ1d-heart-frame-stand
With this file you will be able to print Heart Frame for 4x6 Photo with your 3D printer. Click on the button and save the file on your computer to work, edit or customize your design. You can also find more 3D designs for printers on Heart Frame for 4x6 Photo.