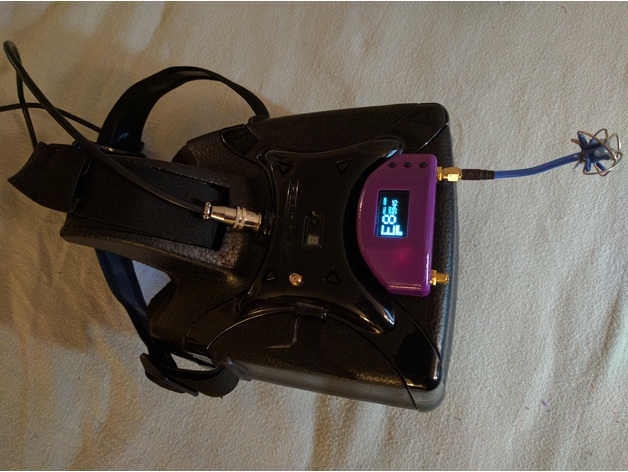
Headplay "Sly-Versity" receiver upgrade
thingiverse
This is a sleek way to add an integrated diversity receiver to your headplay HD! It utilizes the Realacc rx5808 pro module with OLED, which is fully enclosed and protected by a smoked acrylic display window that adds a touch of sophistication. It also employs pushbuttons to replace the stock navigation switch, a built-in USB serial converter with an externally accessible micro USB port for easily updating the module firmware, and two conveniently located forward-facing SMA or RP-SMA connectors (your choice). Assembling this unit requires a moderate amount of modding to the module, so I'll document the build better on my next project. I'm building another unit for a friend, which will help me refine the process. You'll need: M2 heat-set threaded inserts, 4.8mm length A USB-to-serial adapter (optional if you don't require easy firmware updates) A pair of SMA or RP-SMA extensions with bulkhead nuts; I used these SMA ones 5x M2 screws, 10mm in length; you can also order them longer and cut to size as necessary 3x 6x6x6mm tactile switches; I got mine from this set Some smoked acrylic or your preferred color; 12x12 is excessive and 1/8'' is thicker than I'd like, but it works An RX5808 Pro diversity module (you won't need the cover); both SMA and RP-SMA versions will work A set of printed parts, basic hand tools, some small-gauge wire, the receiver cable interconnect from your headplay or a JST SH 6-pin cable, and some soldering finesse The process involves unscrewing the two boards from each other, desoldering the built-in SMA connectors from the rx5808 pro module, installing the acrylic window in the housing, wiring the FTDI to the RX5808, replacing the threaded module board spacers with clearance spacers, and screwing the module to the inside of the housing using M2 inserts. The buttons press snugly from the back but require a bit of hacking to wire up; I'll update with details soon. You'll need to scrape off some solder mask and tap into three traces plus ground. Finally, bolt in the SMA extension bulkheads and solder to the pads on the rear of the module board. Then, add the power/audio/video headplay cable, bolt on the cover, plug into the headplay motherboard, and apply the module to the top of the headplay with strong transfer tape. I know that's a lot of steps, so I'll update with a more detailed build guide soon!
With this file you will be able to print Headplay "Sly-Versity" receiver upgrade with your 3D printer. Click on the button and save the file on your computer to work, edit or customize your design. You can also find more 3D designs for printers on Headplay "Sly-Versity" receiver upgrade.
