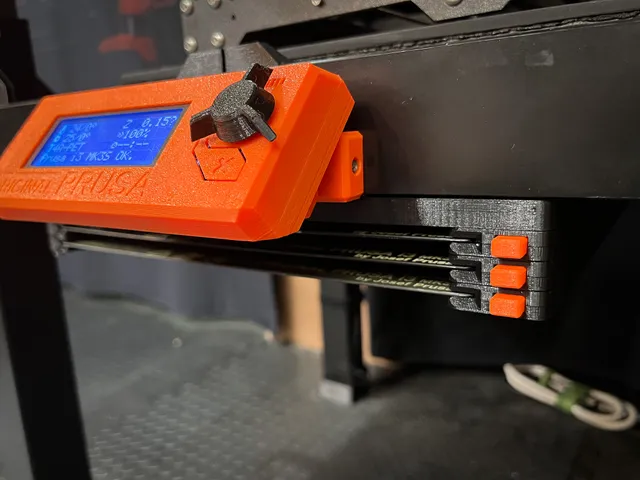
Header for Expandable Sheet Holder
prusaprinters
I wanted to add Whity's Expandable Steel Sheet Holder to my existing LACK Enclosure, but my externally mounted LCD was in the way. This header component provided the necessary clearance and simplified the mounting process.The height of the header matches the height of a single sheet holder, and the hole/nut patterns match those on the sheet holder sides. There are cutouts in the front/rear pieces to allow LCD ribbon cabling to pass through.Please Note: Only the MK version of the sheet holder is supported at this time. PrintingThe provided .gcode files were sliced in PrusaSlicer 2.5.0 for PETG on an MK3S/+ using the 0.20mm SPEED preset.If you're slicing yourself, use 0.2mm layer height with no supports. I used 10% Grid infill. All 3mf files have been rotated by -40° to get them to fit on the print bed, so you will need to adjust the “Fill Angle” parameter in your slicer by the same amount. (On mine that meant changing it from the default 45° to 5°.) Even with the rotation, the front and rear parts just barely fit, so you will need to disable skirt/brim options when printing these. The left/right pieces fit easily and can be printed at the same time. AssemblyI highly recommend printing the sheet holder pieces as well as the header pieces before assembly. This allows you to lay everything out beforehand and understand how all the pieces fit together. Also note that the assembly process is much easier if you can flip the shelf/table you're mounting to upside-down so that you're not fighting gravity the entire time. That being said, the header was specifically designed to make installation easier when this isn't possible, and you're stuck - as I was - lying on your back under a LACK table.Figure out which holes you are going to populate with M3 nuts for attaching additional holders and which ones you are using to attach to the shelf/table as per Whity's Sheet Holder instructions. Put M3 nuts into all four parts as needed.Square up the edge of the front piece with the edge of the table/shelf you're mounting it to and fasten it with 3mm wood screws.Insert the leg of the left or right part into the slot on the front piece (make sure you've got the orientation correct!), then - using an L-square to ensure you're squared up with the front part - fasten the side part to the table.Repeat step three for the other side.Use the free legs on the two side parts to line up the slots on the rear piece - double check with your L-square that everything is still squared up to the front piece - then fasten it down.Attach Steel Sheet Holders to the header as per Whity's Sheet Holder instructions.
With this file you will be able to print Header for Expandable Sheet Holder with your 3D printer. Click on the button and save the file on your computer to work, edit or customize your design. You can also find more 3D designs for printers on Header for Expandable Sheet Holder.
