HCSR04 5V to 3.3V Converter
thingiverse
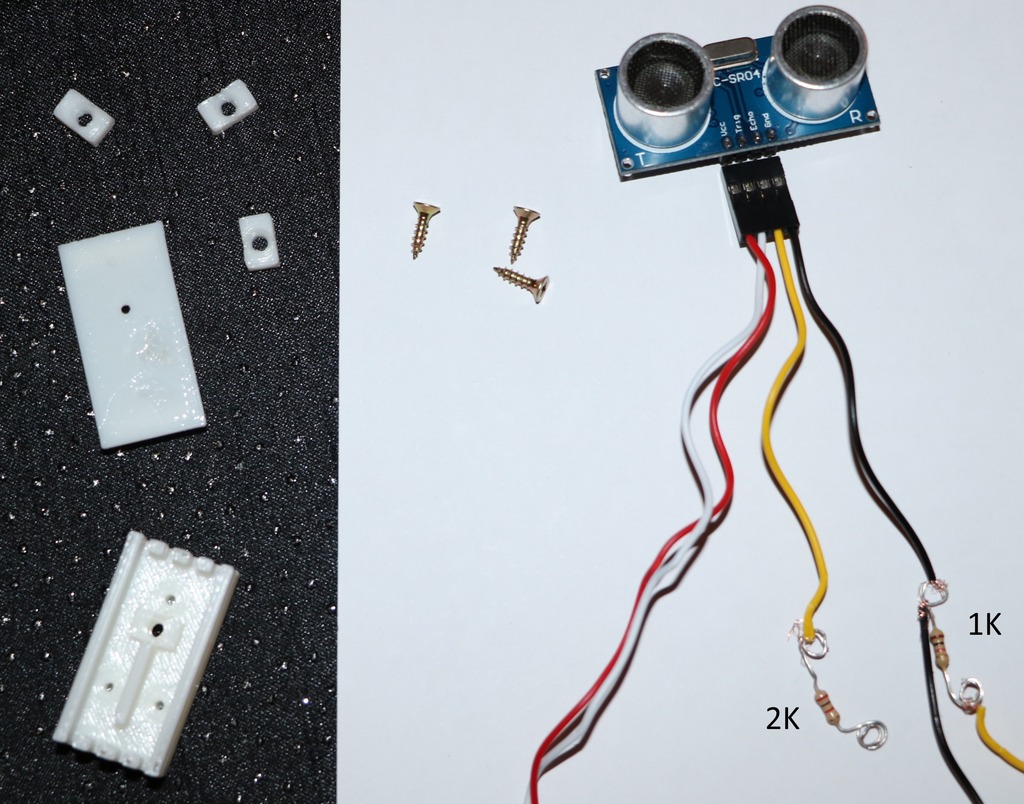
This nifty box lets you connect a HCSR04 distance sensor to your Raspberry Pi's GPIO pins without any soldering required. Since no soldering skills are necessary, it's perfect for classroom introductions. * Why do you need this adapter? - The Raspberry Pi has .3V GPIO, and the HCSR04 requires 5V. - If you want to connect a HCSR04 sensor to your Raspberry Pi, you'll need to add two resistors to split the voltage. A 1K resistor and a 2K resistor are needed. This adapter provides an easy way to achieve this without soldering anything. * What you will need - A female-female Dupont cable with four-pin connectors. - Three screws (refer to the photo of the reference for the correct screws). - One 1K resistor. - One 2K resistor. - The STL parts, which include three Block.stl files. * How to make it: - Prepare the resistors as shown in the first photo. - Use the box, screws, and block to secure the resistors (by screwing the little block onto the wires). * How to connect it - Connect the Dupont cable sensor side to the HCSR04. - Connect the board-side cables to your Raspberry Pi. - Check my recommended SONAR allocation for PI pins. You can find this in two PowerPoint slides. I use a 4-pin female-female Dupont cable where I reorder the wires to match each slot. * How to test it - You can find many Python examples to test HCSR04 devices on GitHub. This is part of a larger project that I've been working on for over a year now, and it's finally nearing completion! Follow me to stay up-to-date.
With this file you will be able to print HCSR04 5V to 3.3V Converter with your 3D printer. Click on the button and save the file on your computer to work, edit or customize your design. You can also find more 3D designs for printers on HCSR04 5V to 3.3V Converter.
