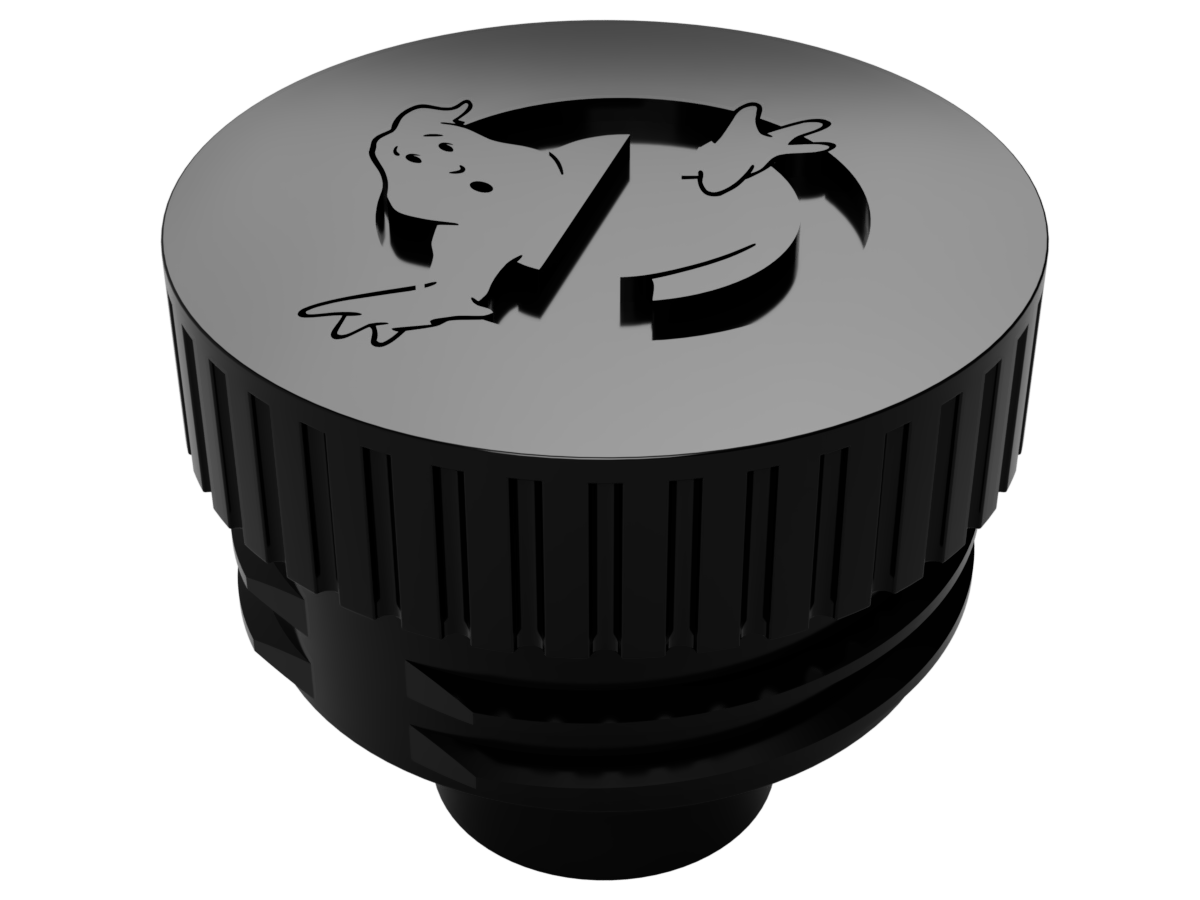
Hasbro Spengler Neutrona Wand End Cap
prusaprinters
<h3>UPDATE - 22 November 2020</h3> <p>Added a set of new caps for Aux Jack mods. There is a flat cap with Aux Jack. Additionally, there are caps with the 3/4" stub with just the jack, the jack + 2 circuit holes, and the jack + 4 circuit holes. There are also a pair of files with the suffix SB. These 2 files have sacrificial bridges over the holes in the cap. This will help by allowing you to print with less support. All you have to do is use a hobby knife or something to punch thru the bridge. It is only .2 mm thick (1 layer).</p> <h3>UPDATE - 15 October 2020</h3> <ul> <li>Added caps with GX-20 geometry.</li> <li>Renamed files so they are easier to identify</li> </ul> <hr/> <p>Threaded handle endcap for 2020 Hasbro Spengler Neutrona Wand.</p> <p>I knew I was going to need a spare sometime or that I would be needing to modify one for wire passthrough for modding. There is a tight-thread version of all the models for those wanting a tighter fit or using a resin printer.</p> <h3>Caps</h3> <ul> <li>Flat Cap</li> <li>Flat Cap with GB Logo</li> <li>Cap with 3/4" Loom Stub</li> <li>Cap with 3/4" Loom Stub and Circuit Passthrough</li> <li>Cap with GX-20 Geometry</li> <li>Cap with 3/4" Loom Stub and Circuit Passthrough without Battery Nub</li> <li>Cap with 3/4" Loom Stub and Aux Jack</li> <li>Cap with 3/4" Loom Stub and Aux Jack and 2-Port Circuit Passthrough</li> <li>Cap with 3/4" Loom Stub and Aux Jack and 4-Port Circuit Passthrough</li> </ul> <h3>Print instructions</h3><ul> <li><p>Flat Cap<br/> Orientation should be with the wide cap on the build plate. No supports required.</p> </li> <li><p>Flat Cap with GB Logo<br/> Orientation should be with the wide cap on the build plate. Supports should be turned on. The slicer will detect the part can be printed with bridging supports and print the embossed part with bridges. There will be no material to remove.</p> </li> <li><p>Cap with 3/4" Loom Stub<br/> Orientation should be with the wide loom facing up. Supports should be turned on and touching build plate only. This will make the cleanest print areas the areas that are exposed.</p> </li> <li><p>Cap with 3/4" Loom Stub and Circuit Passthrough<br/> Orientation should be with the wide loom facing up. Supports should be turned on and touching build plate only. This will make the cleanest print areas the areas that are exposed.</p> </li> <li><p>Cap with GX-20 Geometry<br/> Orientation should be with the wide cap on the build plate. No supports required.</p> </li> </ul> <p><strong>Threads</strong><br/> In Fusion, the base threads have a section size of 1.5mm. In order to make the threads tighter, I increased the section size to 1.75mm. It should be noted that if you are making any changes to the thread section size, you will also need to modify the thread diameter to match. For example, when I increased the section size from 1.5mm to 1.75mm, the coil diameter had to be increased from 28.5mm to 28.75mm.</p> <p>I do not have a resin printer, but I would imagine someone with a resin printer would want tighter threads. The tight thread versions are tight enough that printed with my FDM, there is no play at all.</p> <p><strong>GX-20</strong><br/> The GX-20 cap is designed so that you can screw it together by hand. Simply put the retaining washer and hex nut in the cap inside of the recess. Then screw in the connector head from the other side. The nut will stay locked against the cap walls and the connector head will seat itself into the groove on the top of the cap.</p>
With this file you will be able to print Hasbro Spengler Neutrona Wand End Cap with your 3D printer. Click on the button and save the file on your computer to work, edit or customize your design. You can also find more 3D designs for printers on Hasbro Spengler Neutrona Wand End Cap.
