Hanna Checker Stand
thingiverse
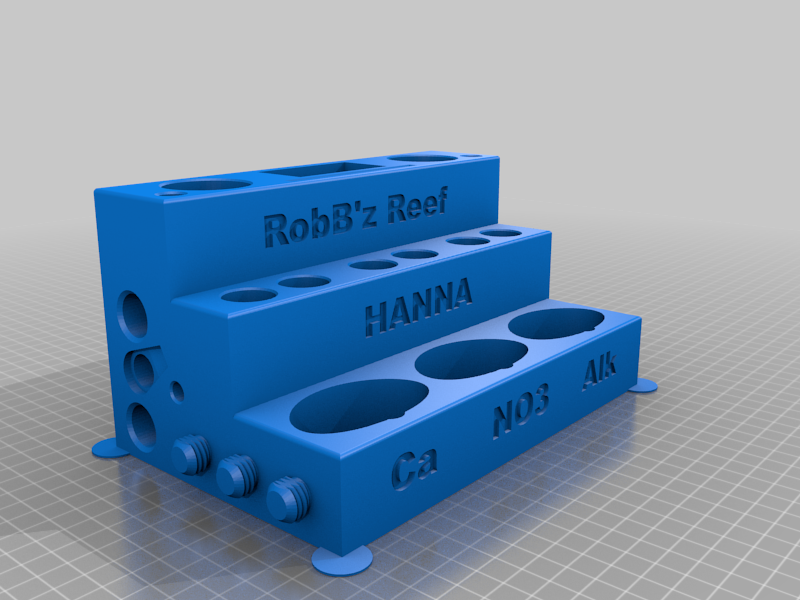
v3 --- Mount it on your wall with the bracket or set it on your counter top. Use the provided source file to edit the text embossing to make it your own. If you don't use Fusion 360 you'll have to reach out to get an stl with the verbiage you require. The wall bracket is made to use #8 wood screws. The stand will hold up to 3 checkers, two test vials for each and around 20 test packets for each checker. In addition it will hold 3 standard 5ml syringes as well as 3 10ml syringes and has a slot to hold the Hanna provided destructions for the checkers. The pads at the corners were to help keep them from warping up. I'm new to printing and was really struggling with the corners on this thing coming up a bit and this definitely fixed that issue. I'm convinced it's just because I don't know what I'm doing yet. Either way, I just remove them with a razor blade when it's done. v4-- another awesome reefer suggested that storing the cuvettes upside down with the caps off to facilitate them drying might be a good idea but also a place to store said caps. Well..I thought this was brilliant and did a forehead smack as I realized when I through them back in the Hanna provided case I also never put the caps back on so they would dry...smh. So this is what I came up with. There is a small offset at the bottom of the cuvette holes to allow some air circulation and for it to drip. Caps are screwed on to studs on the side for easy access. v5-- **Major revision** This version has been updated to more accurately support the Alkalinity test (i found out it uses a liquid reagent (doh!) as well as the Calcium test. Please note when choosing Calcium as one of the testing options the center packet slot is enlarged as it has to share with one of the other tests for the powder packets. With Calcium using liquid reagent AND powder packets there just wasn't enough room in this form factor without blowing it all away. For the same reason I swap out one of the slots for a 10ml syringe for that goofy 100 µl syringe on the left hand side which is where the Ca option will always be fixed to. The enlarged center should be big enough to hold almost 30 packets. Using fusion 360 simply utilize the selection sets I've created and suppress the active selection set and unsuppress the selection set for the combination you want. Selection sets: No Alk & Ca (neither of those tests are being used), If using both Ca and Alk choose the Alk & Ca Option, if using one or the other there is a selection set for each of those. I've located the embossing text in the assembly sketches so you don't have to drill into the components to change that. Note: It's worth mentioning I also fought tooth and nail to get this under 500g. I'm using the Prusa Slicer 2.3 and with 10% infill it's about 490g. The object was to squeeze two of these potentially from a 1kg spool, assuming they aren't lying and including the spool in the net filament weight for the stuff you're buying.
With this file you will be able to print Hanna Checker Stand with your 3D printer. Click on the button and save the file on your computer to work, edit or customize your design. You can also find more 3D designs for printers on Hanna Checker Stand.
