Hanging MMU2S Spool Holder - Customizable / Open Source
prusaprinters
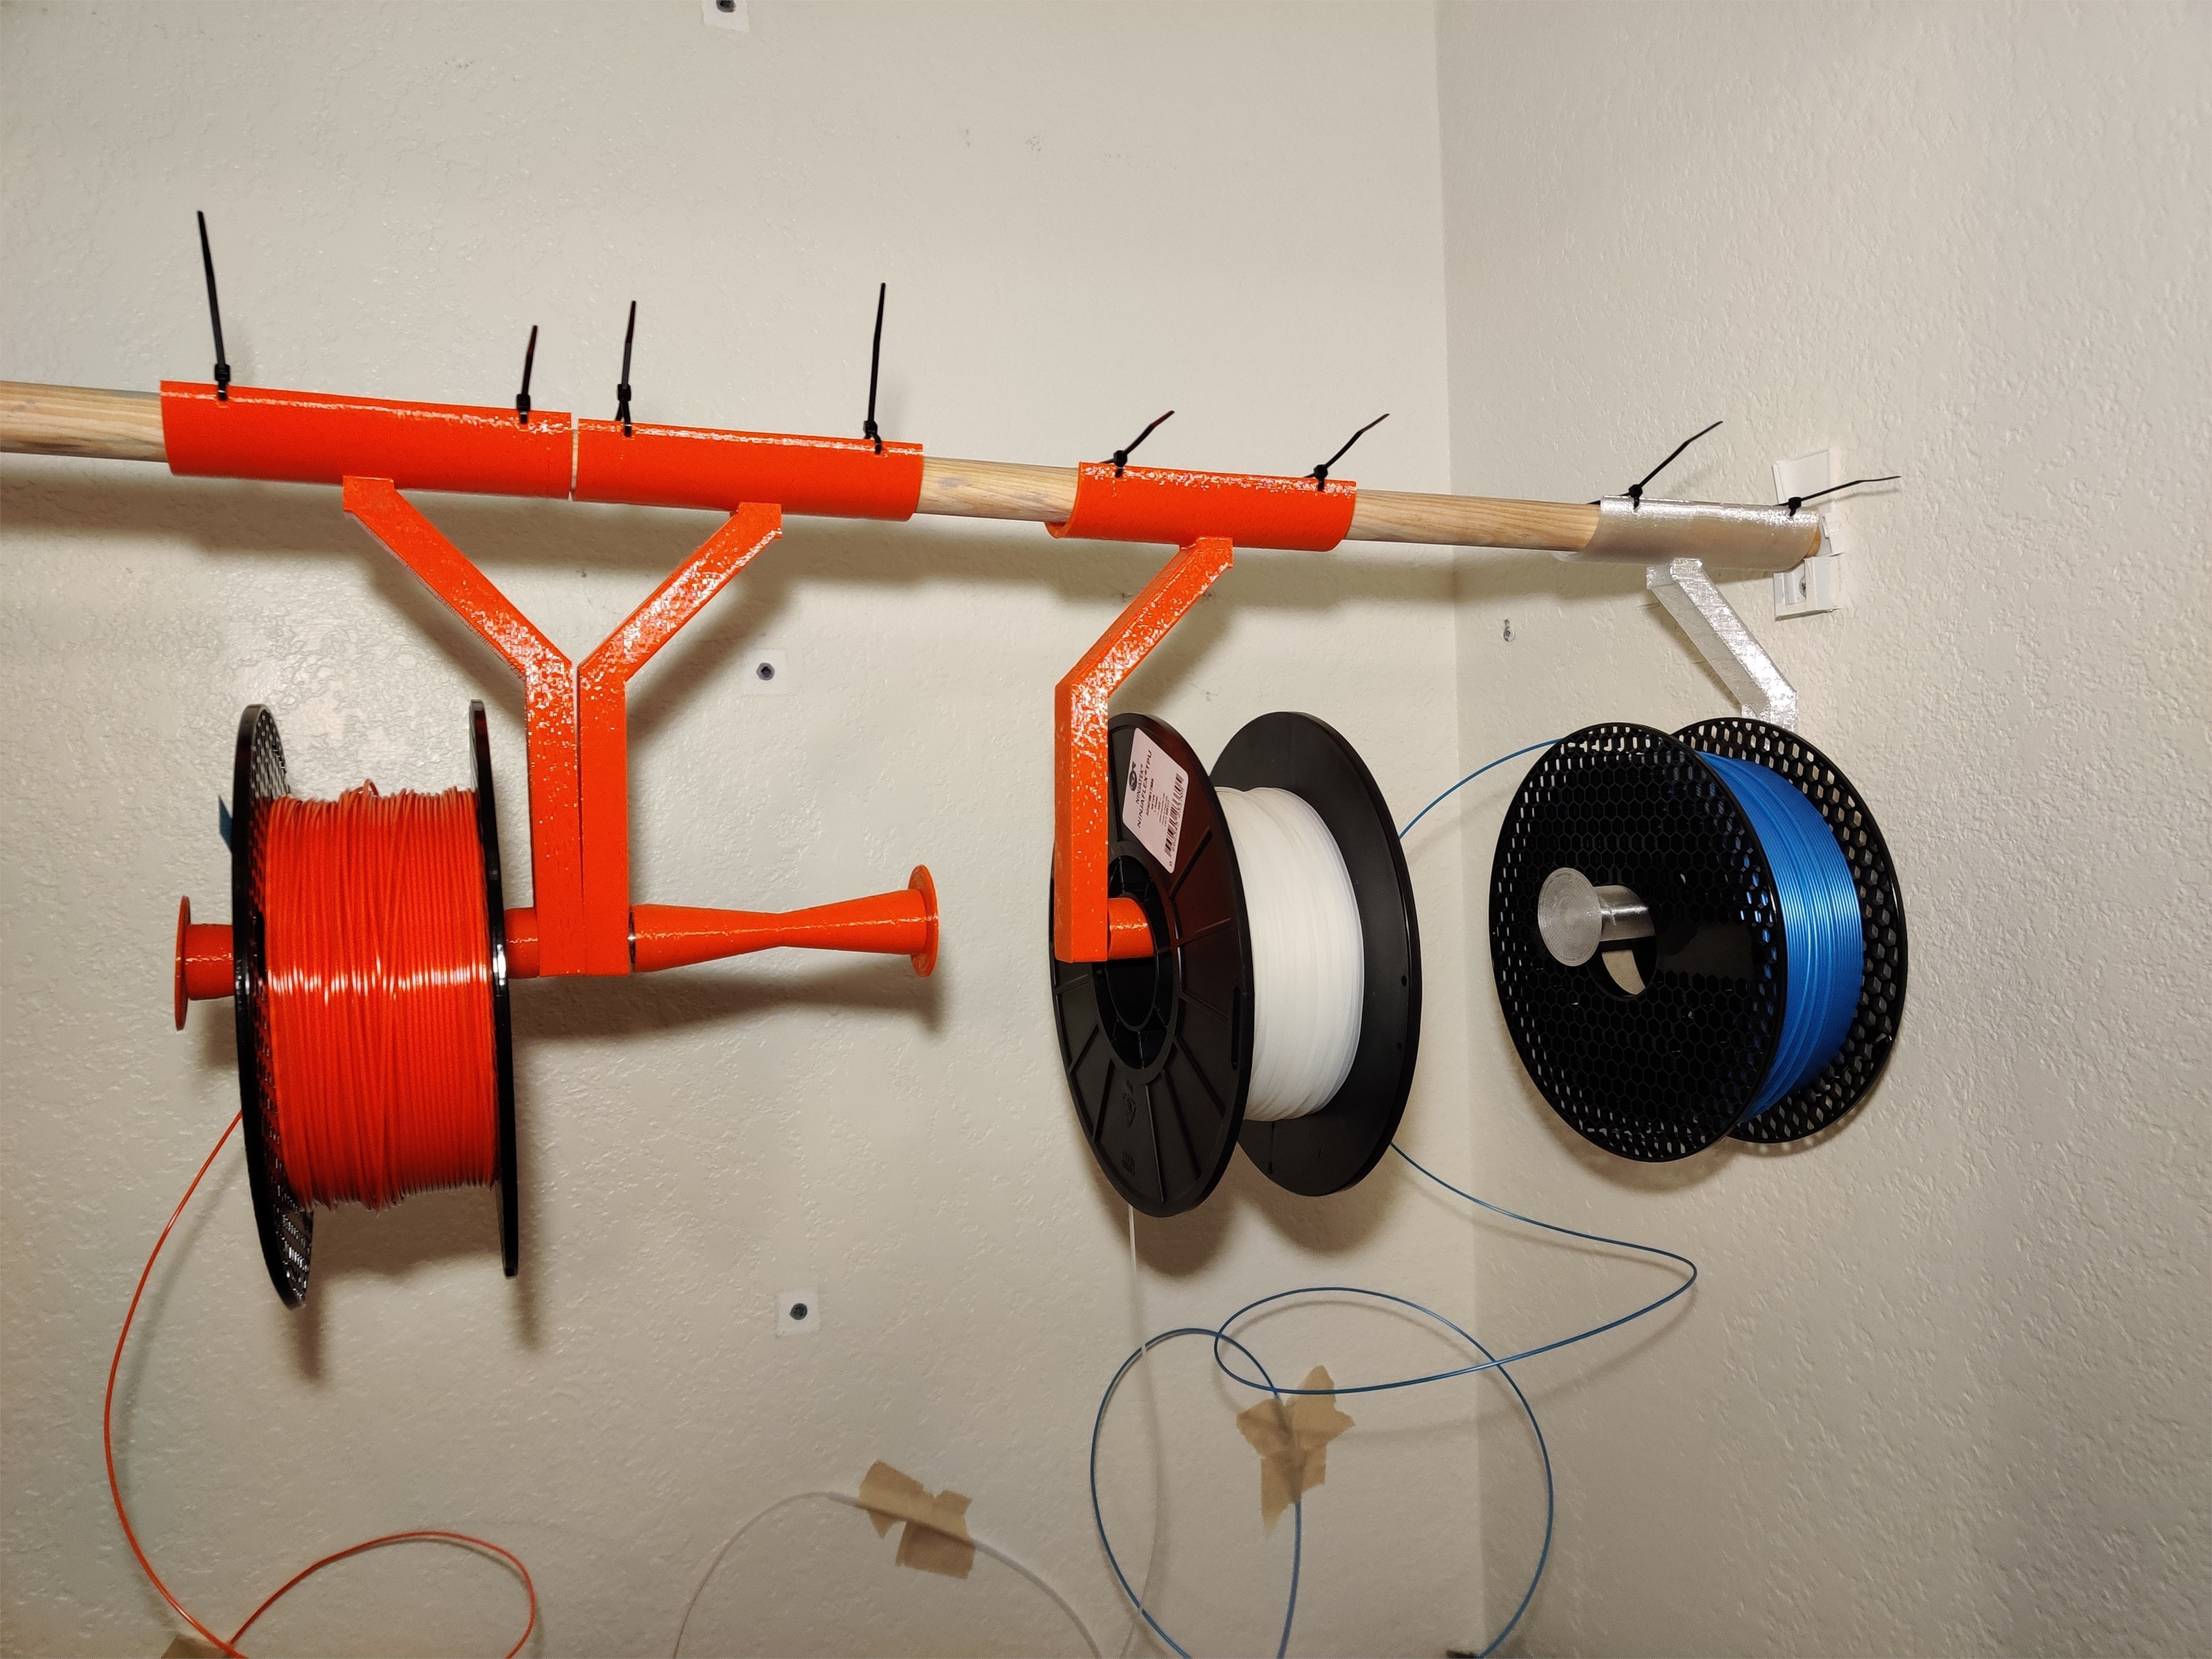
<p>--Features</p> <ul> <li>Minimalist strong design, no supports needed, simple geometry</li> <li>Reuses MMU2S Spool holder hardware, create up to 10 hanging spool holders!</li> <li>High tech Self Stablizing roller, see this video for an explanation of how it works! (it was also the inspiration for the roller design) <a href="https://www.youtube.com/watch?v=Ku8BOBwD4hc">https://www.youtube.com/watch?v=Ku8BOBwD4hc</a></li> <li>low rolling resistance, perfect for flexible filaments in the MMU2S! (ive had success printing 85A hardness filaments!)</li> </ul> <p>--Required Hardware</p> <ul> <li>1x Rod that came with MMU2S trays</li> <li>2x Bearings that came with MMU2S trays </li> <li>2-4x Zipties that came with printer or MMU2S</li> <li>0.8mm nozzle recommended</li> </ul> <h3>Print instructions</h3><p>--How to Print<br/> (print test piece first)</p> <p>Highly Recommend nozzle larger than 0.4mm, especially if using MMU2S. Less layer changes, less filiament swaps, smaller purge blocks with thicker layer heights, Faster Prints. they are cheap and worth it. This spool holder can be printed in under 3 hours while still making a strong print. I dont have settings for anything other than 0.8mm, you are welcome to try.</p> <p>(<em>used prusa slicer</em>)</p> <ul> <li>PETG filament thats strong and reliable (you dont want 1kg mass falling on your printer)</li> <li>Bed temp 70c, add gluestick, first layer temp 255c, other layers 265c</li> <li>I had my petg set to 12mm^3/s max volumetric speed, its near the limit but allows for fast strong prints. its also why temp is so high.</li> <li>I used a 0.6mm profile as a starting point and scaled all the settings for 0.8mm nozzle.</li> <li>0.8mm nozzle, recommend tuning extrusion multiplier, mine is set to 1.08</li> <li>retraction for 0.8mm nozzle was set to 0.4mm</li> <li>Extrusion width for 1st layer is 150%</li> <li>all other extrusion width settings set to 0.9mm</li> <li>0.6mm layer height</li> <li>3 perimeters</li> <li>2 top and bottom layers</li> <li>Rectiliear infill, 10% density on the interior</li> <li>fast print speed settings, first layer speed set to 10mm/s</li> <li>no support</li> <li>make sure first layer sticks well</li> <li>min 30% fan max 70%, disabled for first 2 layers, slow down if print speed is below 8 seconds per layer<pre><code>-slow down at most 4mm/s for cooling </code></pre> </li> </ul> <p>--How to assemble</p> <ol> <li>First print test piece with settings above</li> <li>Clean out the hole with a razer or something, be careful not to enlarge the hole too much or break the blade. </li> <li>Get a rod and try push fitting it into the hole, it will require a lot of force</li> <li>Try using a hammer, with plastic part facing down and rod pushing into carpet or something. dont bang the rod and dont do it on tile as the force may break it. gently but firmly hammer the test piece onto the rob. it should go in about 1cm. a full inserted rod will stick out about 10.8cm from the piece. its OK if a bit more sticks out if it feels secured. ideally 9mm or more will enter the part.. </li> <li>If it doesnt fit properly, try altering the test piece with openscad and generate an updated STL.</li> <li>Repeat steps above until you get a good fitting rod that can hold 1kg without bending a bunch. </li> <li>Generate a new main arm if you altered the hole size.</li> <li>Print everything</li> <li>Trim parts</li> <li>Press fit bearings into roller, be careful not to break it</li> <li>Press fit rod into main arm, use hammer on plasic piece with rod in carpet.</li> <li>Slide roller on, verify it rolls smoothly</li> <li>press fit cap on, may need to trim peg</li> <li>hang with zipties!</li> </ol> <p>available on Github: <a href="https://github.com/osimmac/hanging-spool-holder-mmu2s">https://github.com/osimmac/hanging-spool-holder-mmu2s</a></p> <p>--How to get started if new to OpenSCAD</p> <ol> <li>Download and install from here (os specific instructions are there): <a href="https://www.openscad.org/downloads.html">https://www.openscad.org/downloads.html</a></li> <li>launch openscad and start messing around with the examples, they can be accessed from the launcher or "file" at the top of the application. most of what i learned is from there. the examples are easy to modify and expand upon.</li> <li>Check out the Basics > CSG-Modules.scad example, this spool holder uses modules. (though it could use them better)</li> <li>Useful cheatsheet once you understand how the commands work: <a href="https://www.openscad.org/cheatsheet/index.html">https://www.openscad.org/cheatsheet/index.html</a></li> </ol> <p>--How to get started if not new to OpenSCAD :)</p> <ol> <li>download and open spoolholder.scad from this repository</li> <li>there are many comments within the file that explain whats going on; generally you will need to edit the variables near the top</li> <li>comment out a few lines in the RENDERING /OUTPUT section, start with leaving test piece uncommented if you need to adjust fitment</li> <li>Render (F6)</li> <li>if it looks good, Export to STL (F7)!</li> </ol>
With this file you will be able to print Hanging MMU2S Spool Holder - Customizable / Open Source with your 3D printer. Click on the button and save the file on your computer to work, edit or customize your design. You can also find more 3D designs for printers on Hanging MMU2S Spool Holder - Customizable / Open Source.